To use Interface Builder or not to use Interface Builder…

A lot of students who come to learn iOS App Development ask me this question. There are a lot of people who don’t even know that there is another way to develop apps. For those who are new to app development let us have a look at 2 approaches towards app development.

Interface Builder: Interface Builder is the mechanism for making an iOS App by simply dragging different view elements from the side bar & dropping them on to your app screen.

Screen shot of Interface Builder in Action

Screen shot of Interface Builder in Action

T

his way the developer can immediately see how the app is going to look without running a simulation. The GUI based design makes it very easy to configure the view components to your need very quickly. Remember that just because you choose to develop your app using Interface Builder doesn’t mean that you won’t have to write a single line of code. Far from it, you will still have to write code to get your app working.

Programatic Approach: The other approach is to make every thing on the fly. The developer writes code that is required to display the desired view components.

Screen shot of a programatic approach to making apps.

Screen shot of a programatic approach to making apps.

The view components are also configured in the program itself. In this approach the Interface Builder is not used at all.

Now for the million dollar question. Which is better? The thing is that it basically depends on what your end goal is.  If the app is a very simple app or a demonstrator of possible future apps/ideas, then it might be a good idea to use Interface Builder. However, if you wish to have an extremely high degree of control over your app & be able to do some really fancy stuff then you might want to consider the programatic approach.

Typically apps which require a higher degree of precision over the layout or performance would require many view components to be rendered using code. Games would be a good example of such a situation. However, if that is not the criteria then one can design using Interface Builder. This is not to say that apps developed using Interface Builder are less efficient but programming the view does give the developer a higher level of control.

In the end it all boils down to what you feel more comfortable with. People from a strong programming background may prefer to code it all. Hence, the focus shouldn’t be on which approach is better, it should be on how can I get the best possible app on the store.

Things to keep in mind while making mobile apps

Carrying on from an earlier post on Getting started with iOS App Development. Here are a few things to keep in mind while making mobile apps (or any software ).

  1. Resources: It is up to you the developer to get the resources required for your app. By resources I mean all artwork, images, documents, audio files that may be required as a part of your app. These resources have to be your own & not borrowed from google. Basically, you should own the rights to the resources.
  2. Marketing: Its a good idea to make your own app. But you also need to think about marketing. Come up with ways to spread the message about the app.
  3. Feedback: This comes a little later in the app dev cycle. But it is equally important. Make sure you get as many family members & friends as possible to give you a straight & honest feedback about your app. This will help you make some quick fixes or introduce new features you didn’t think about earlier .
  4. Devices: Once you are ready & satisfied with the simulations on the mac start testing the app on a real device. Depending on your app you may want to test on multiple devices with different versions of the OS installed on them. This can be handy if you want to target multiple devices & would like to cover maximum number of users. It could also be possible that the features you are using are not OS specific, in that case you may want to test your app on as many different versions as possible.
  5. Branding: This could also fall under the marketing section. Think of a catchy name for your app. Something that would cause a casual browser of apps to look at your app in further detail.
  6. Attention to detail: A very important point. Here is a link to an article I wrote about earlier. Attention to Details

Getting started with iOS App Development

A lot of people ask me about what all is required to make an app in iOS. There is a lot of documentation around which discusses what I am about to talk about, but I felt there was a need for a workflow which handled all the questions that come up.

This is a brief overview of how the whole thing works.

  • Sign up for the iOS Developer program.
  • Design & Test your app.
  • Publish your app to the iTunes store.

Thats all. Now lets get into the specifics of all those steps.

MAKING AN APP:

First & foremost, you DO NOT need to sign up for the developer program TO START developing. You can start making app with a free developer account. You need the paid version to test you app on a real device & for distributing your app on the app store.

Now that we have got that part cleared out. Lets move on to make an app. There are a few things you need to have with you before you begin

Mac OS X  You need a Mac computer with preferably the latest OS installed.

Screen Shot 2013-04-01 at 12.03.55 PM 
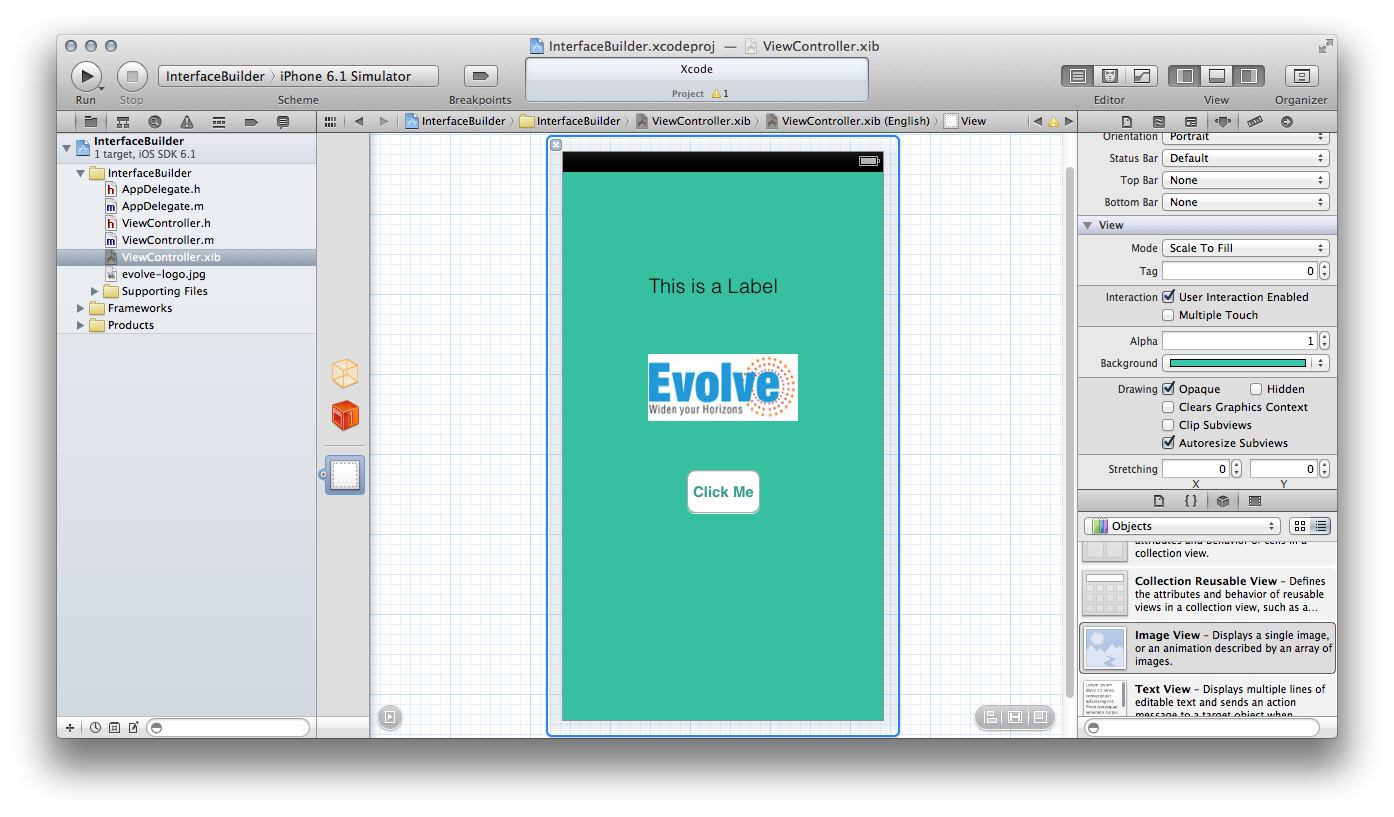
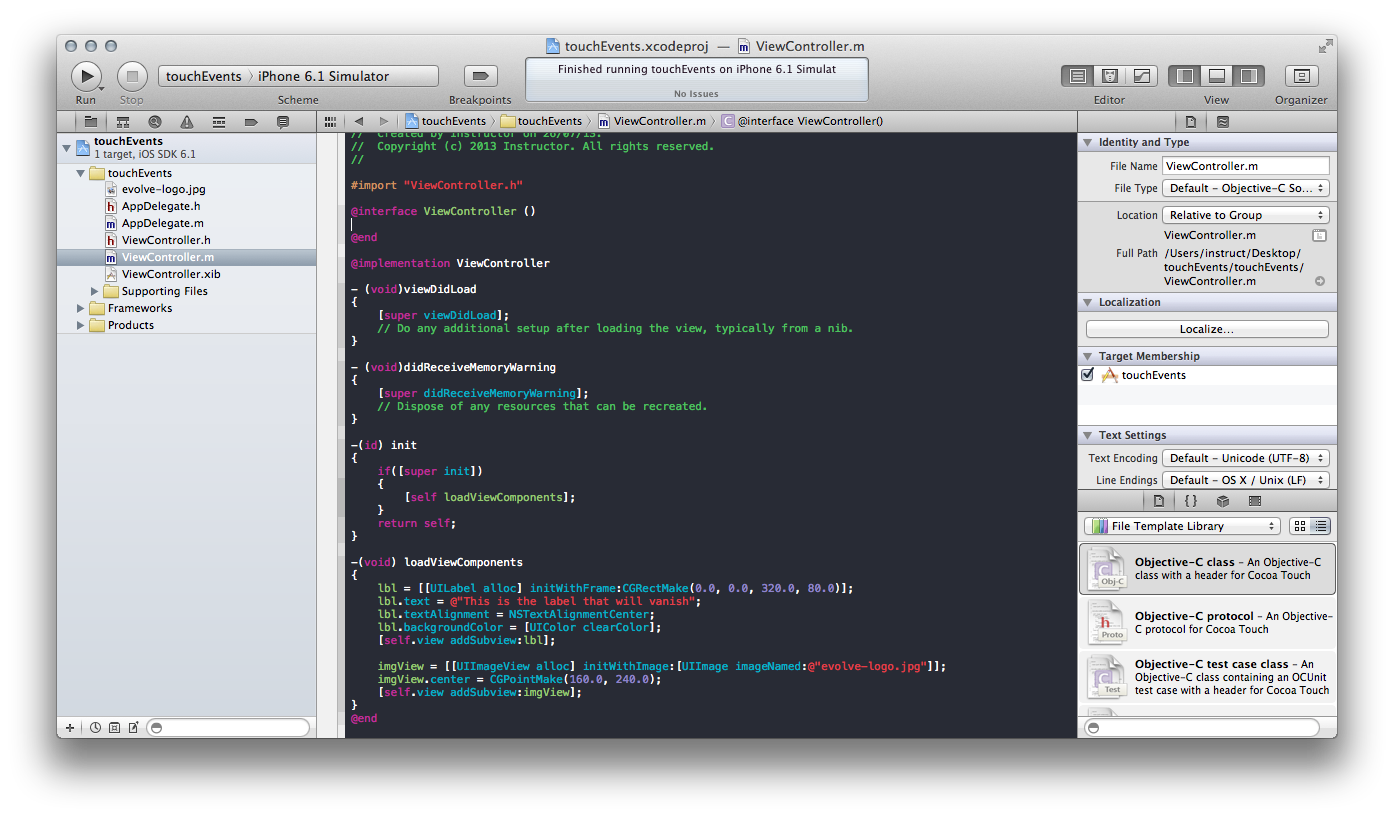
The next thing you need is Xcode. Xcode is an IDE which we use to design our apps. It is free to download from the Mac App Store.

Thats it. Thats all you need to get started.

Now before you start coding, there are a few things to look into. A successful app needs 2 things a great idea backed up with brilliant execution. Start of by thinking of what might really help the end user. Remember people will only download your app if it appeals to them or if it helps them in their day-to-day life.

Once you have the idea then you can move onto the next step which is the planning & scripting step. This is where you start thinking about the specifics of the app. What color combination will you use? Will the app require an internet connection? Will it support multitouch? Will there be a theme to the different view components?

Scripting is where you lay down the rules as to the flow of your app. It is often referred to as storyboarding. This is where you will draw the app & get the first look on how it should flow, the orientation of the buttons.

Having done this we are now ready to start coding. This is an iterative process. You will at this point have to test it frequently. It would also be a good idea to get a preliminary feedback from friends & family. This process will continue until you & your family/friends feel comfortable with your product.

DISTRIBUTING AN APP:

This is where things get a little murky for users. Once you have made the app you are ready to test it on a device & put it on the iTunes store. To do this we now have to sign up for the developer program.

So what is a developer program? A developer program is basically a membership to an online portal which enables you to do a lot of post coding steps. Here are some of them.

Testing – In order to test your app on devices you need to files a provisioning profile & a distribution profile. You can create these documents on the portal.

Distribution – To distribute your app on the iTunes store you need a distribution provisioning profile along with a distribution certificate. Also, there is another portal where you can upload your app to Apple servers for distribution.

DEVELOPER PROGRAM:

This brings us to the question, Which developer program should I enroll for? or Which Developer program am I eligible for. There are 3 programs available: iOS Developer Program, iOS Developer Enterprise Program, iOS Developer University Program.

iOS DEVELOPER PROGRAM:

This is a basic developer program. It costs $99 a year. Once you enroll for this program you can test apps on devices & upload apps onto the iTunes store. This program is ideal for individuals & small businesses.

 icon_enterprise_callout  iOS DEVELOPER ENTERPRISE PROGRAM:

This is the enterprise version of the program. It costs $299 a year. Once you enroll for this program you can test apps you develop on different devices & distribute apps within your enterprise. Note you cannot upload apps onto the iTunes Store, this program is for internal deployment only or in other words this is to enable you to make apps for you own employees. To be eligible for this program your company needs to have a D-U-N-S number. If your company does not have a D-U-N-S number then you can either apply to have one or opt for the basic iOS Developer Program.

https://developer.apple.com/ios/enroll/dunsLookupForm.action

You could also look up your D-U-N-S number with the link above to see if your company has a D-U-N-S number. You would also require the contact details of a person who has the authority to approve this enrollment.

icon-university-callout  iOS DEVELOPER UNIVERSITY PROGRAM:

This program has been designed mainly for Universities who want to introduce iOS Development as a part of their curriculum. The program is available for free. Again, just like the Enterprise Program, here to you need the contact details of a person who has the authority to approve this enrollment.

————————–

Once you have decided upon & enrolled into a developer program, all you have to do is to test your app on as many different devices with as many different versions of OS possible (depends on you app specifications & requirements). Then just go ahead & distribute your app via the iTunes Store.

C++ in iOS – 2

Continuing from the previous post. This one will look into a working example for the same. The code used here is pretty trivial. It is organized in the following sets of files. A c++ header file which contains the declaration of a class. A c++ implementation file (.cpp) where the member functions are implemented. An Objective-C++ header file which holds the C wrapper struct & an Objective-C wrapper object. An Objective-C++ implementation file (.mm) which implements the C struct & all the member functions for both the C struct as well as the Objective-C class.

CppStruct.h


#include <string>
class MyObject
{
     public:
          std::string getName();
          void setName(std::string tempName);
          MyObject();
      private:
           std::string name;
 };

CppStruct.cpp

#include "CppStruct.h"
#include <string>
#include <iostream>

std::string MyObject::getName()
{
     return name;
}

void MyObject::setName(std::string tempName)
{
     name = tempName;
}

MyObject::MyObject()
{
     name = "NIL";
}

CppStructWrapper.h

struct PersonWrapper;

@interface CppStructWrapper : NSObject
{
     struct PersonWrapper *obj;
}

-(void) makeAPerson;
-(void) setName:(NSString *) personName;
-(NSString *) getName;
@end

CppStructWrapper.mm

#import "CppStructWrapper.h"
#include "CppStruct.h"
#include <string>

@implementation CppStructWrapper

struct PersonWrapper
{
     MyObject *personObj;
     std::string getName();

     void setName(std::string tempName);
     PersonWrapper();
};

std::string PersonWrapper::getName()
{
     return personObj->getName();
}

void PersonWrapper::setName(std::string tempName)
{
     personObj->setName(tempName);
}

PersonWrapper::PersonWrapper()
{
     personObj = new MyObject;
}

-(id) init
{
     self = [super init];
     if(self)
     {
          obj = nil;
     }
     return self;
}

-(void) makeAPerson
{
     obj = new PersonWrapper;
}

-(void) setName:(NSString *) personName
{
     std::string temp([personName UTF8String]);
     obj->setName(temp);
}

-(NSString *) getName
{
     NSString *str = [[NSString alloc] initWithUTF8String:obj->getName().c_str()];
     return str;
}

@end

ViewController.m

//this code could be anywhere I have put it inside the ViewController.m within the init message.
#import "ViewController.h"
#import "CppStructWrapper.h"

-(id) init
{
     self = [super init];
     if(self)
     {
          CppStructWrapper *obj = [[CppStructWrapper alloc] init];
          [obj makeAPerson];
          [obj setName:@"ABC"];
          NSString *str = [obj getName];
          NSLog(@"%@",str);
     }
     return self;
}