Managing all your data on iOS devices

In todays interconnected world managing all your data is quite important. Most of us end up having more than one smart device that we use everyday. As time goes on we will buy a newer version of the device. It is not necessary that we will get a newer version of each smart computer that we own simultaneously. This means that we have to pay special attention to making sure that our data stays up to date on all the devices & that there is no accidental loss of data.

There are various solutions available to users which easily takes care of data management problems commonly faced by multiple users. One of the most common solutions is to make sure that all your data is available on the cloud. I have given a brief overview on the different cloud services available in my previous article.

However, storing information on the cloud is not enough. Some effort still needs to be done on the users end to ensure that the data is there everywhere they want it. In this article I will be talking about managing your data, migrating your data & backing up your data on your iOS devices.

The starting point for this is the iCloud service. It is a free service provided by Apple & is a must for iPhones & iPads.

Through this article I will be referring to the iOS device as iPhone, however, the steps apply to any iOS device. A few settings & options may change depending on the version of the OS on your computer & your mobile device. The steps mentioned below would be applicable for iOS 8. They may be applicable for earlier versions, but all features may not be available.


Moving your data (migrating) from your old iPhone to your new iPhone

This is a very common situation. Most people have a devices for a few years & place a lot of data on it. Once they purchase a new device getting the same data onto the new device is the challenge. This involves a few steps.

STEP 1

  1. Make sure your iCloud service is turned on. By default iCloud provides sync capabilities for the information enumerated below. Note that not all services needn’t be on. But its a good idea to make sure that it is on at the very least for migration purposes.
    1. Contacts
    2. Calendar Events
    3. Reminders
    4. Photos
    5. Notes
    6. Documents for Keynote/Numbers/Pages
    7. Any documents you might have placed in the iCloud Drive (iOS 8 & later).
    8. Passbook
  2. Data provided by other services such as Google, Microsoft & any other provider will be taken care of by their respective accounts.
  3. Prepare a list of apps that don’t take advantage of the iCloud service or any other cloud based service. Note: Some apps do take advantage of iCloud but need the feature to be turned on explicitly. You may have to back this data up manually. If there are online accounts associated with the app, then make sure you are signed in & that the account offers data retrieval at a later point in time.
  4. Take a backup of your phone on your computer using iTunes.

STEP 2:

  1. Turn on your new iPhone & follow the screen steps.
  2. When asked “if you would like to setup the iPhone as a new phone or not” choose the option to restore from backup (do this only if you plan to restore from a backup taken via iTunes or from iCloud).
  3. This will prompt you to connect your iPhone to the computer where you last backed up your old iPhone.
  4. Once the restore is complete simply sign in with your Apple ID & start using your new iPhone from where you had left off.
  5. All the Apps, songs, movies, books purchased using your Apple ID will be available on your new iPhone. Apps will be available subject to OS Version compatibility.

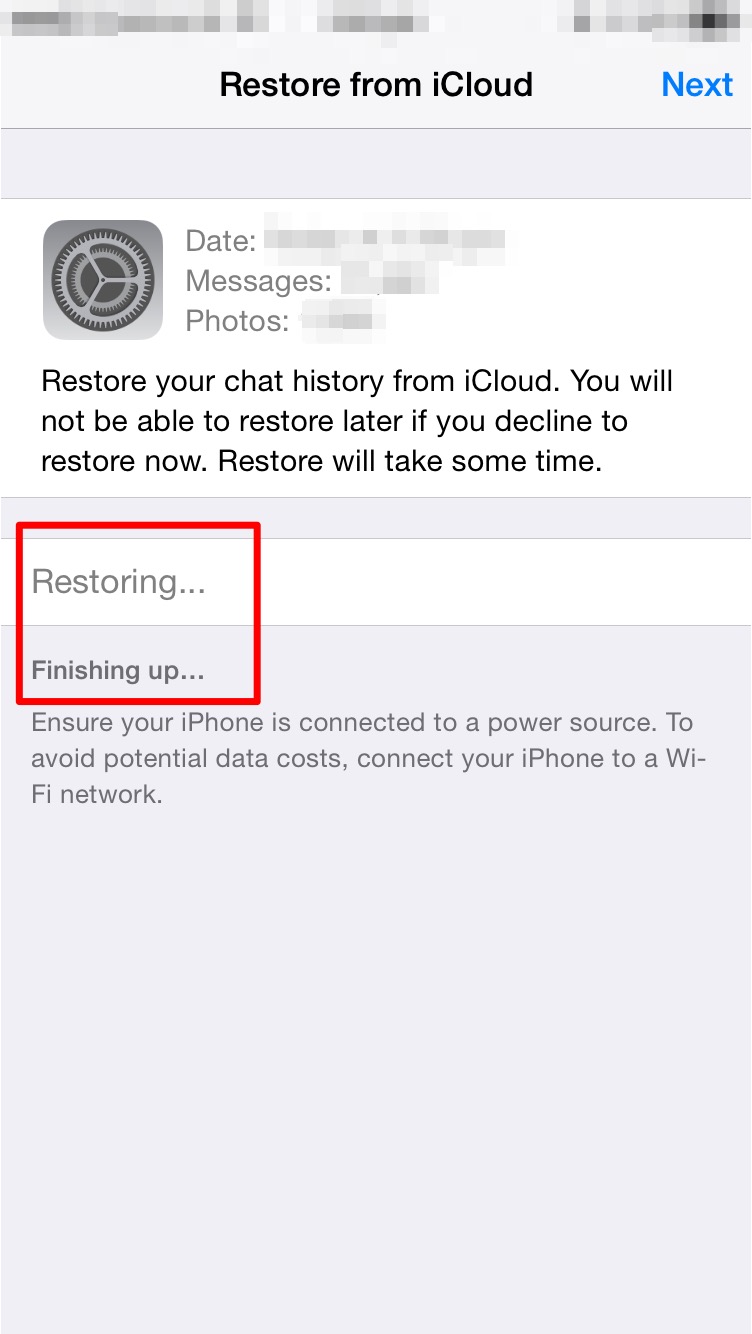
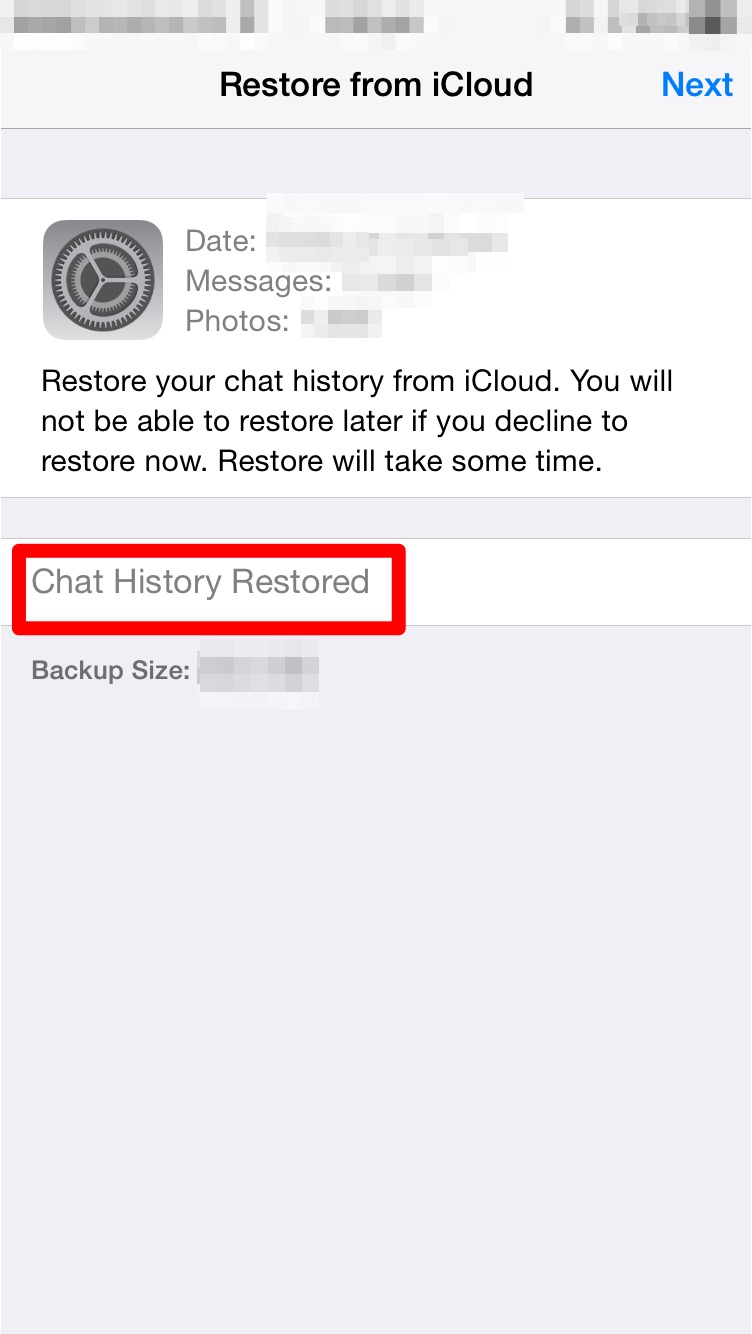
For those who do not have a computer based backup or don’t have a computer can choose to backup their phone onto iCloud. Note that this will require sufficient free space available on the cloud. When they are prompted to restore users will have to sign in with their Apple ID & restore the backup from there.


Moving data from your computer to your new iPhone or Moving from another smartphone to iPhone

This is for first time buyers or people switching to the iPhone. No matter which is the case there is one important thing to be done. You have to move your data onto a cloud service which is compatible with iPhone.

From a computer

iCloud is available for iOS Devices, Macs & Windows. So if you are moving your data from Windows onto your iPhone you could consider running iCloud for Windows. Additionally the iCloud service is also accessible from the browser. So you can access many documents across both the platforms.

Apart from this you can also use iTunes for Windows to move your data from the computer to the iPhone.

From another smartphone

This will mean that you will have to use a third party cloud service. Good choices for something like this would be Google Drive or Dropbox. Other services such as Evernote could also be used for the same.

  1. On your current device transfer as much content as you can to the cloud service. Note that apps & media purchased on the smartphone may not necessarily be available due to compatibility reasons.
  2. On your new iPhone sign in with the same cloud service & pull in all your data.

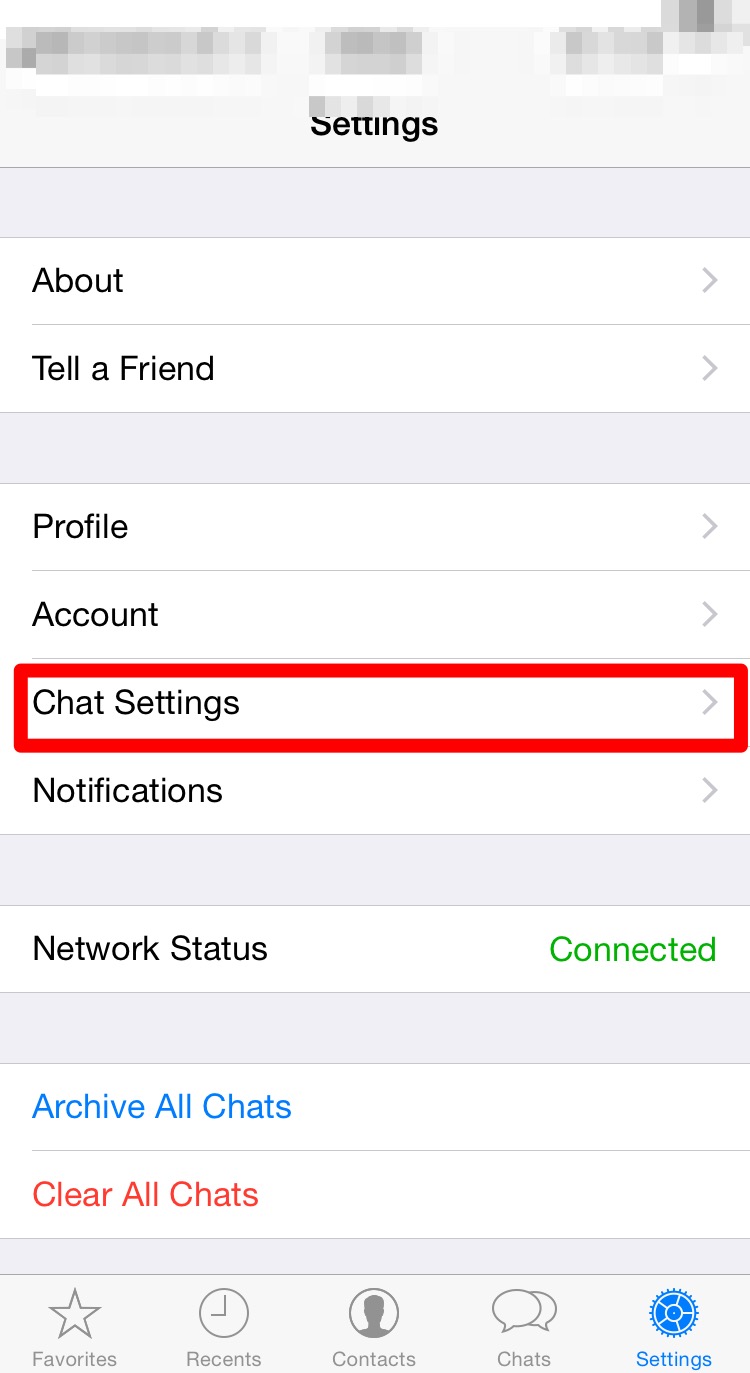
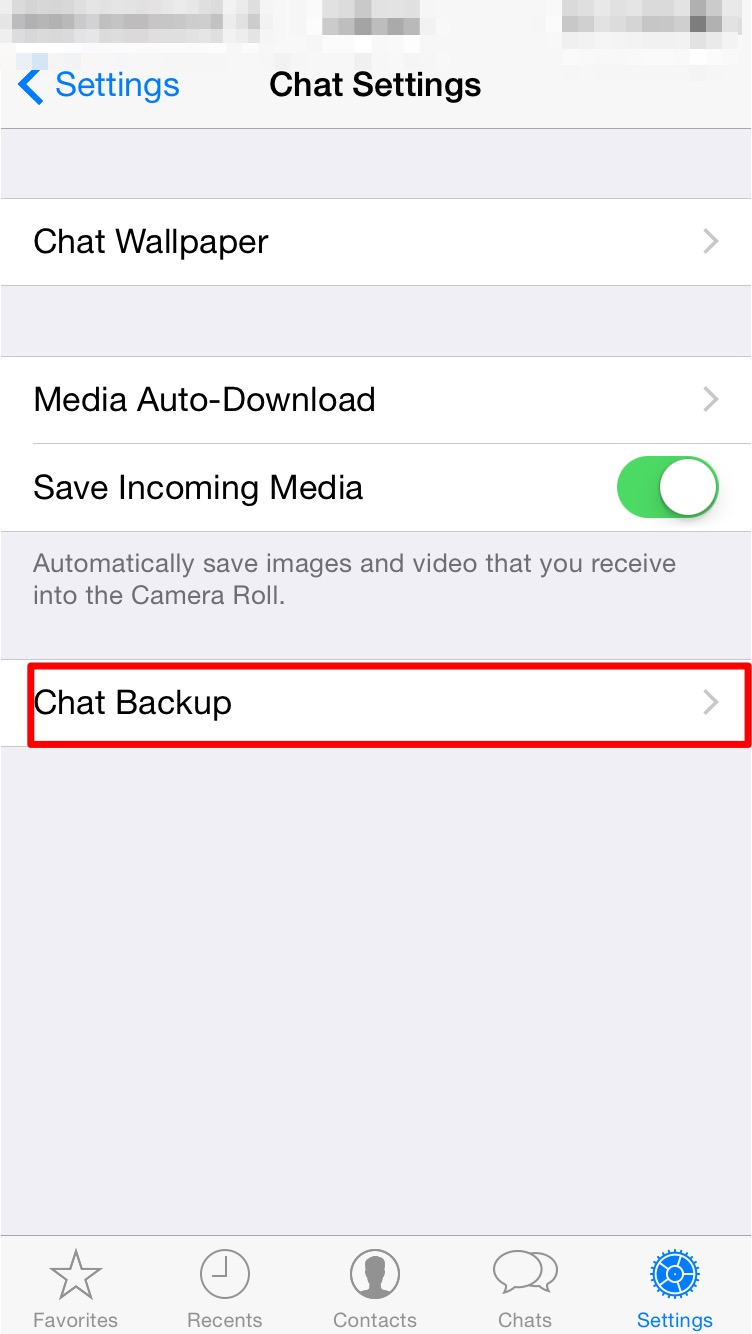
Backing up your iPhone/iPad

Backing up data is very important. This is a step missed quite often by many users. A common mistake made is in believing that they can restore all their data from the iCloud whenever they wish. While that is true, iCloud is not meant to act as a backup. You can choose to save your backup on iCloud, but this is simply using the iCloud storage space for holding the backup & is not otherwise accessible.

There are 2 options to backing up your iPhones data. One is to back it up onto your computer using iTunes, the other is to back it up onto iCloud.

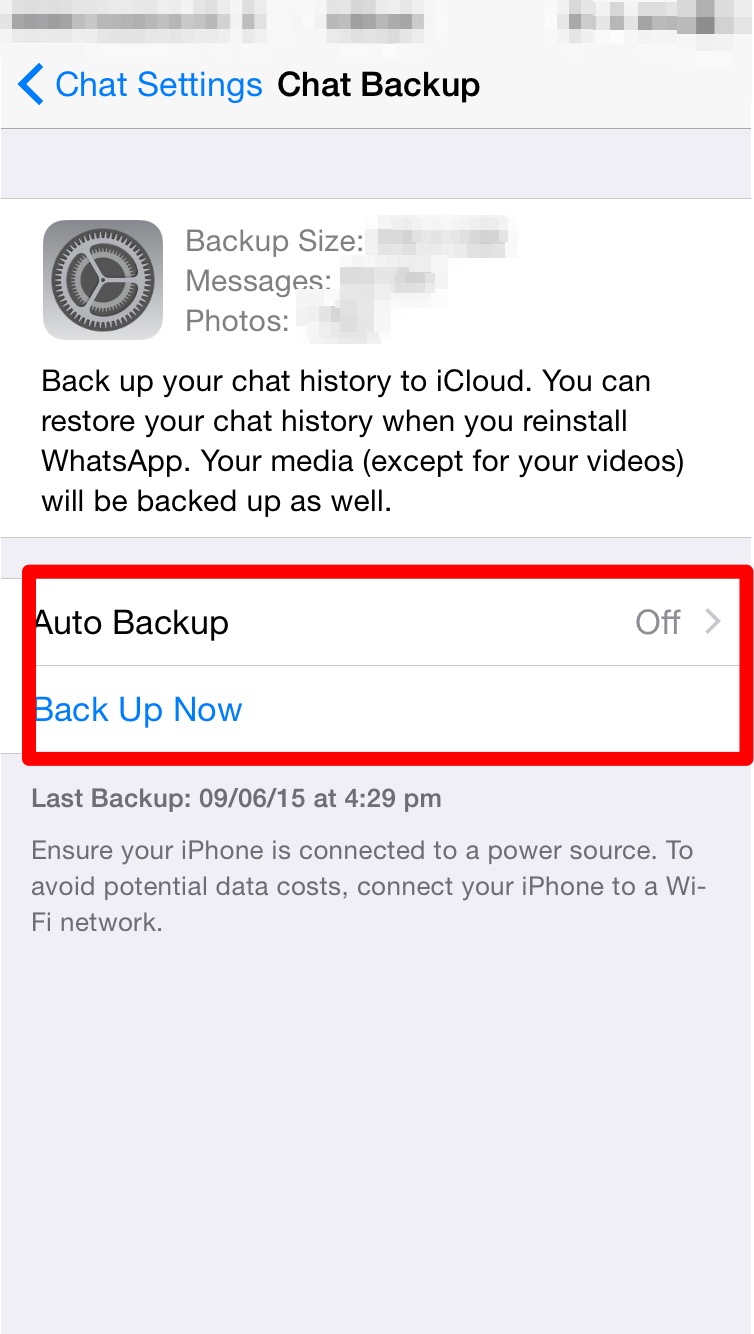
Backing up onto iCloud

Pros

  • Your backup is immediately available.
  • No need to have a separate computer just for this.
  • Backup can be restored from any location as long as internet connection is available.

Cons

  • A very good internet connection would be required.
  • The backup is restricted by the amount of space available on the cloud.
Backing up using iTunes

Pros

  • There is no storage limit. Your backup can be very large.
  • You can have multiple large backups.
  • Optional encryption capability.
  • With WiFi, based syncing the backups happen automatically.

Cons

  • You have to be physically connected to the computer using cable or WiFi to perform the backup.
  • You have to be physically connected to the computer using cable or WiFi to restore the backup.

Backing up your WhatsApp messages using iCloud

Its a safe assumption that most of us use WhatsApp for our everyday communication. In fact, it is one of the most widely used methods of communication.

People use it for all kinds of things: Staying in touch with friends, family. Collaborating with people on an office project, conducting team meetings, communicating with a client. This means that our conversations are of utmost importance to us. So one should take care & back these messages up on a regular basis. The big advantage with backup is that one can even restore past conversations from the backup when the user switches from one iOS device to the other.

Use the following steps to backup your messages to iCloud

  1. First make sure you have turned on iCloud.

  2. Open Settings > iCloud

  3. Sign in with your Apple ID

  4. Switch to Whatsapp

  5. Click on Settings

  6. Click on Chat SettingsIMG_0063

  7. Click on Chat BackupIMG_0064

  8. Here you can set the auto backup feature or manually take a backup.IMG_0071

  9. Thats it, your Whatsapp messages are now being backed up.

While restoring the process is straightforward.

  1. Make sure you are signed into iCloud.

  2. Install Whatsapp.

  3. Enter your Phone number to verify.

  4. Enter the Code sent via SMS to your phone.

  5. You will be asked whether you want to restore your previous chats from iCloud.IMG_0067

  6. Just click restore.IMG_0068 IMG_0069 IMG_0070

  7. All your previous conversations should come up now.

iOS Device guide for App Developers

Developers making iOS Apps regularly come across situations where they need to find out the dimensions of the screen or the icons. This guide should give a better idea about the same.

iphones

iPhone 5S/SE iPhone 6/6S/7/8 iPhone 6+/6S+/7+/8+ iPhone X
Display Points

320×568

375×667

414×736

375×812

Pixels

640×1136

750×1334

1242×2208

1125×2436

Display Points to Pixels Ratio

1:2

1:2

1:3

1:3

Pixel Density

326 ppi

326 ppi

401 ppi

458ppi

App Icon Size in pixels

120×120

120×120

180×180

180×180

Aspect Ratio

16:9

16:9

16:9

19.5:9

ipads

  iPad Mini 2,3,4 iPad Air/iPad Air 2/iPad Pro 9.7” iPad Pro 10.5 iPad Pro 12.9”
Display Points

1024×768

1024×768

1112×834

1366×1024

Pixels

2048×1536

2048×1536

2224×1668

2732×2048

Display Points to Pixels Ratio

1:2

1:2

1:2

1:2

Pixel Density

326 ppi

264ppi

264ppi

264ppi

App Icon Size in pixels

152×152

152×152

167×167

167×167

Aspect Ratio

4:3

4:3

16:9

16:9


Cloud Services Demystified

A lot of us use cloud services. Here we will talk about some of the popular services & how to use them to maximise your advantage.

What is Cloud?

Cloud Service is a technology that makes your data available across multiple devices. Depending on service provider this may even be cross platform. This is great as in todays day & age most of us make use of at least 2 smart devices. A common confusion amongst a lot of users is that cloud is a backup technology. This is not strictly true. As I mentioned earlier, when you enable cloud services they ensure that your data across all devices is the same. So if for example, you delete a file on one device, it is deleted across all the devices. It is not possible to go & retrieve the file back from the cloud. To protect yourself from such problems you should look into a cloud based backup technology.

What are the advantages?

There are numerous advantages with cloud based solutions.

  1. Firstly, your data is immediately accessible across multiple devices without your manual intervention.
  2. Storage management especially handling portable storage drives is no longer required.
  3. It is highly cost effective. In most cases the data that we consume is fairly small. The free version for most of the services does provide at least 2Gb of data. In most cases there is the option of purchasing additional storage space if needed.
  4. Its easy to use, with no major technical requirements.
  5. Most of the providers support multiple platforms & devices.

Common Cloud Service Providers & services offered

googleDrive

Google Drive: The google drive is a free account that every user gets along with their gmail account. With unto 15GB free storage this is an ideal option for those who want to store large amounts of data. It is also an ideal option for those who wish to share files & collaborate with other users. Works best when used within the Google ecosystem.

WebLink: drive.google.com


onedrive

Similar to google drive. Microsofts OneDrive allows you to store files on the cloud. This comes free with your existing hotmail.com or outlook.com accounts.  Works best when used within the Microsoft Ecosystem.

WebLink: https://onedrive.live.com/about/en-us/


dropbox

Yet another popular cloud storage & sharing service. While it has limited capacity of 2Gb it has the advantage of being accessible across multiple platforms. The storage capacity does increase for shared collaborative accounts.

WebLink: http://www.dropbox.com


evernote

Evernote is a popular app for storing information on the cloud. Apart from just offering cloud services for documents it also has a lot of other built in features such as card reader, calendar, notes that makes it a very popular app. The fact that it runs on almost all the most commonly used platforms only adds to its value. There are paid options available but they are for additional features rather than more storage explicitly.

WebLink: https://evernote.com


icloudDrive

This is Apple’s cloud solution primarily for OS X & iOS devices. Just like Google drive it ensures that the data across your OS X & iOS devices is the same. The fact that it is accessible via the web make it useful. This service is not available on all the platforms barring the desktop version of Windows for which a free download is available. Works best when used within the Apple ecosystem.

WebLink: http://www.icloud.com


Owncloud

Unlike the other services available this one is OpenSource. It has numerous advantages that make it a very attractive option, especially for businesses thinking of providing cloud services to their employees.

The main advantage is the fact that you can configure & host your own cloud services (as the name says). This means that you have control over the amount of space allocated for users & importantly security.

Apart from that there are native apps available along with a web portal to access all your data from almost all devices anywhere. This means that it is very easy to deploy without the headache of compatibility issues.


The following table gives a basic comparison on what all is offered, note that there maybe more services provided which I may have skipped, the table only highlights the most important points.

Cloud Services Comparison

Cloud Services Comparison

Clarifying Swift & Objective-C

swiftApple made a surprising announcement at the recent WWDC held between June 2-6 2014. While everyone was looking forward to the launch  of the new OS for both the Mobile as well as Mac platforms, Apple also announced a new programming language for developers. SWIFT.

It was described as Objective-C without C. Over the past few months I have gone over the features of the language & even converted many of the apps into Objective-C. While the initial learning curve is there, it is a fairly easy language to pick up. I will be going over a few interesting features of the language in this article. But what I will also be touching upon is the future & relevance of Objective-C.

Reduction in Lines of code: One of the first things that you will notice once you start programming in Swift is the reduction in the number of lines of code. Swift does away with the long syntax which you find in Objective-C. This makes the code look a lot more compact & less intimidating.

Lets take the example of creating an object in Swift & compare the syntax with that of Objective-C

Objective – C version: NSString *myString = [[NSString alloc] initWithString:@”This is a string”];

Swift version: var myString : String = String(“This is a string”)

As we can see, there is a great deal of simplicity that comes along. Reduction in the number of lines of code is of great importance to software developers. This means more compact code & improves readability. However, this comes at a price. While Objective-C code was more elaborate & did use many more lines of code it was far easier to understand by simply reading through it. In case of Swift the code will have to be complemented with details comments about what it does.

Single File: Another new feature there in Swift is the lack of header files. People coming from a Java background would find this familiar. The declaration of classes & implementation of its functions is done in .swift file now. This removes the necessity of having to import various header files. In case, certain frameworks need to be used all that needs to be done is to import that framework at the top of the file.

import framework

Replace the keyword framework with the name of the framework you wish to include.

Mixed Language Programming: Unlike Objective-C, Swift does not work well with other languages. In fact, Swift only works with Objective-C. So if you have any API’s or pieces of code that you have written in C or C++, you will have to create Objective-C wrapper classes for that C/C++ code so that you can incorporate it into your project.

This means that Objective-C is not going to be deprecated any time soon. Also, it will be equally important to learn Objective-C & can’t be ignored by people.

COMMON QUESTIONS:

– I already know Objective-C should I also learn Swift?
There is no pressing need to immediately learn Swift, though it would be a good idea to learn it anyways. None of the apps you have already made will stop working. However, you may come across code written in Swift or would need to incorporate programs written in Swift, so having knowledge of the same would be a good idea.

– I don’t know Swift or Objective-C which should I learn?
Again, as in the previous question knowing both is a really good idea. If you are confident that you will be making apps using Swift only, then you can learn just that for starters. If you feel that there is a good chance of having to read/modify or write Objective-C code then learning Objective-C before Swift makes more sense.

CONCLUSION: Swift is a very easy to use language & will sit nicely on familiar eyes. A lot of the code that will be written in the coming apps will definitely use Swift. However, this does not mean the end of the road for Objective-C. Nor does it mean that Objective-C will become redundant or obsolete. A developer can choose to use any of the languages to make the app. It will be nice for a new developer to first learn Objective-C & then move on to Swift as it will give the user a more all round understanding of the entire development framework .


iOS Developer Programs Explained

Most people who first venture off into App Development focus their efforts on the design of the App & its implementation. However, when the time to publish the app comes along then there are questions as to which developer program he/she should opt for.

Developer programs are online accounts created by Apple for the developer community. Each developer can register their own account from where they can manage the distribution of their apps, the collection of payments for purchase of apps or items within the app. The different programs offered are meant to cater to a specific audience set.

There are 4 different types of developer programs.

  • Free Membership
  • iOS Developer Program
  • Enterprise Developer Program
  • University Developer Program

Free Membership

This is the simplest program. Anyone can enrol for this & there is no cost involved. To sign up simply go to developer.apple.com & register. This is the perfect program for those looking to start iOS App Development. It gives the member full access to the latest guides, sample codes & information about the different classes & frameworks used for the current publicly available version of iOS.

iOS Developer Program

The iOS Developer Program is the paid version of the program. It costs $99 a year & is meant for those who wish to distribute apps on the App store. Apart from distribution it also gives the user options to test it on their own device. All the benefits from the Free Membership are also made available here.

Enterprise Developer Program

The Enterprise Developer Program is another paid program. It costs $299 a year & is meant for organisations who wish to distribute apps within the organisation to their own employees. The big difference between this program and the regular iOS Developer Program is the fact that in the Enterprise Program you have full control over how your apps are distributed to your employees & have to take care of the hosting as well as distribution aspects. The apps made by an organisation do not go onto the app store & are not verified by Apple.

University Developer Program

The University Developer Program is a free developer program meant for Universities or colleges. This program allows such educational institutes to test the apps made by students as part of the official curriculum. Limited distribution amongst students is also permitted. The program lacks the ability to perform large scale distribution or distribution on the App store.

The table below illustrates the different  facilities made available to different account holders.

devProg

For more information related to the D-U-N-S Number:

The fading art of pens..

The fading art of pens..

Thanks to the proliferation of low cost laptops, tablets & smarphones he number of people using pens is dwindling. Its a little sad as pens are still a great way to record one’s thoughts or to write a message. I still use one loyally.

To use Interface Builder or not to use Interface Builder…

A lot of students who come to learn iOS App Development ask me this question. There are a lot of people who don’t even know that there is another way to develop apps. For those who are new to app development let us have a look at 2 approaches towards app development.

Interface Builder: Interface Builder is the mechanism for making an iOS App by simply dragging different view elements from the side bar & dropping them on to your app screen.

Screen shot of Interface Builder in Action

Screen shot of Interface Builder in Action

T

his way the developer can immediately see how the app is going to look without running a simulation. The GUI based design makes it very easy to configure the view components to your need very quickly. Remember that just because you choose to develop your app using Interface Builder doesn’t mean that you won’t have to write a single line of code. Far from it, you will still have to write code to get your app working.

Programatic Approach: The other approach is to make every thing on the fly. The developer writes code that is required to display the desired view components.

Screen shot of a programatic approach to making apps.

Screen shot of a programatic approach to making apps.

The view components are also configured in the program itself. In this approach the Interface Builder is not used at all.

Now for the million dollar question. Which is better? The thing is that it basically depends on what your end goal is.  If the app is a very simple app or a demonstrator of possible future apps/ideas, then it might be a good idea to use Interface Builder. However, if you wish to have an extremely high degree of control over your app & be able to do some really fancy stuff then you might want to consider the programatic approach.

Typically apps which require a higher degree of precision over the layout or performance would require many view components to be rendered using code. Games would be a good example of such a situation. However, if that is not the criteria then one can design using Interface Builder. This is not to say that apps developed using Interface Builder are less efficient but programming the view does give the developer a higher level of control.

In the end it all boils down to what you feel more comfortable with. People from a strong programming background may prefer to code it all. Hence, the focus shouldn’t be on which approach is better, it should be on how can I get the best possible app on the store.