What are custom operators?
Custom operators are operators that are defined by us and are not part of the programming language natively.
We are all aware of the built in operators in the Swift Language.
Operators like: + – * % > == ! to name a few.
These operators are defined by the system. It is also possible for us to overload some of these operators. However there are situations where we would like to create our own operators that perform operations not defined by the system.
Thats exactly what Custom operators are. They are operators defined by the developer. These are not overloaded operators but completely new operators that don’t exist otherwise.
These operators are used within the project that we are working on. Though it is possible for us to share these operators using Swift Packages or XCFrameworks.
These operators are typically associated with a specific type and their behavior is also defined by us.
Why do we need them?
There are many reasons why we would want custom operators:
- Allow for more compact and concise syntax.
Using custom operators allows our code to be more compact. Entire function calls can be condensed into a single operator.
- Make the code more readable
This also improves the readability of our code. Properly chosen symbols can convey the message immediately and easily.
- Allow for consistency in design of code
One of the other things that custom operators help us achieve is consistency. By using standard operations as operators we make our code more familiar and consistent to others who may read it. Programmers are familiar with the concept of operators and using them for different operations. So even if they may not immediately recognise the operator they would understand that there is some task for them to perform.
And finally it encourages reusability.
What do we need to create custom operators?
There are a couple of things that we need to create custom operators:
- A logic for the action being performed by the operator
- A list of valid symbols
- Information about the operators attributes like prefix, postfix, infix.
- The precedence of the operator if it is an infix operator
Operator Rules
There are some rules that must be followed when we are constructing the symbol for our operator. Most of the requirements are rather straightforward. However, choosing the right symbol is a very important task. There are a set of symbols that are allowed.
There are rules as far as whitespace around operators is concerned.
And finally there are certain symbols are allowed only in combination with other symbols.
Operator types
| Type | Description |
|---|---|
| Prefix | Operators that appear before a variable or value. These are unary operators. |
| Postfix | Operators that appear after a variable or value. These are unary operators. |
| Infix | Operators that appear in between variables or values. These are binary operators. |
Allowed Characters
This is the important bit. Which characters are allowed for usage as an operator.
We can have ASCII symbols that are used for builtin operators.
There are also many mathematical symbols that can be used as operators.
Note that the list of symbols show in the slide are not complete.
| Type | Examples of different symbols |
|---|---|
| ASCII Characters | /, =, -, +, !, *, %,<, >, &, |, ^, ?, ~ |
| Mathematical Operators, Miscellaneous symbols, dingbats* | ∝, √, ⊆, ≿, ∫ |
Here are some more
| U+00A1–U+00A7 | U+2190–U+23FF |
| U+00A9 or U+00AB | U+2500–U+2775 |
| U+00AC or U+00AE | U+2794–U+2BFF |
| U+00B0–U+00B1 | U+2E00–U+2E7F |
| U+00B6 | U+3001–U+3003 |
| U+00BB | U+3008–U+3020 |
| U+00BF | U+3030 |
| U+00D7 | U+0300–U+036F |
| U+00F7 | U+1DC0–U+1DFF |
| U+2016–U+2017 | U+20D0–U+20FF |
| U+2020–U+2027 | U+FE00–U+FE0F |
| U+2030–U+203E | U+FE20–U+FE2F |
| U+2041–U+2053 | U+E0100–U+E01EF |
| U+2055–U+205E |
Whitespace
The next important bit is the whitespace around the operator.
If an operator has a whitespace on both the sides or doesn’t have whitespace on both the sides then it is interpreted as a binary operator. This is what would appear for infix operator.
If an operator has whitespace only on the left then it is a prefix unary operator.
If an operator has whitespace only on the right then it is a postfix unary operator.
If an operator does not have whitespace on the left but is followed by a dot then it is treated as a postfix unary operator.
Finally, any round, brace, square brackets appearing before or after the operator along with comma, colon, & semicolon are treated as whitespace
Making sure that we put the whitespace in the correct place while using these operators is very important.
| No. | Rule | Example code |
|---|---|---|
| 1 | If an operator has a whitespace on both the sides or doesn’t have whitespace on both the sides then it is interpreted as a binary operator | a**b or a ** b |
| 2 | If an operator has whitespace only on the left then it is a prefix unary operator | **a |
| 3 | If an operator has whitespace only on the right then it is a postfix unary operator | a** |
| 4 | If an operator does not have whitespace on the left but is followed by a dot then it is treated as a postfix unary operator | a**.b is treated as a** .b |
| 5 | (, {, [ before the operator and ), }, ] after the operator along with ,, :, ; are treated as whitespace |
There are some exceptions to the rules we just saw. Especially with exclamation mark & question mark.
- ! & ? which are predefined are always treated as postfix if there is no whitespace on the left
- If we wish to use ? In optional chaining then it must not have whitespace on the left
- To use it as a ternary conditional operator ?: it must have whitespace on both the sides
- Operators with a leading or trailing <, > are split into multiple tokens. For example, in Dictionary<String, Array<Int>> the last 2 arrows are not interpreted as shift operator.
Operator grammar
There are rules for constructing operators. Only certain combinations are allowed.
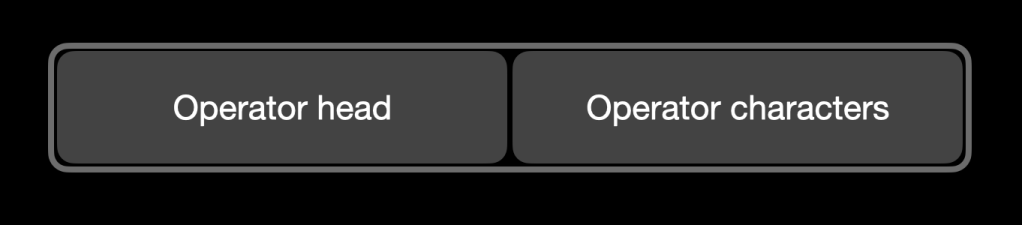
Each operator contains a symbol which forms the operator head. The head is the first character in the operator.
The head may or may not be followed by 1 or more characters which are operator characters.
The head and the optional characters combined together form the operator.
The head itself can contain a one out of a set of valid symbols. Or it can contain a period.
These are some of the symbols allowed for usage as the head of the operator. You can choose any one of those.
| /, =, -, +, !, *, %,<, >, &, |, ^, ?, ~ | U+2055–U+205E |
| U+00A1–U+00A7 | U+2190–U+23FF |
| U+00A9 or U+00AB | U+2500–U+2775 |
| U+00AC or U+00AE | U+2794–U+2BFF |
| U+00B0–U+00B1 | U+2E00–U+2E7F |
| U+00B6 | U+3001–U+3003 |
| U+00BB | U+3008–U+3020 |
| U+00BF | U+3030 |
| U+00D7 | |
| U+00F7 | |
| U+2016–U+2017 | |
| U+2020–U+2027 | |
| U+2030–U+203E | |
| U+2041–U+2053 |
For the successive characters you can use any of the symbols allowed for the head plus some additional allowed symbols. The list above contains all the allowed symbols.
| /, =, -, +, !, *, %,<, >, &, |, ^, ?, ~ | U+2055–U+205E |
| U+00A1–U+00A7 | U+2190–U+23FF |
| U+00A9 or U+00AB | U+2500–U+2775 |
| U+00AC or U+00AE | U+2794–U+2BFF |
| U+00B0–U+00B1 | U+2E00–U+2E7F |
| U+00B6 | U+3001–U+3003 |
| U+00BB | U+3008–U+3020 |
| U+00BF | U+3030 |
| U+00D7 | U+0300–U+036F |
| U+00F7 | U+1DC0–U+1DFF |
| U+2016–U+2017 | U+20D0–U+20FF |
| U+2020–U+2027 | U+FE00–U+FE0F |
| U+2030–U+203E | U+FE20–U+FE2F |
| U+2041–U+2053 | U+E0100–U+E01EF |
Examples
.+.
≈
√
**
Operator Precedence
As far as infix operators are concerned there is also the question of precedence. Precedence is used to determine the operator priority when there are multiple operators in a single statement.
precedencegroup <#precedence group name#> {
    higherThan: <#lower group names#>
    lowerThan: <#higher group names#>
    associativity: <#associativity#>
    assignment: <#assignment#>
}
While the first 2 values are straightforward, they simply help determine the exact position of the newly created precedence as compared to existing precedences, the associativity and assignment are extra items that are not immediately clear.
| Type | Description | Values |
|---|---|---|
| Associativity | Determines order in which a sequence of operators with the same precedence are evaluated in the absence of grouping brackets | left, right, none |
| Assignment | Specifies priority when used with optional chaining. TRUE: Same grouping rules as assignment operator from standard libraryFALSE: Same rules as operators that don’t perform assignment | true, false |
The assignment of a precedence group specifies the precedence of an operator when used in an operation that includes optional chaining. When set to true, an operator in the corresponding precedence group uses the same grouping rules during optional chaining as the assignment operators from the standard library. Otherwise, when set to false or omitted, operators in the precedence group follows the same optional chaining rules as operators that don’t perform assignment.
Determines order in which a sequence of operators with the same precedence are evaluated in the absence of grouping brackets. so for example 4 – 6 – 7 has the minus sign which has left associativity. The operation 4-6 is grouped and then the – 7 operation is performed.
Nonassociative operators of the same precedence level can’t appear adjacent to each to other.
The priority for the built in precedences can be seen in Apple’s documentation.
Creating the operators
It is fairly easy to create our own operators. You can try the code in a playground. We will be creating 1 operator of each type: postfix, prefix, infix.
- Create a new playground.
- Declare the creation of the prefix operator as shown. This will be used as a squaring operator.
prefix operator **
- Now we will provide a generic version of the operator implementation.
prefix func **<T:Numeric> (inputValue : T) -> T {
    return inputValue * inputValue
}
That’s it. It is that simple to create our own prefix operator. Now let us test it.
- Create a variable of type Float and use the operator we have just created.
var lengthOfSideOfSquare : Float = 1.1

var areaOfSquare : Float = **lengthOfSideOfSquare

print("The area of a square whose side is \(lengthOfSideOfSquare) centimeters long is \(areaOfSquare) square centimeters")
- Similarly declare a postfix operator. This one will perform conversion to a string.
postfix operator ~>
- Now we will implement this operator. To do that let us make a simple type which will have the to string operator capability.
struct Person {
    var name : String = ""
    var age : Int = 0
}

extension Person {
    static postfix func ~> (inputValue : Person) -> String {
        return "NAME: \(inputValue.name)\nAGE: \(inputValue.age)"
    }
}
- Let us try this operator out and see.
var developer : Person = Person(name: "Arun Patwardhan",
                                age: 35)

var description : String = developer~>

print(#line, description)
- Now let us implement an infix operator. The one that we are going to implement is a similarity operator which can be used to determine the degree of similarity between objects of the same type. To do that let us start off by declaring an enum which holds the values for the degree of similarity.
enum DegreeOfSimilarity {
    case exactly_the_same
    case almost_the_same
    case slightly_similar
    case completely_different
}
- Infix operator can also have a precedence associated with it. Let us declare our own precedence and use it for our operator.
precedencegroup DegreeOfSimilarityPrecedence {
    higherThan: AdditionPrecedence
    lowerThan: MultiplicationPrecedence
    associativity: none
    assignment: true
}
Let us examine the values we have given:
higherThan: This indicates that our precedence has higher priority than the Addition precedence
lowerThan: This indicates that our precedence has lower priority than the Multiplication precedence
Associativity: This indicates that our operator is not associative. So we cannot combine multiple occurrences of our operator in one statement.
assignment: This indicates that out operators has the same behaviour, as other operators that assign, when it comes to optional chaining.
- Now we can declare our infix operator.
infix operator ≈ : DegreeOfSimilarityPrecedence
It is useful to save your new operator symbols as code snippets to easily use them. You can read this article if you don’t know how to create a code snippet.
- Let us look at the implementation. I am going to use the same person type we used earlier.
extension Person {
    static func ≈ (lhsValue : Person, rhsValue : Person) -> DegreeOfSimilarity {
        guard lhsValue.name == rhsValue.name else {
            return DegreeOfSimilarity.completely_different
        }

        guard lhsValue.age == rhsValue.age else {
            return DegreeOfSimilarity.almost_the_same
        }

        return DegreeOfSimilarity.exactly_the_same
    }
}
- Now we will test them and see.
var employee1 : Person = Person(name: "Jack",
                                age: 22)

var employee2 : Person = Person(name: "John",
                                age: 21)

var employee3 : Person = Person(name: "Jack",
                                age: 23)

var employee4 : Person = Person(name: "Jack",
                                age: 23)

print(#line, employee1 ≈ employee2)

print(#line, employee1 ≈ employee3)

print(#line, employee3 ≈ employee4)
- Run the code and see the end result.
Feel free to create more operators and play around. You could also package these operators in a swift package and share them around. I have shared links to
Summary the new operator
Creating operators is very easy. Most of the requirements are rather straightforward. However, choosing the right symbol is a very important task.
The one thing that we should keep in mind is not to over use these. It can be tempting to do this. But abstracting everything can make the code look a little too vague.
So that is how you can create operators.
Download the sample project
I have uploaded some of the custom operators, that I have shown above, as a Swift Package. You can download the package as well as a demo project, which shows how to use them, from the links below.
