Creating reusable UI Components for iOS App Development

In an earlier article I had discussed how we can create our own frameworks to easily share reusable code. In this article we will take this a little further and create our own reusable UI Components.

Points to Note:

  • The reusable component we will be creating is based on UIKit. For that reason this component can only be used in iOS Apps. However, you can follow the same steps to create a reusable component for macOS using Cocoa.
  • UI Components, distributed through a framework, do not render in the project storyboard file.
  • You should be familiar with creating Embedded Binaries (your own Framework). If you aren’t then please read this article first.
  • These projects are created on Xcode 10 with Swift 4.2

Getting Started

We will complete the implementation as a 2 step process. Here is the screen that we are planning to implement.

Creating the Reusable Framework

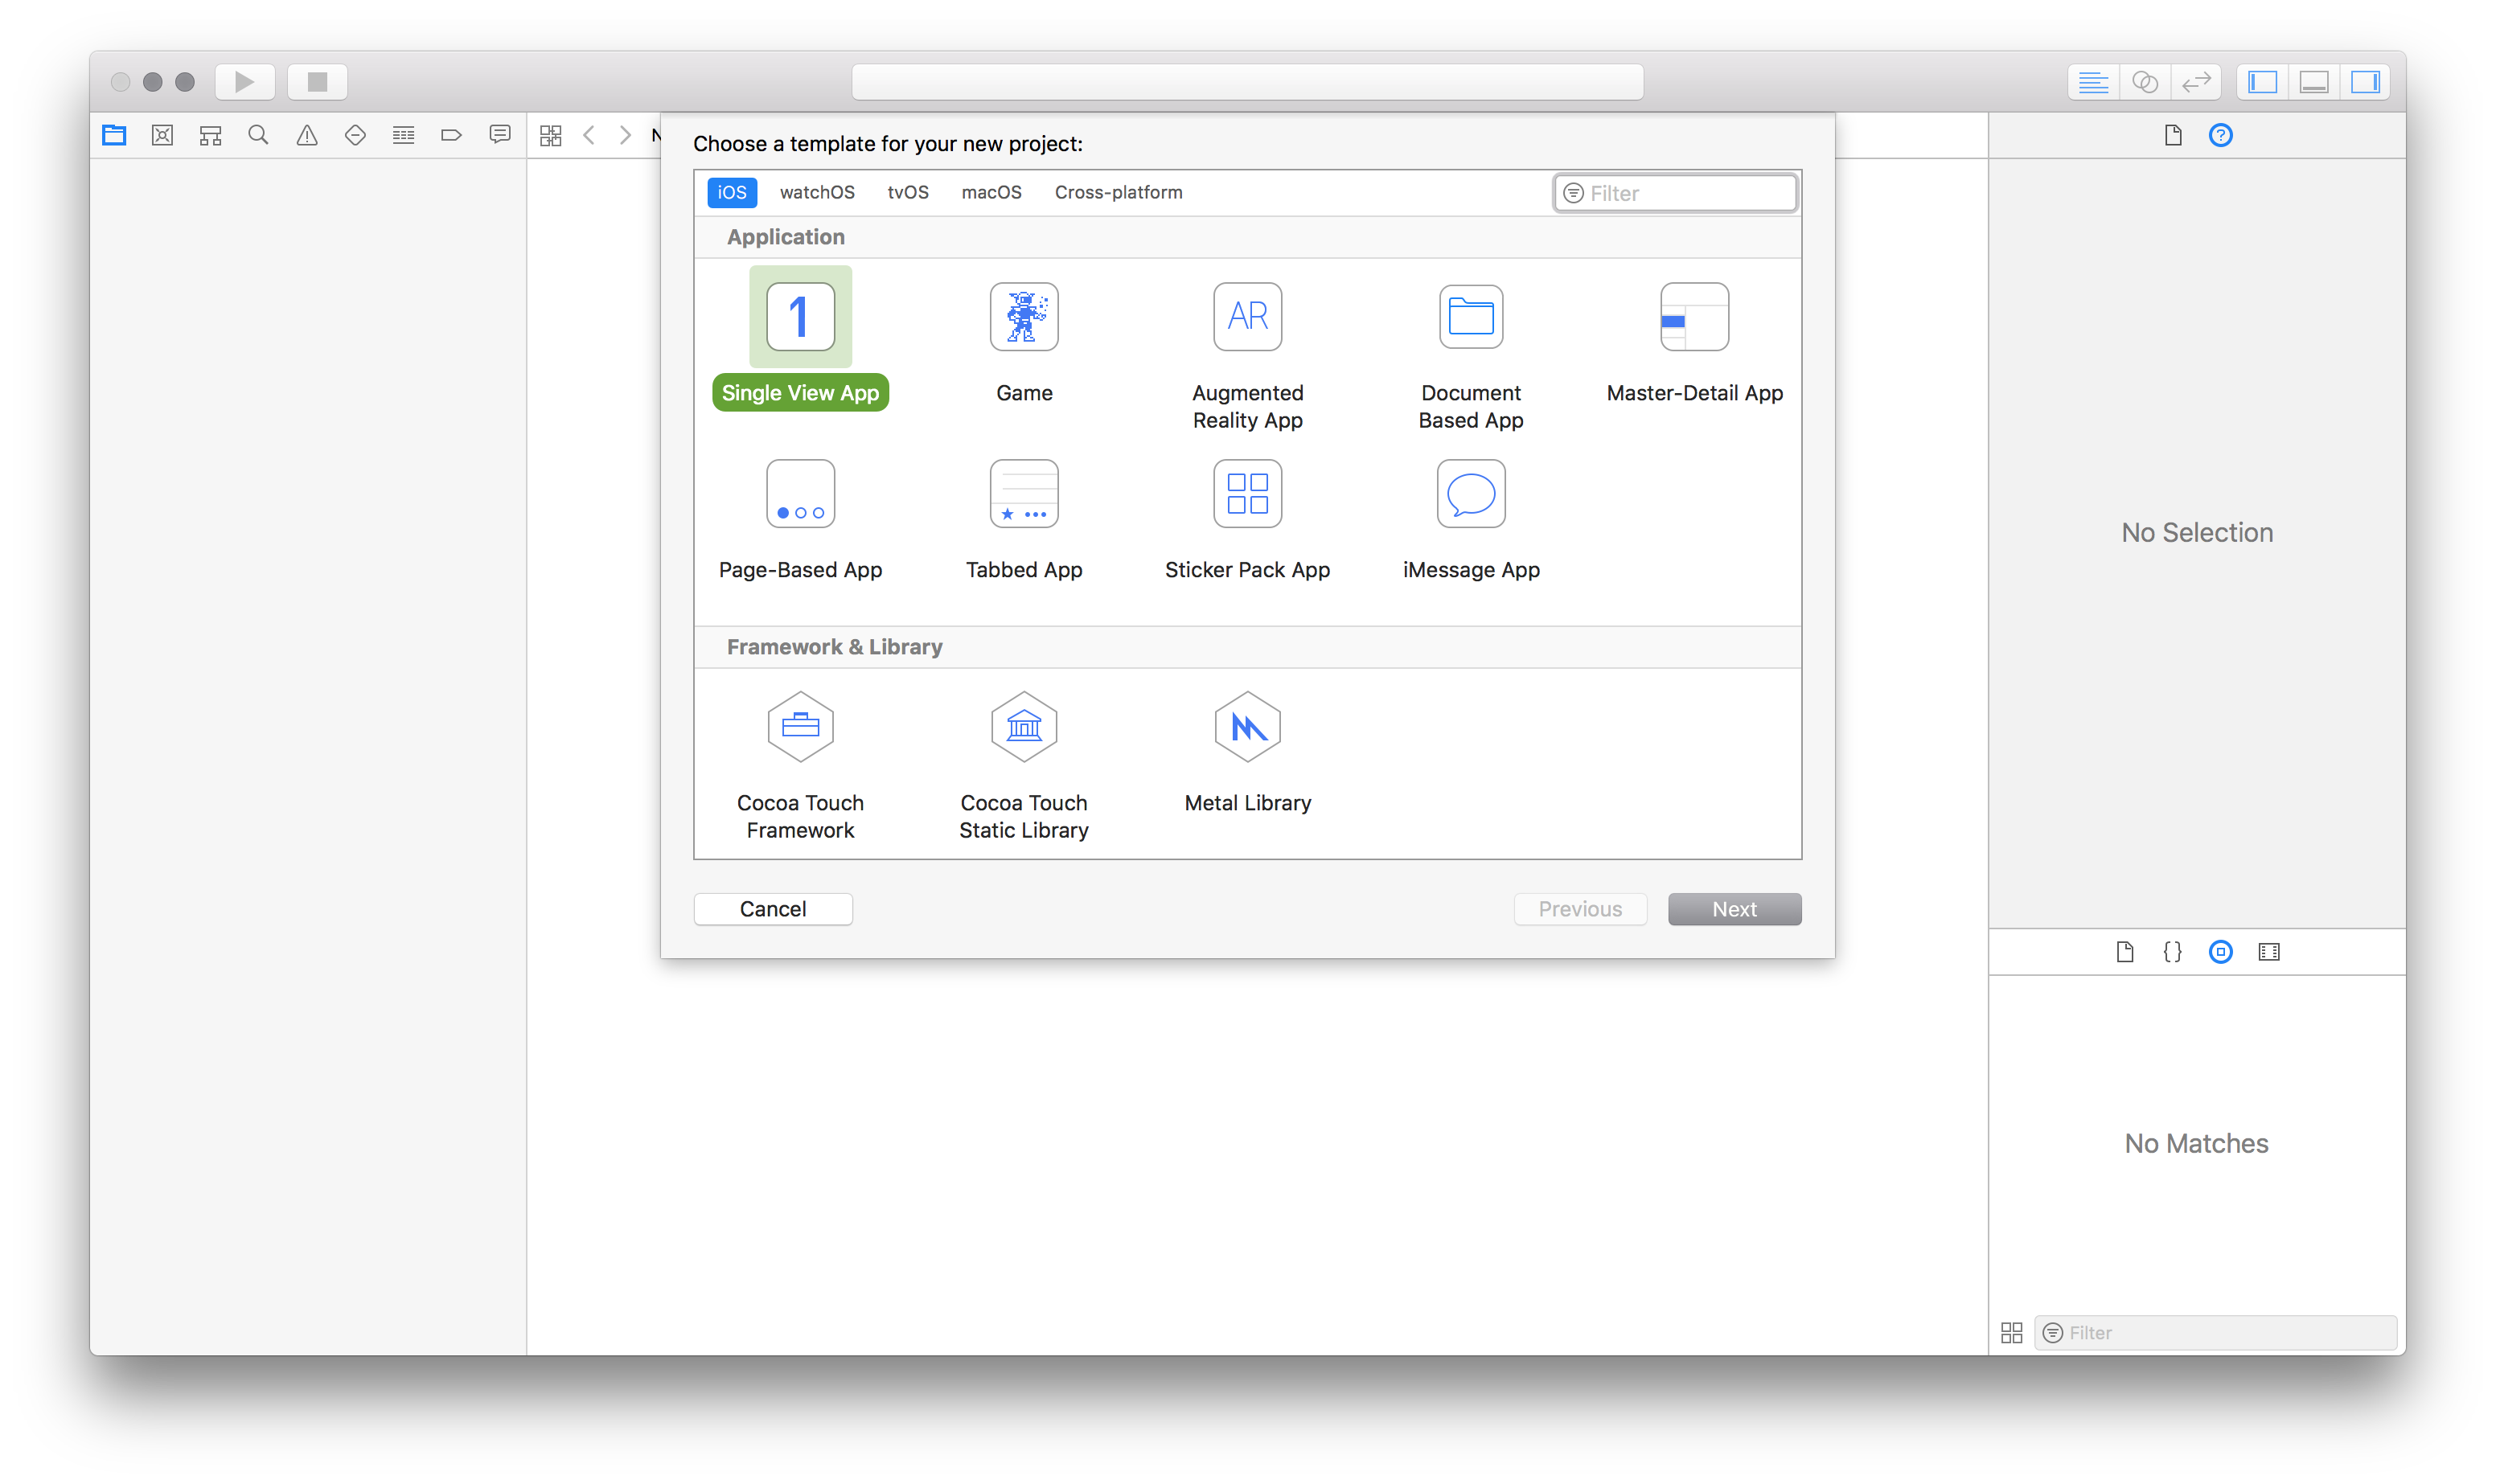
  1. Open Xcode and create a new Framework project.
    Screen Shot 2018-09-06 at 1.21.04 PM
  2. Name the project “UIVIdentityCard”.
    Screen Shot 2018-09-06 at 1.23.05 PM
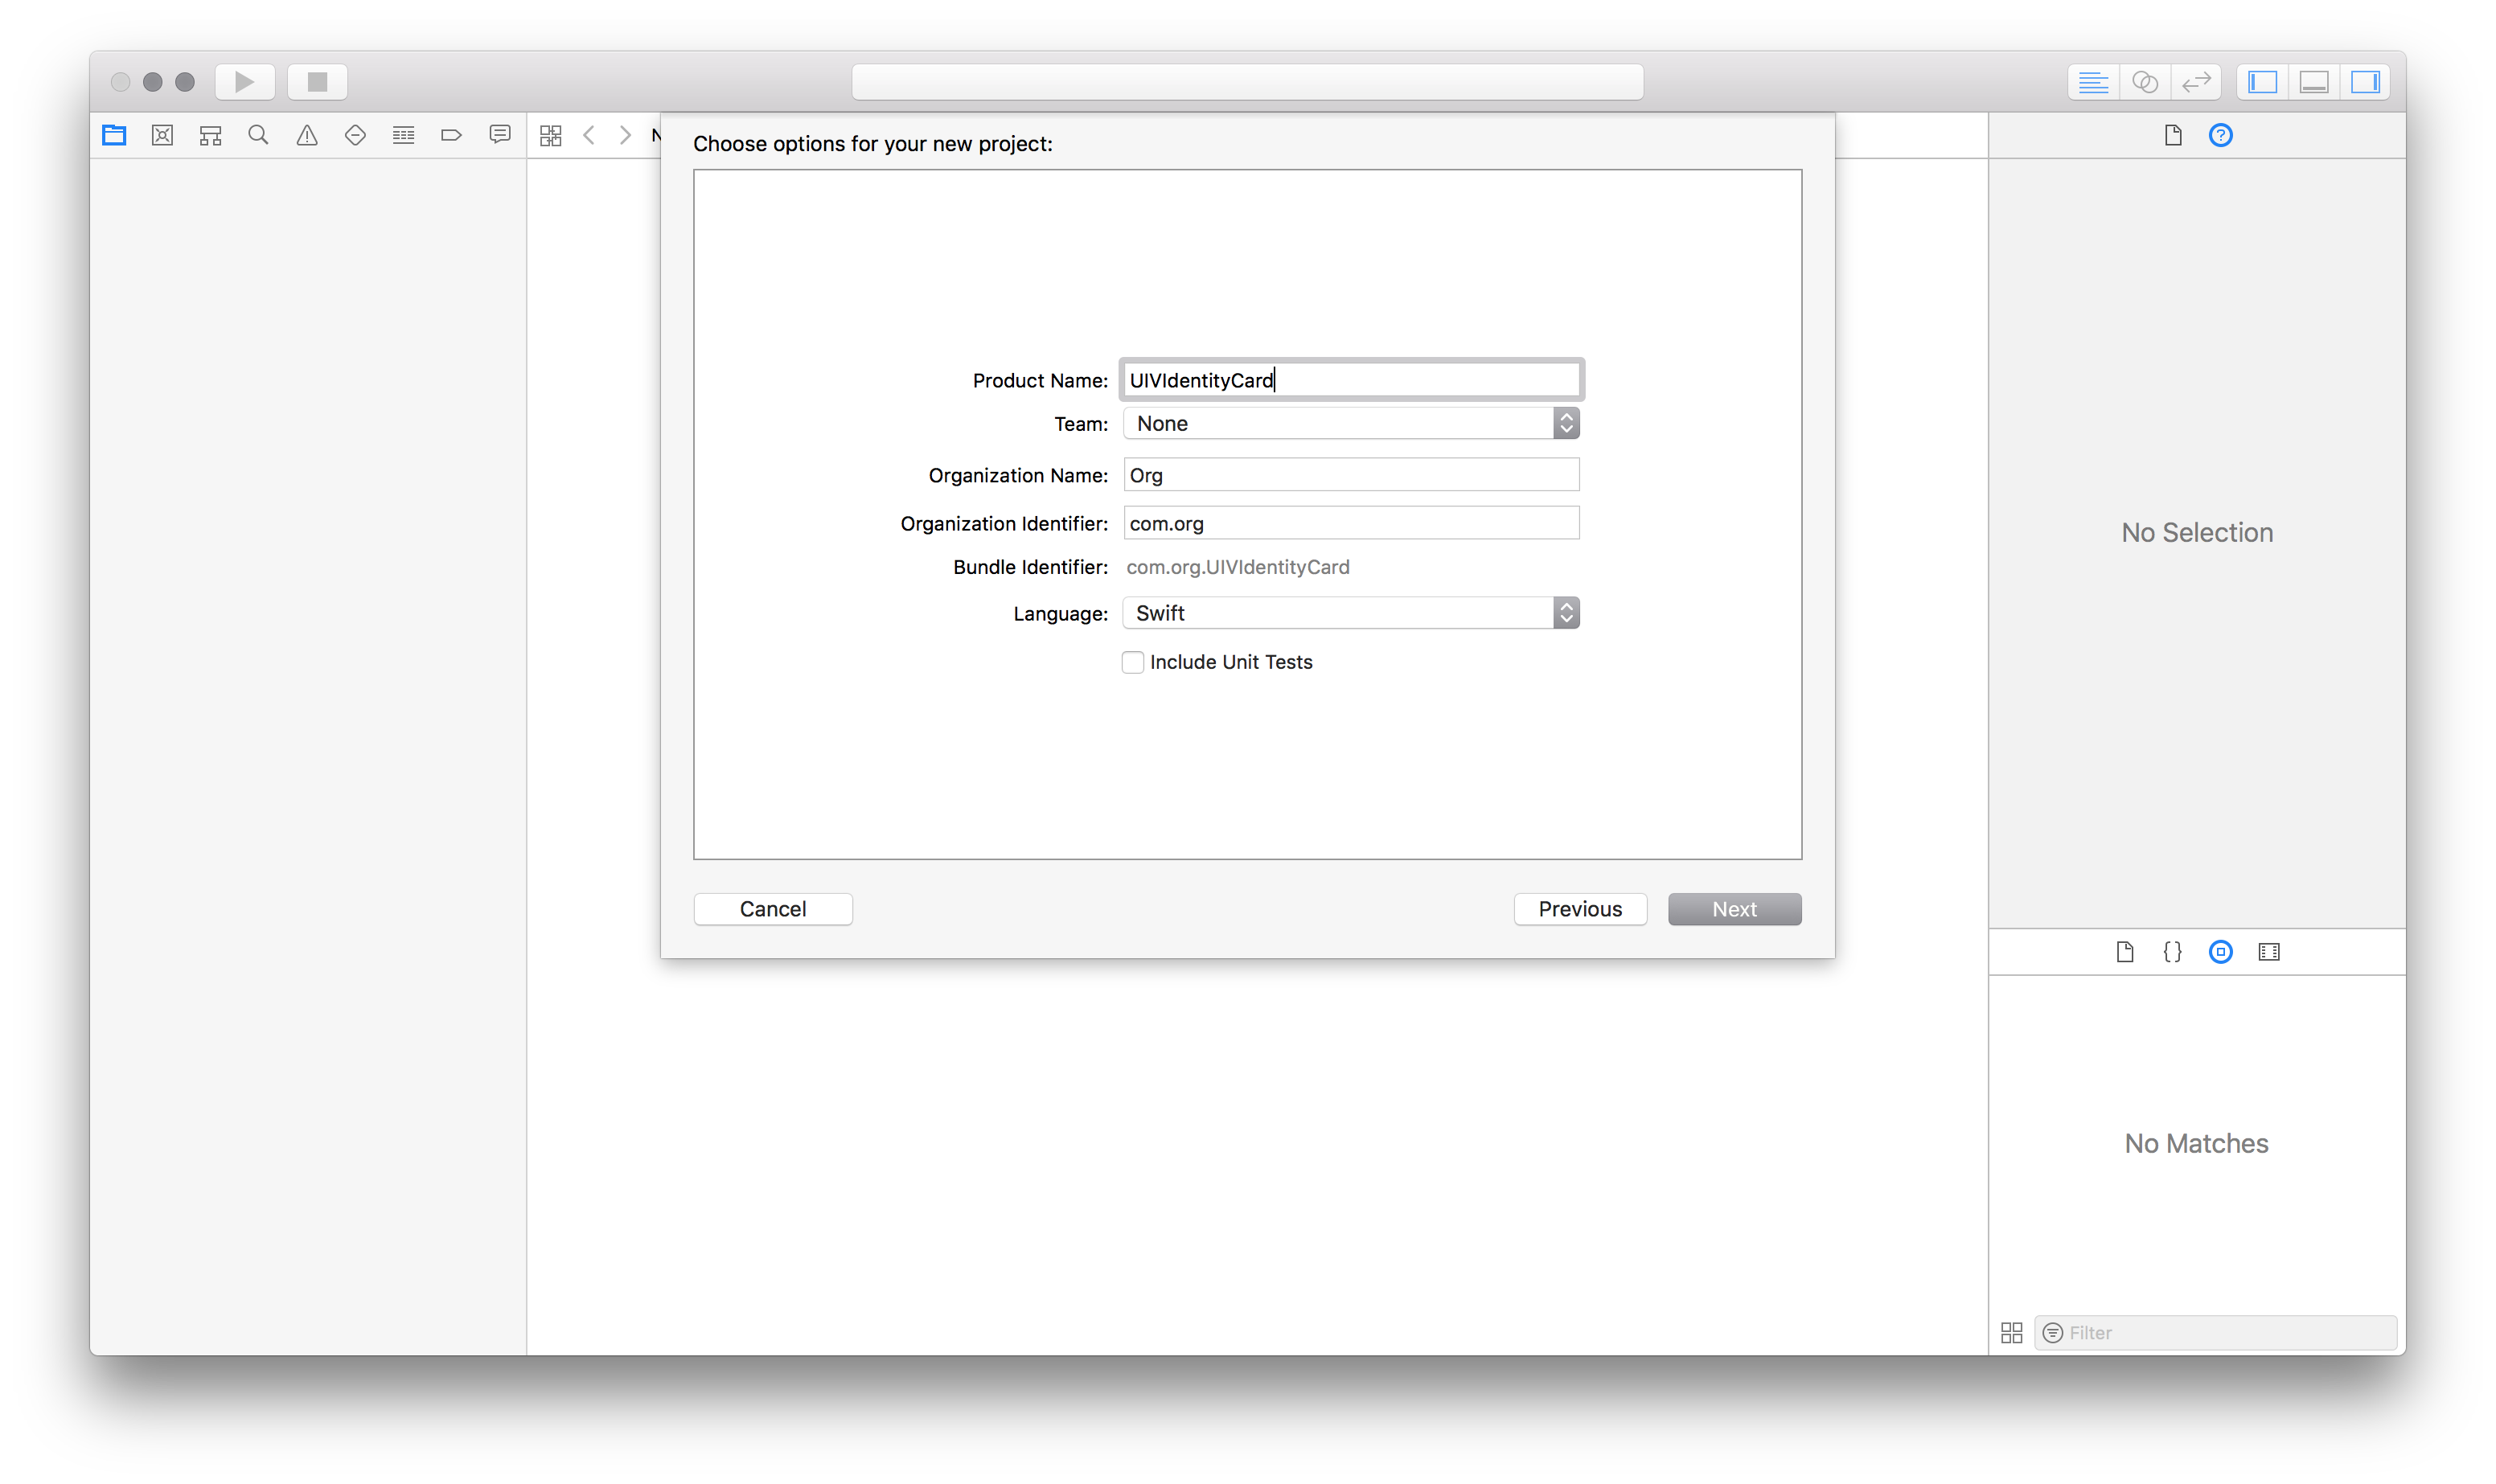
  3. Save the project in any folder.
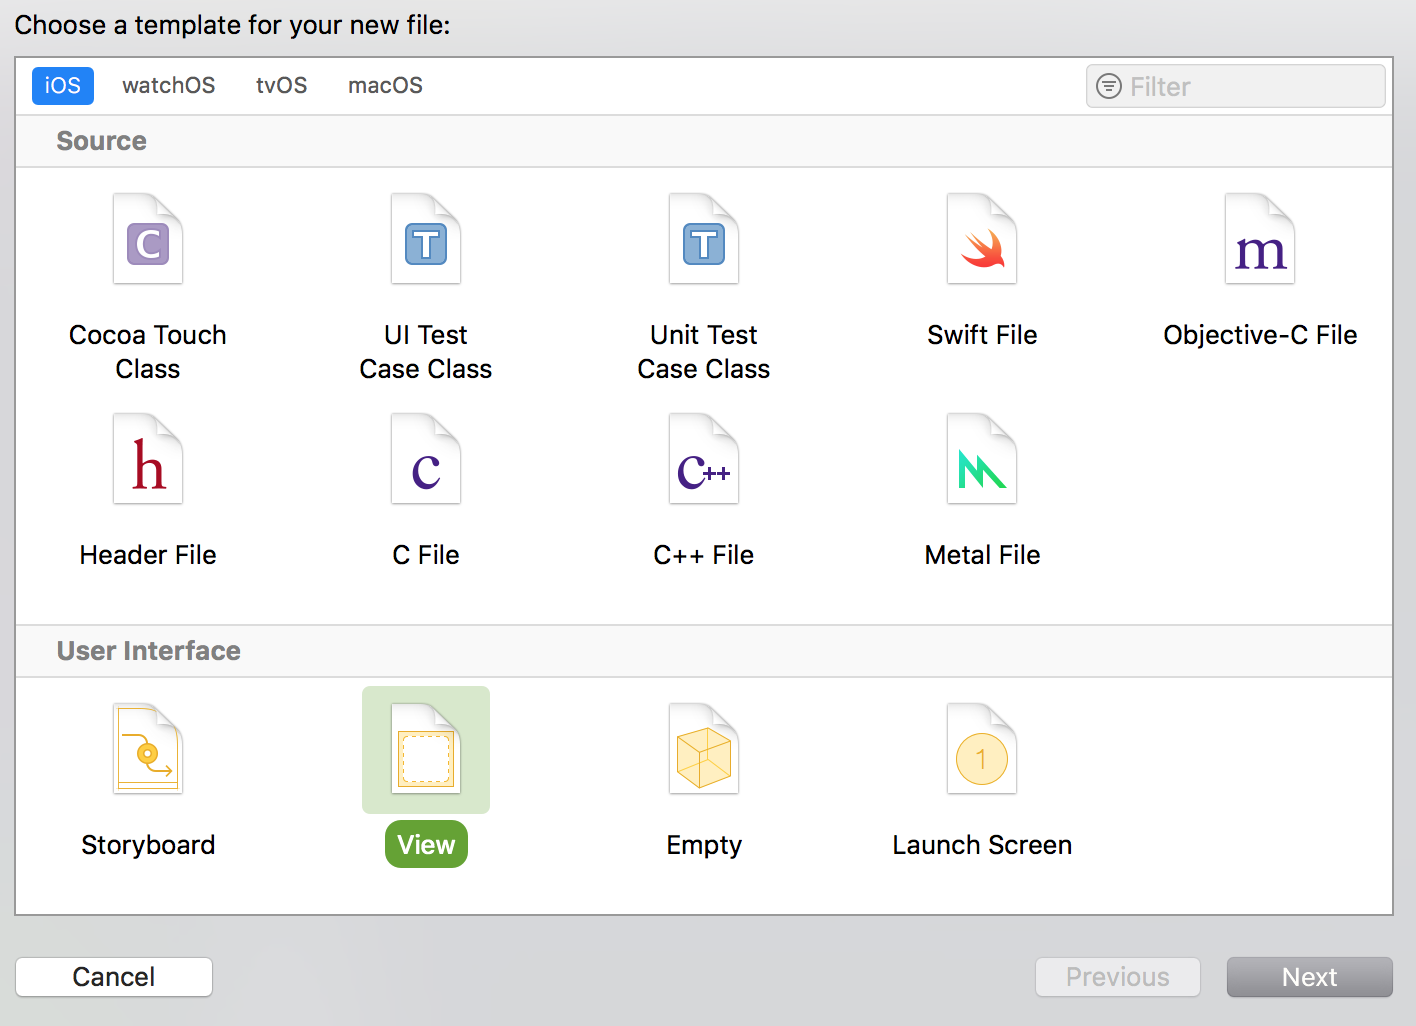
  4. Create a new Swift file File > New > File > Swift.
  5. Name the file “GenderType.swift”. This is where we will declare the enum that holds the Gender type that we are creating.
  6. Add the following code to the file.
     
    import Foundation 
    /** Possible scores that can be given. 
    *values* 
    `Male` 
    
    `Female` 
    
    `NotSpecified` 
    
    *functions* 
    `func toString() -> String` 
    Used to get the `String` version of the value 
    
    - Author: Arun Patwardhan 
    - Version: 1.0 
    */ 
    public enum GenderType 
    {      
         case Male      
         case Female      
         case NotSpecified 
    } 
    
    /** This extension adds the Enum to String converions capability 
    - Author: Arun Patwardhan 
    - Version: 1.1 
    */ 
    extension GenderType 
    {      
         /** This function converts from enum value to `String`         
         - important: This function does not do validation         
         - returns: `String`.         
         - requires: iOS 11 or later         
         - Since: iOS 11         
         - author: Arun Patwardhan         
         - copyright: Copyright (c) Amaranthine 2015         
         - version: 1.0 */      
         @available(iOS, introduced: 11.0, message: "convert to String")      
         func toString() -> String      
         {           
              switch self           
              {                
                   case .Male:                     
                        return "Male"                
                   case .Female:                     
                        return "Female"                
                   case .NotSpecified:                     
                        return "Not Specified"           
              }      
         } 
    } 
  7. Create a new Swift file called “PersonDetailsModel.swift”.
  8. Add the following code to the file.
    import Foundation
    
    /**  This struct represents the data that is to be shown in the ID card  
    **Variables**  
    `personName`  
    
    `personIcon`  
    
    `personDob`  
    Date of Birth  
    
    `personAddress` 
     
    `personPhone` 
     
    `personEmail` 
     
    `personCompany`
      
    `personHeight`
      
    `personWeight`  
    
    `personGender`  
    
    **Important**  There is a variable with the name `entryCount`. This variable keeps tracks of the number of stored properties that exist. The value of this variable will be used to determine the number of rows in the table.The computed property `numberOfRows` is the property used to access the value of `entryCount`.  
    
    - Author: Arun Patwardhan  
    - Version: 1.0
    */
    public struct PersonDetailsModel
    {     
         internal var entryCount : Int = 7     
         public var personName   : String = ""     
         public var personIcon   : UIImage     
         public var personDob    : Date     
         public var personAddress: String = ""     
         public var personPhone  : String = ""     
         public var personEmail  : String = ""     
         public var personCompany: String = ""     
         public var personHeight : Double? = 0.0     
         {          
              willSet          
              {               
                   if newValue == nil & personHeight != nil               
                   {                    
                        entryCount -= 1               
                   }               
                   else if newValue != nil & personHeight == nil               
                   {                    
                        entryCount += 1               
                   }          
              }     
         }     
    
         public var personWeight : Double? = 0.0     
         {          
              willSet(newValue)          
              {               
                   if newValue == nil & personWeight != nil               
                   {                    
                        entryCount -= 1               
                   }               
                   else if newValue != nil & personWeight == nil               
                   {                    
                        entryCount += 1               
                   }          
              }     
         }     
    
         public var personGender : GenderType?     
         {          
              willSet          
              {               
                   if newValue == nil & personGender != nil               
                   {                    
                        entryCount -= 1               
                   }               
                   else if newValue != nil & personGender == nil               
                   {                    
                        entryCount += 1               
                   }          
              }     
         }     
    
         public var numberOfRows : Int     
         {          
              return entryCount     
         }     
    
         public init(withName newName : String, icon newIcon : UIImage, birthday newDob : Date, address newAddress : String, phone newPhone : String, email newEmail : String, Company newCompany : String, height newHeight : Double?, weight newWeight : Double?, andGender newGender : GenderType?)     
         {          
              personName = newName          
              personIcon = newIcon          
              personDob  = newDob          
              personAddress = newAddress          
              personPhone = newPhone          
              personEmail = newEmail          
              personCompany = newCompany  
            
              if newGender != nil          
              {               
                   entryCount += 1          
              }          
              if newWeight != nil          
              {               
                   entryCount += 1          
              }          
              if newHeight != nil          
              {               
                   entryCount += 1          
              }          
    
              personHeight = newHeight          
              personWeight = newWeight          
              personGender = newGender     
         }
    }
    
    /**     This extension adds protocol conformance for the `CustomStringConvertible` protocol.     
    
    - Author: Arun Patwardhan     
    - Version: 1.1
    */
    extension PersonDetailsModel : CustomStringConvertible
    {     
         public var description: String     
         {          
              return """               
                   NAME: \(self.personName)               
                   DATE OF BIRTH:\(self.personDob)               
                   ADDRESS: \(self.personAddress)               
                   EMAIL:\(self.personEmail)               
                   PHONE:\(self.personPhone)          
              """     
         }
    }
  9. Now we will focus out attention on the View. Create a new file File > New > File > View.
    Screen Shot 2018-09-06 at 2.18.32 PM
  10. Name the view “UIVIdentityCard.swift”.
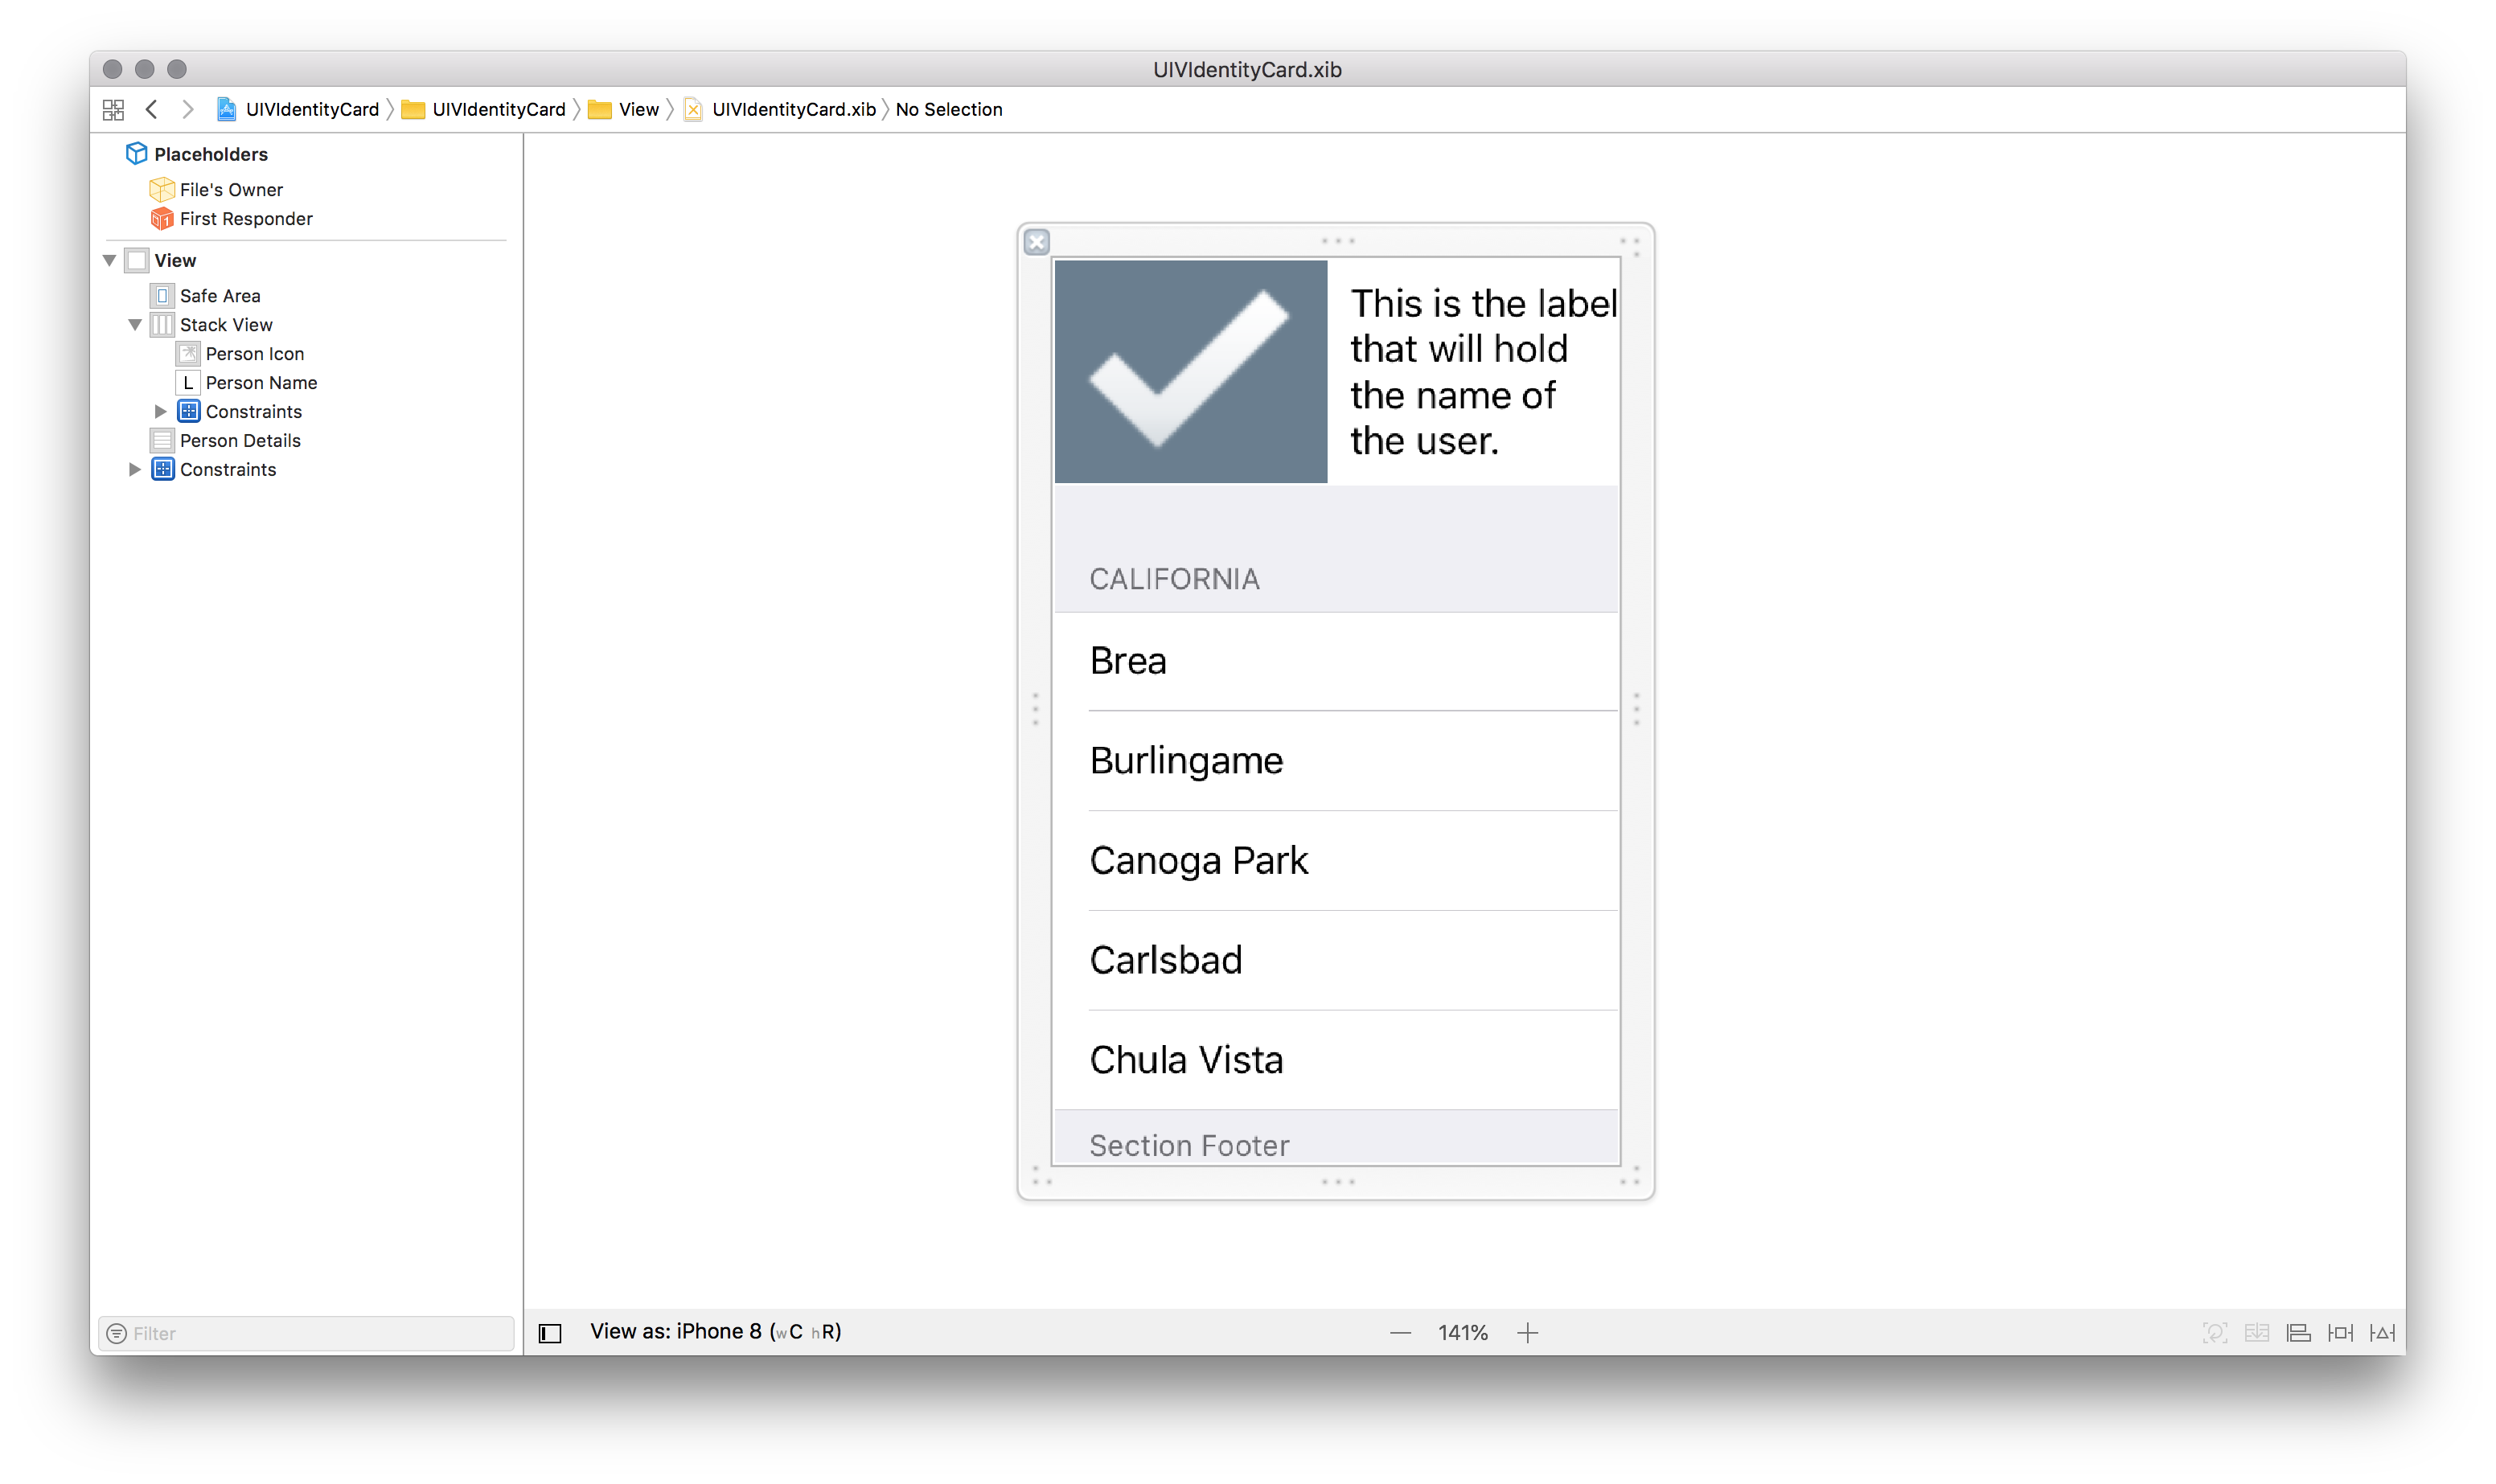
  11. Design the view as shown in the screenshot below.
    Screen Shot 2018-09-07 at 12.22.49 PM
  12. Create the corresponding“UIVIdentityCard.swift” file.
  13. Make the IBOutlet & IBAction connections for the different UI elements.
  14. Add the following code. This is how your file should look after its completed.
    /**     The UIVIdentityCard class     
    **Functions**     
    `public func load(data newPerson : PersonDetailsModel)`     
    Used to load the data for the view.     
    
    - Author: Arun Patwardhan     
    - Version: 1.0
    */
    @IBDesignableopen class UIVIdentityCard: UIView, UITableViewDelegate, UITableViewDataSource
    {     
         //IBOutlets --------------------------------------------------     
         @IBOutlet public weak var personIcon : UIImageView!     
         @IBOutlet public weak var personName : UILabel!     
         @IBOutlet public weak var personDetails : UITableView! 
    
         //Variables --------------------------------------------------     
         public var localTableData : PersonDetailsModel!     
         let nibName : String = "UIVIdentityCard"     
         var view: UIView!     
         let cellIdentifier : String = "IDCard"     
         //Functions --------------------------------------------------     
         /**     This function does the initial setup of the view. There are multiple things happening in this file.     
         1) The first thing that we do is to load the Nib file using the `nibName` we saved above. The UNIb object contains all the elements we have within the Nib file. The UINib object loads the object graph in memory but does not unarchive them. To unarchive them and get the ibjects loaded completely for use we have to instatiate the object and get the arry of top level objects. We are however interested in the first object that is there in the array which is of type `UIView`. The reference to this view is assigned to our local `view` variable.     
         2) Next we specify the bounds of our view     
         3) Finally we add this view as a subview     
    
         - important: This function does not do validation     
         - requires: iOS 11 or later, the varibale that contains the name of the nib file.     
         - Since: iOS 11     
         - author: Arun Patwardhan     
         - copyright: Copyright (c) Amaranthine 2015     
         - version: 1.0     
         */     
         @available(iOS, introduced: 11.0, message: "setup view")     
         func setup()     
         {          
              //1)          
              self.view = UINib(nibName: self.nibName, bundle: Bundle(for: type(of: self))).instantiate(withOwner: self, options: nil)[0] as! UIView          
         
              //2)          
              self.view.frame = bounds          
              
              //3)          
              self.addSubview(self.view)     
         }     
    
         public func tableView(_ tableView: UITableView, numberOfRowsInSection section: Int) -> Int     
         {          
              if let count = localTableData?.entryCount          
              {               
                   return count - 2          
              }          
              return 0     
         }     
    
         public func tableView(_ tableView: UITableView, cellForRowAt indexPath: IndexPath) -> UITableViewCell     
         {          
              var cell : UITableViewCell? = tableView.dequeueReusableCell(withIdentifier: cellIdentifier)          
    
              if nil == cell          
              {               
                   cell = UITableViewCell(style: .default, reuseIdentifier: cellIdentifier)          
              }          
    
              switch indexPath.row          
              {               
                   case 0:                    
                        let formatter = DateFormatter()                    
                        formatter.dateStyle = .medium                         
                        cell?.textLabel?.text = "Birthday\t: "+ formatter.string(from: (localTableData?.personDob)!)      
    
                   case 1:                    
                        cell?.textLabel?.text = "Email\t: " + localTableData.personEmail               
    
                   case 2:                    
                        cell?.textLabel?.text = "Phone\t: " + localTableData.personPhone               
    
                   case 3:                    
                        cell?.textLabel?.text = "Address\t: " + localTableData.personAddress               
    
                   case 4:                    cell?.textLabel?.text = "Company\t: " + localTableData.personCompany               
    
                   case 5:                    
                        cell?.textLabel?.text = "Gender\t: " + \(localTableData.personGender?.toString())!               
    
                   case 6:                    
                        cell?.textLabel?.text = "Height\t: \((localTableData.personHeight)!)"               
    
                   case 7:                    
                        cell?.textLabel?.text = "Weight\t: \((localTableData.personWeight)!)"               
                   default:                    
                        print("error")          
              }          
    
              cell?.textLabel?.font = UIFont.boldSystemFont(ofSize: 12.0)          
              cell?.textLabel?.setContentCompressionResistancePriority(.defaultHigh, for: .horizontal)          
              return cell!     
         }     
    
         //Inits --------------------------------------------------                    
         override public init(frame: CGRect)     
         {          
              super.init(frame: frame)          
              self.setup()     
         }     
         
         required public init?(coder aDecoder: NSCoder)     
         {          
              super.init(coder: aDecoder)          
              self.setup()     
         }     
    
         override open func layoutSubviews()     
         {          
         super.layoutSubviews()     
         }
    }
    
    /**     This extension adds the function to load data     
    - Author: Arun Patwardhan     
    - Version: 1.1
    */
    extension UIVIdentityCard
    {     
         /**          
         This function loads the data for the view          
         - important: This function does not do validation          
         - parameter newPerson: This is the object representing the person whose information will be displayed on the screen.          
         - requires: iOS 11 or later          
         - Since: iOS 11          
         - author: Arun Patwardhan          
         - copyright: Copyright (c) Amaranthine 2015          
         - version: 1.0     
         */    
         @available(iOS, introduced: 11.0, message: "load data")     
         public func load(data newPerson : PersonDetailsModel)     
         {          
              self.localTableData = newPerson          
              self.personIcon.image = localTableData.personIcon          
              self.personName.text = localTableData.personName          
              self.personDetails.reloadData()     
         }
    }
  15. Add the placeholder image for the image view.
  16. Select any of the simulators from the list.
  17. Press ⌘ + B to build the project.
  18. From the Project navigator select the Framework file.
    Screen Shot 2018-09-07 at 12.29.44 PM
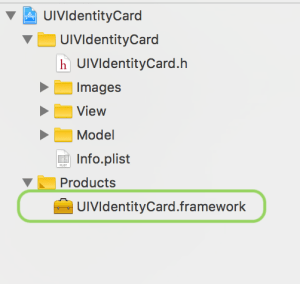
  19. Control click and select “Show in Finder”.
  20. Copy the framework to the “Desktop”.

We are done creating the reusable framework. We will not shift our focus towards testing this framework.

Using the Framework in a project

Let us now test the framework we created. We will do this by incorporating the code in our iOS App.

  1. Create a new project. Call it “IdentityCardTest”.
    Screen Shot 2018-09-07 at 12.33.52 PM
    Screen Shot 2018-09-07 at 12.33.49 PM
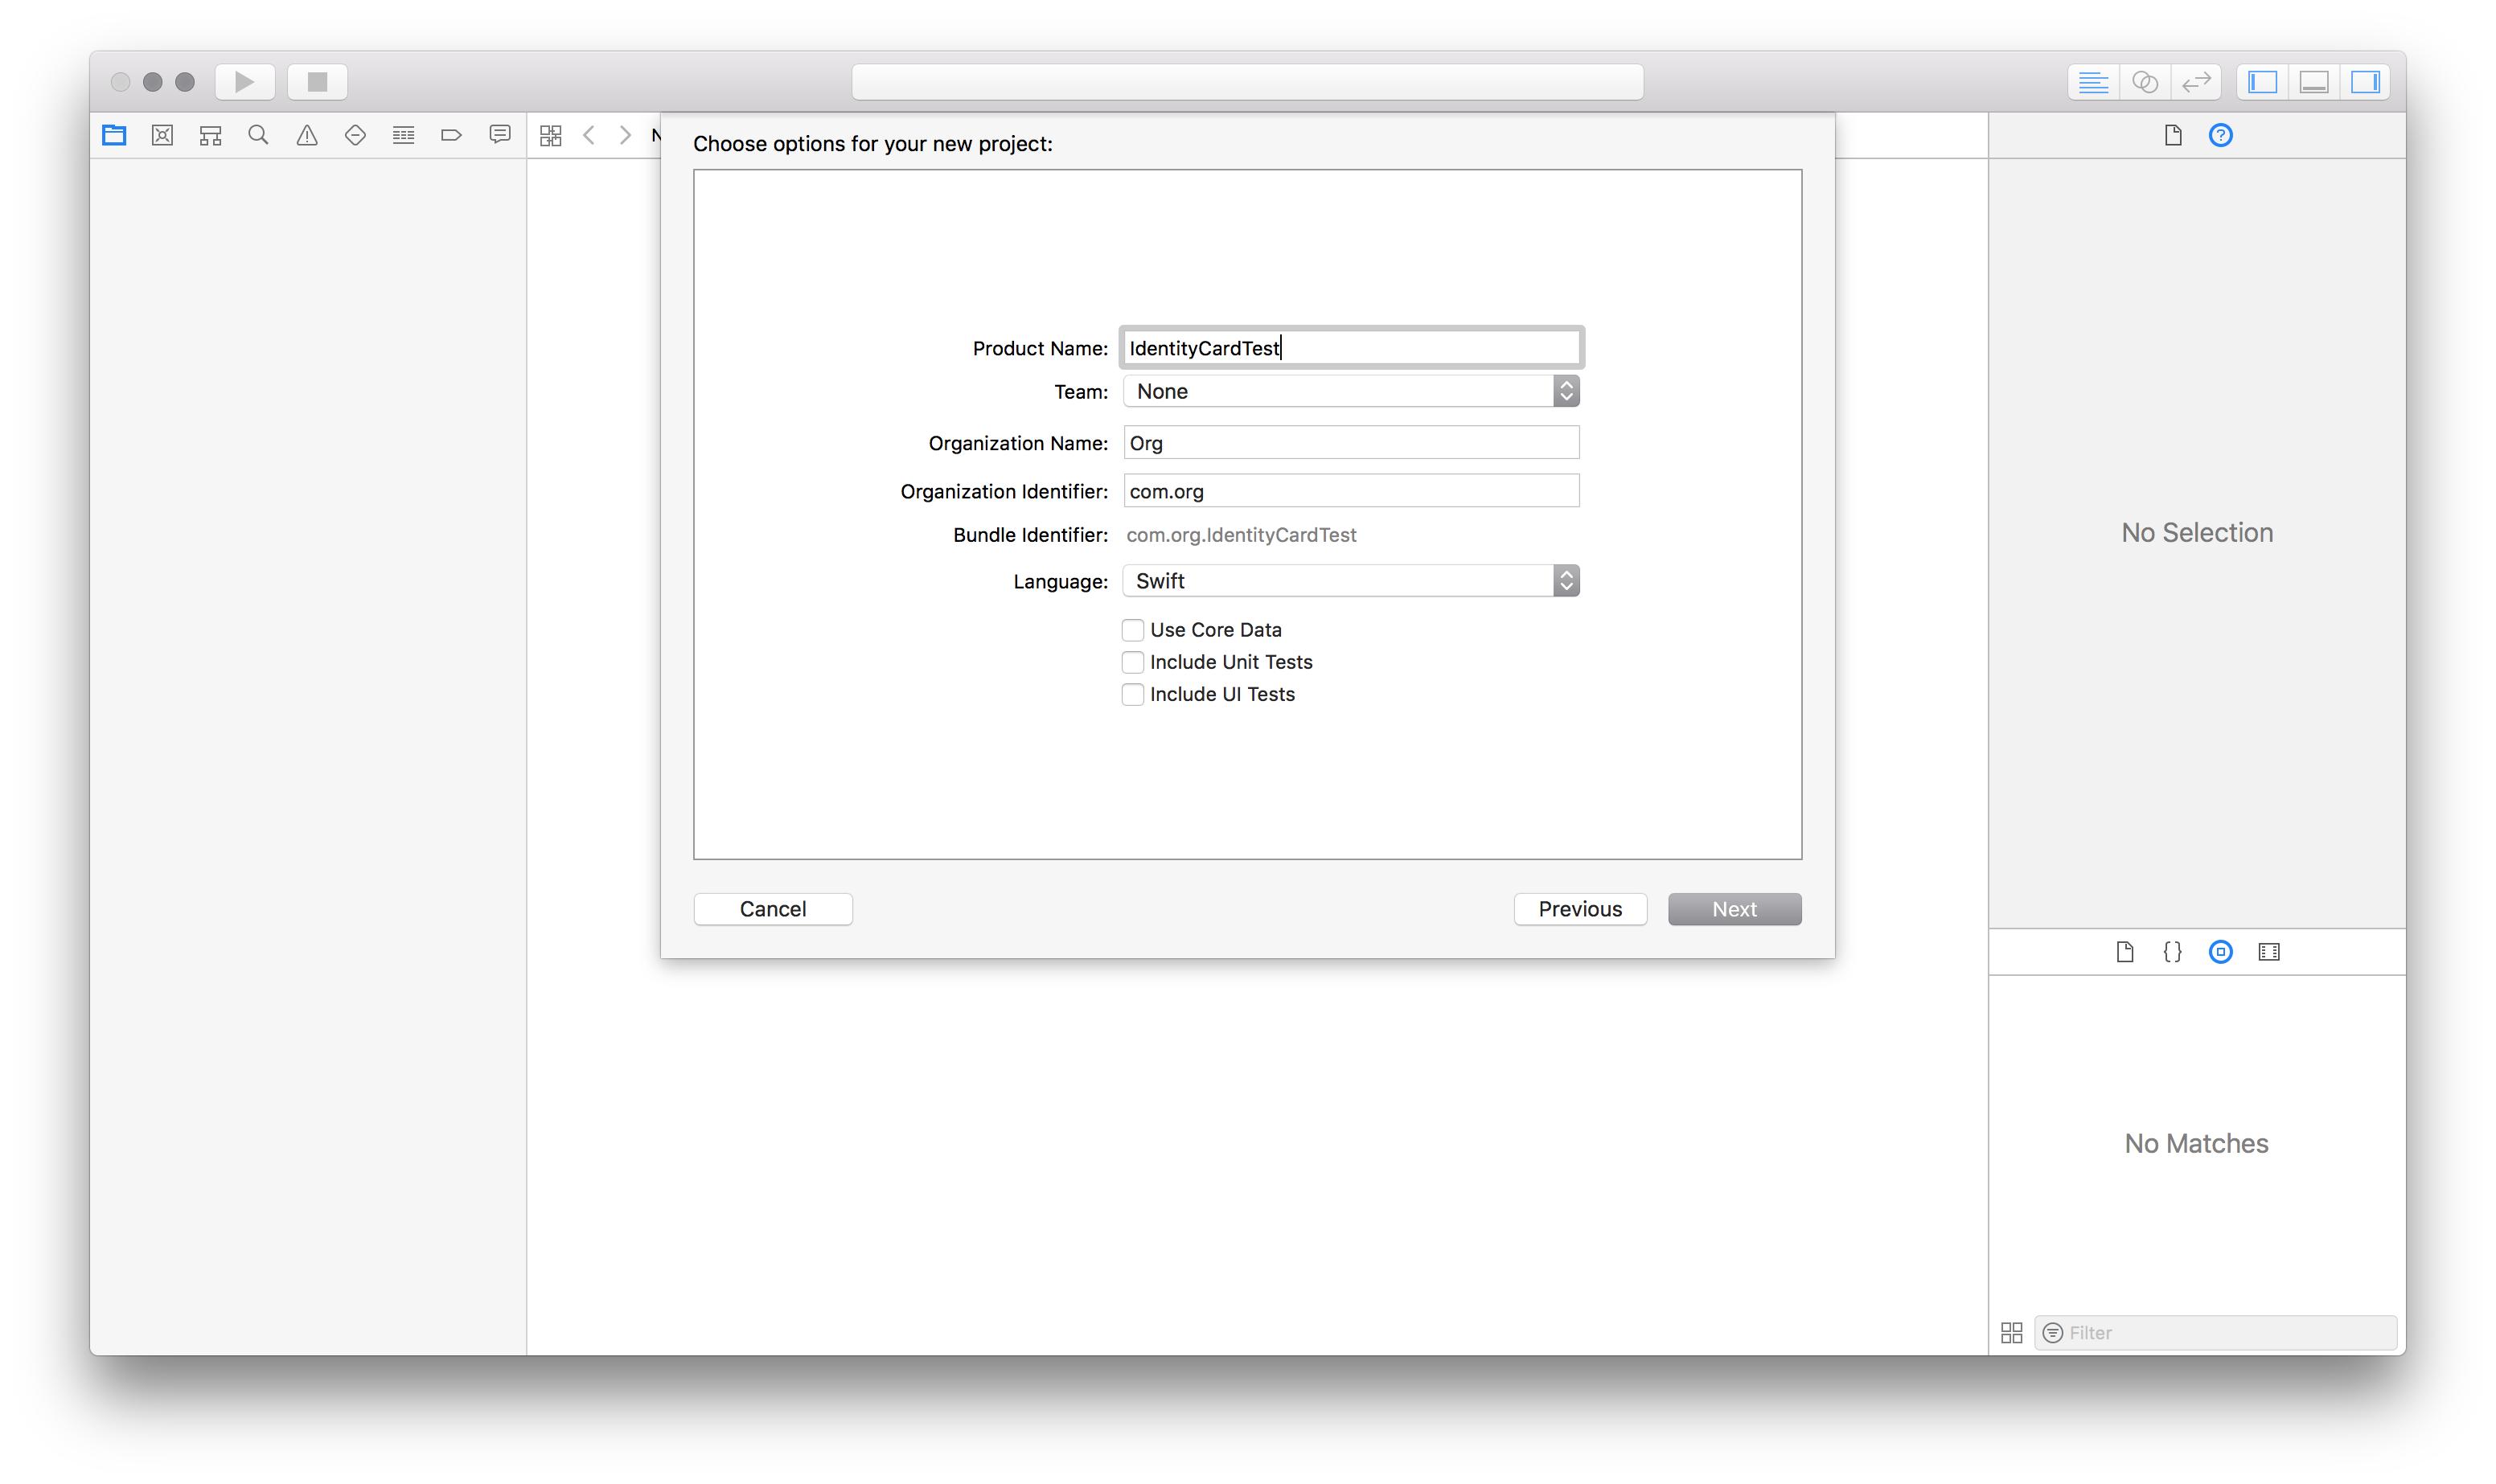
  2. Save the file in a folder of your choice.
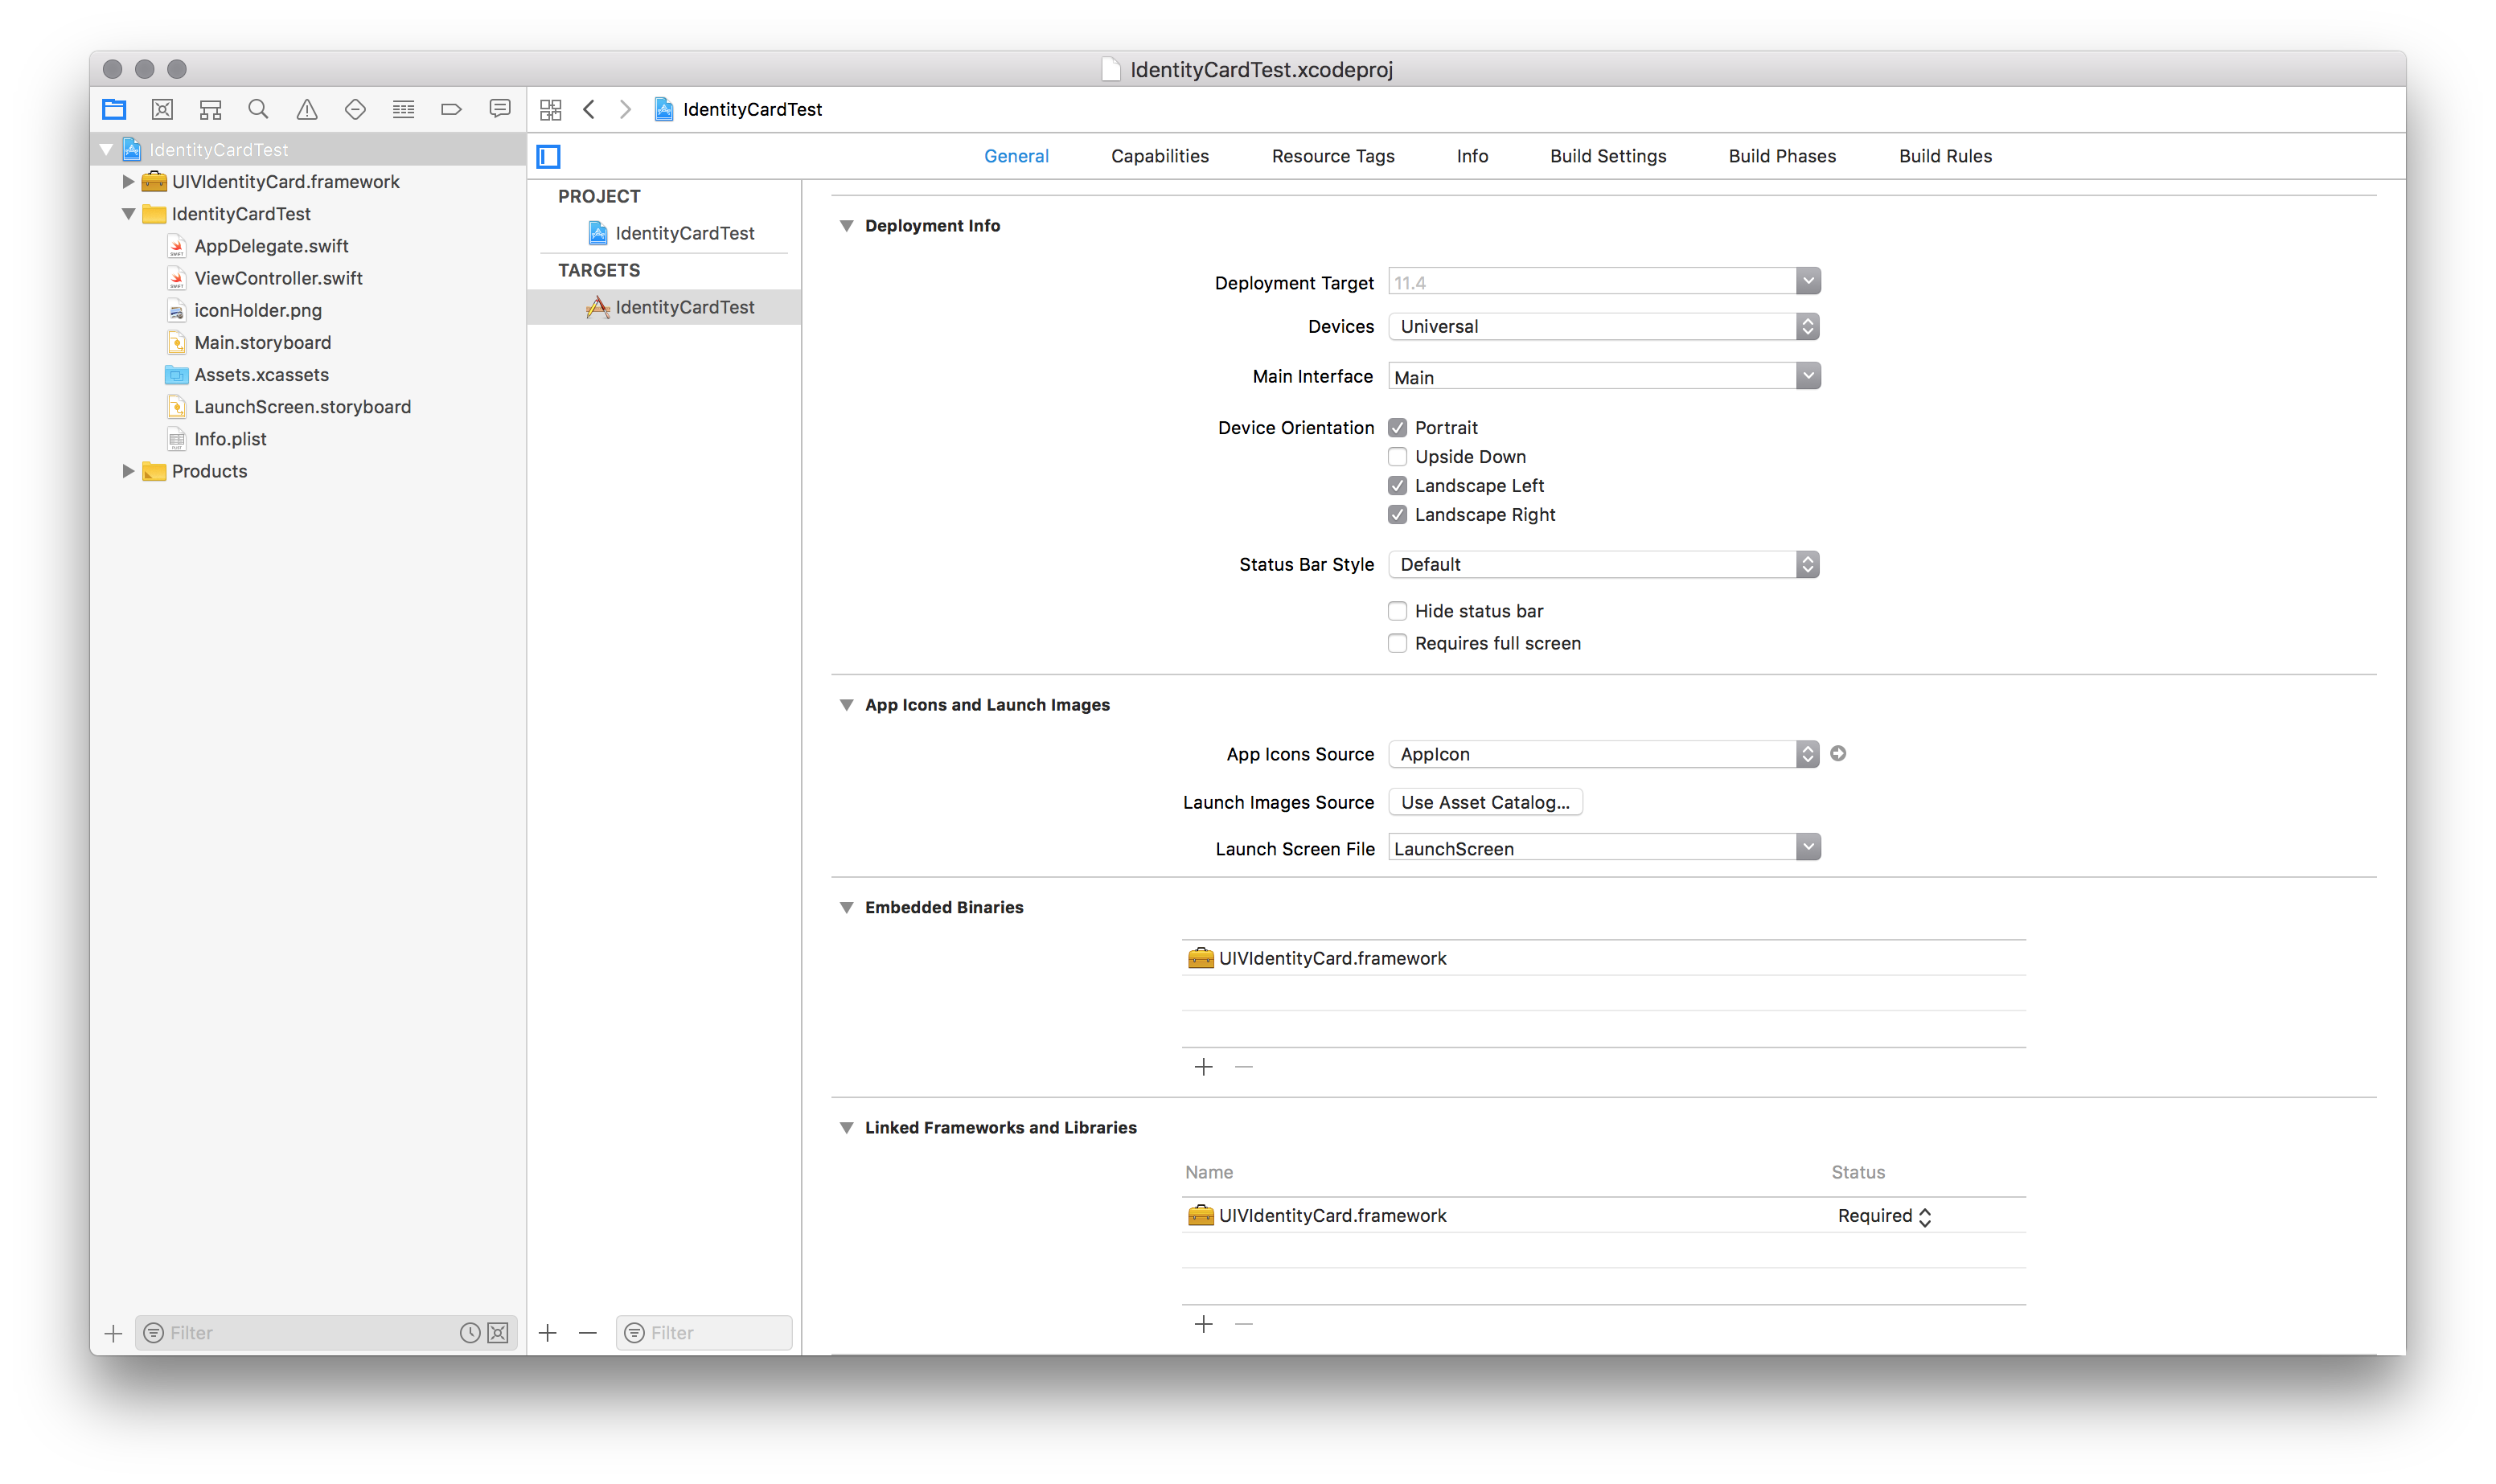
  3. Select the Project file and Embed the Framework into your project. 
    Screen Shot 2018-09-07 at 12.36.14 PM
  4. Add an image to your project, this will be the image that will be displayed in your custom view.
  5. Switch to the Main.storyboard file. Drag a UIView into the ViewControllers view.
  6. Set its identity to the UIVIdentityCard in the identity inspector. Also set its module to UIVIdentityCard.
    Screen Shot 2018-09-07 at 12.38.11 PM
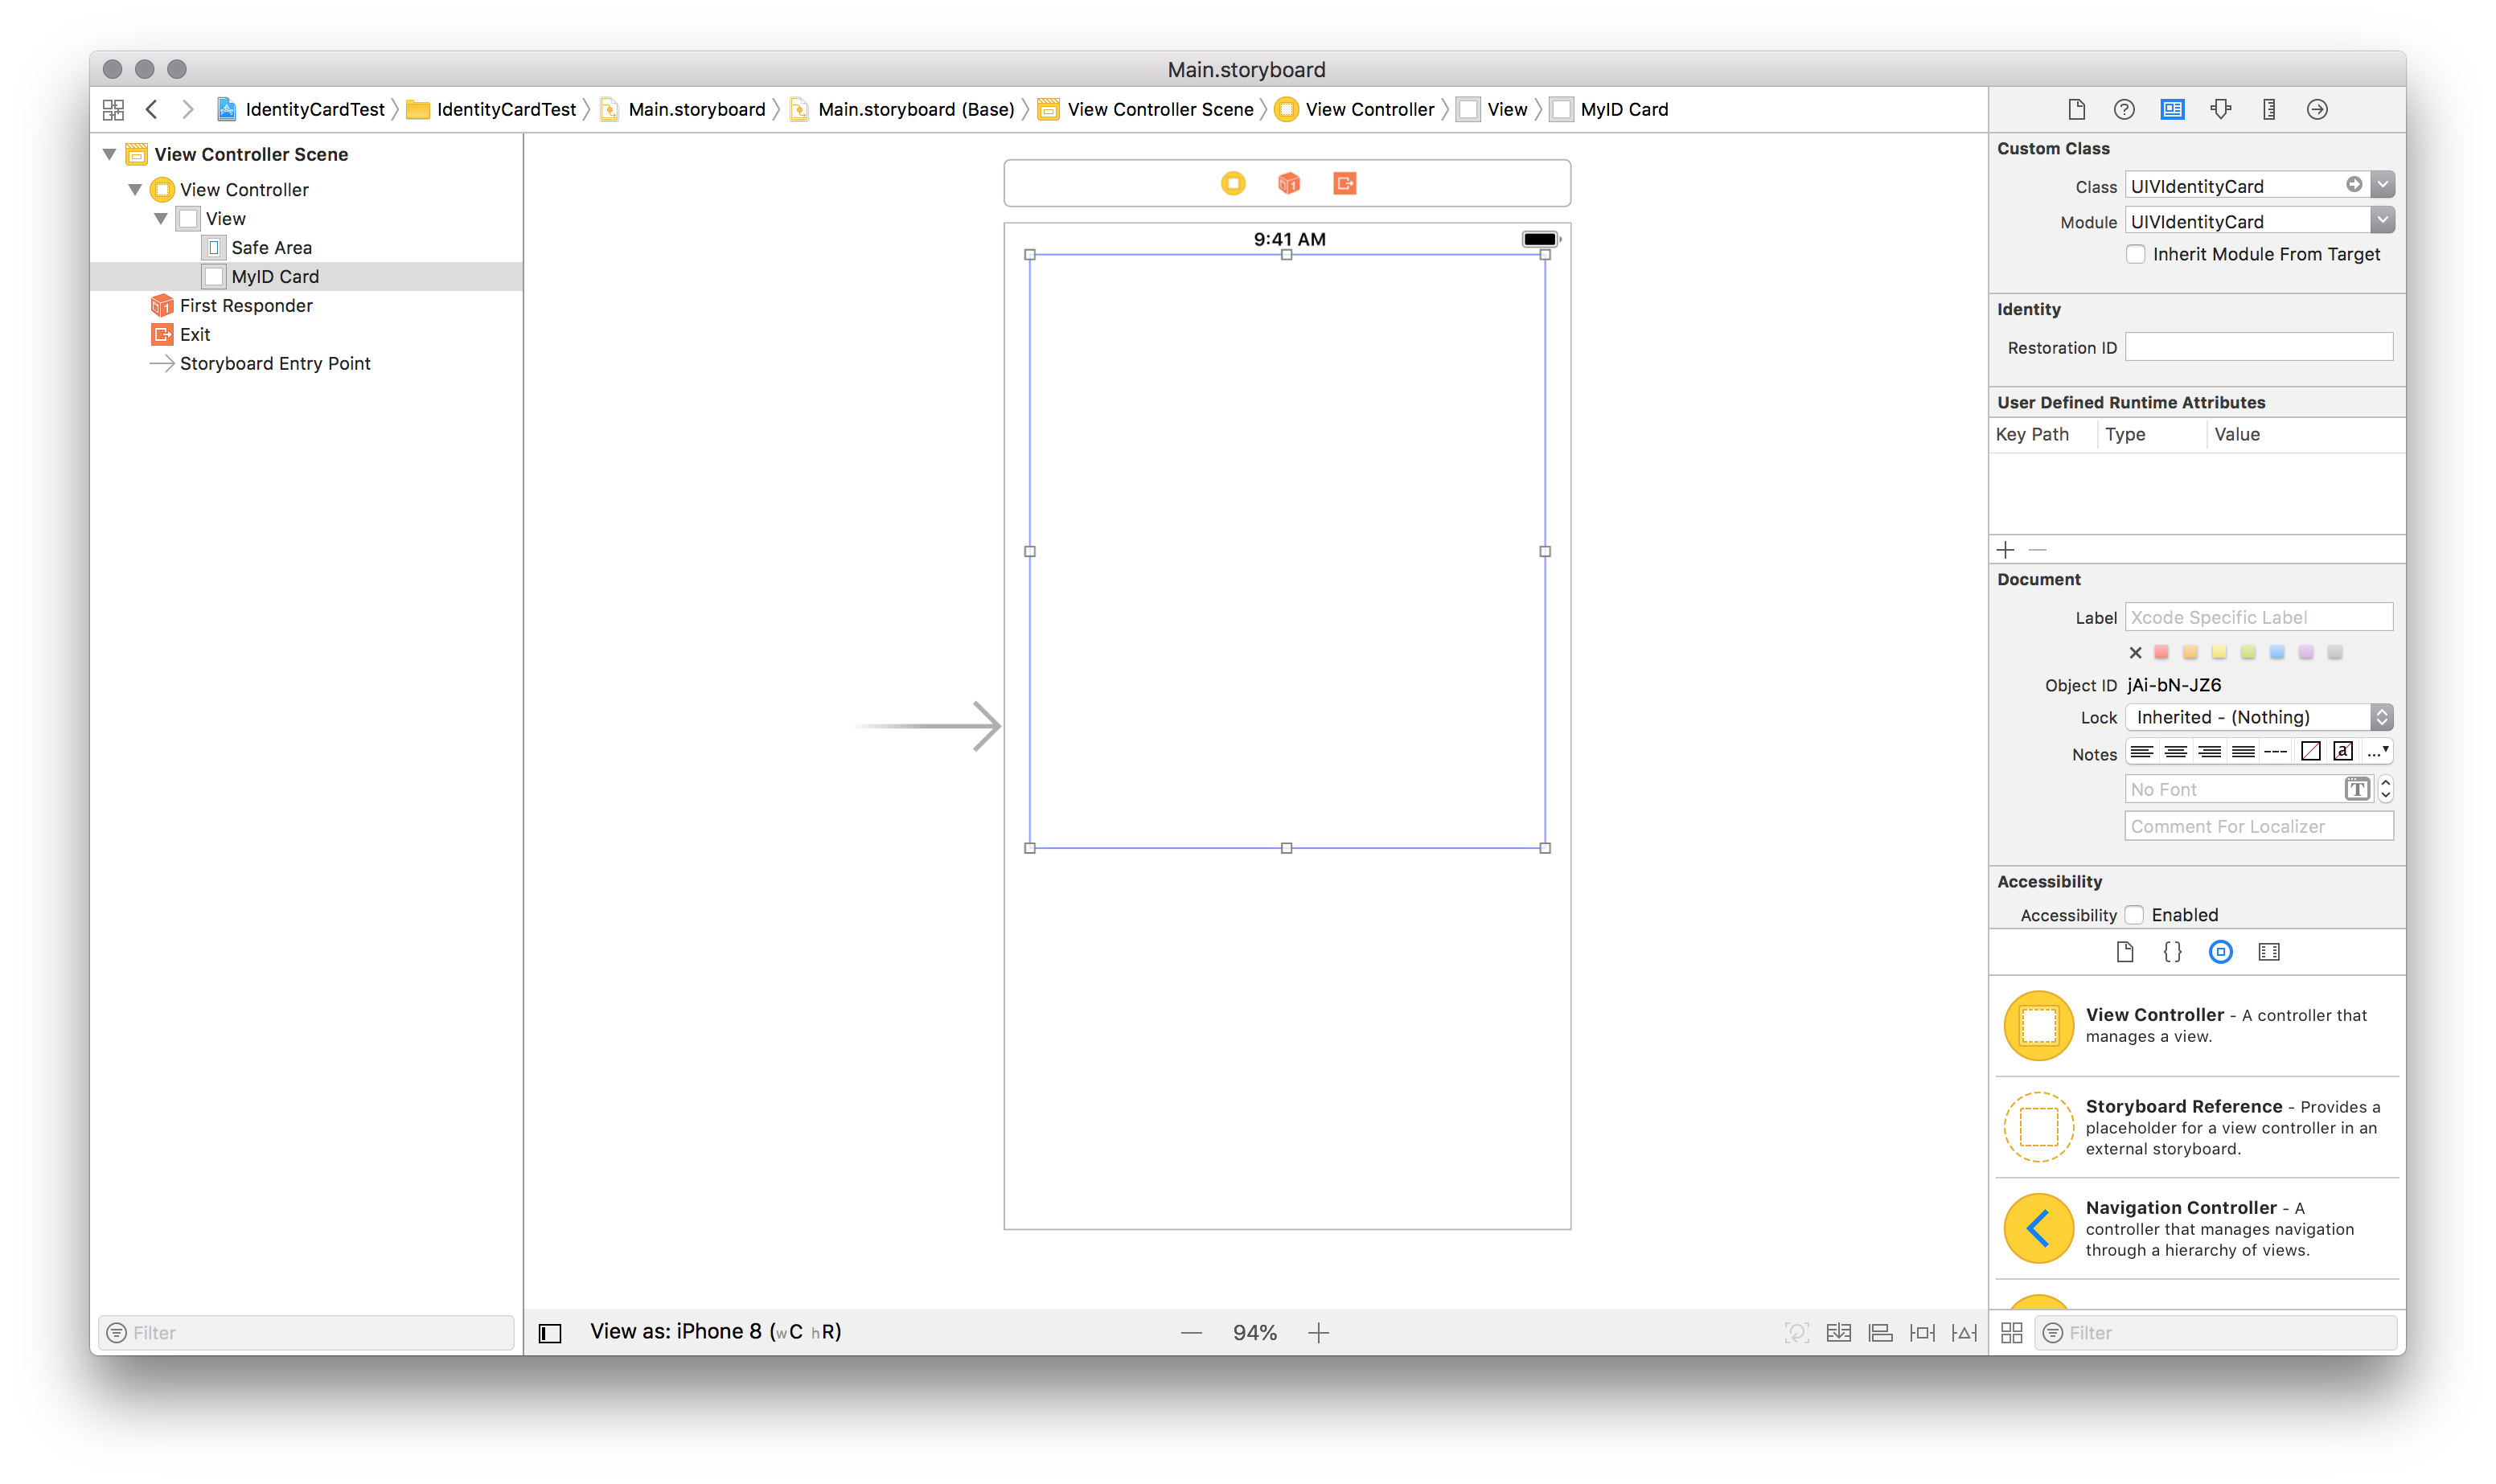
  7. Create an IBOutlet for this custom view.
  8. Switch to the ViewController.swift file. Import the UIVIdentityCard framework at the top of the file.
    Screen Shot 2018-09-07 at 12.41.13 PM
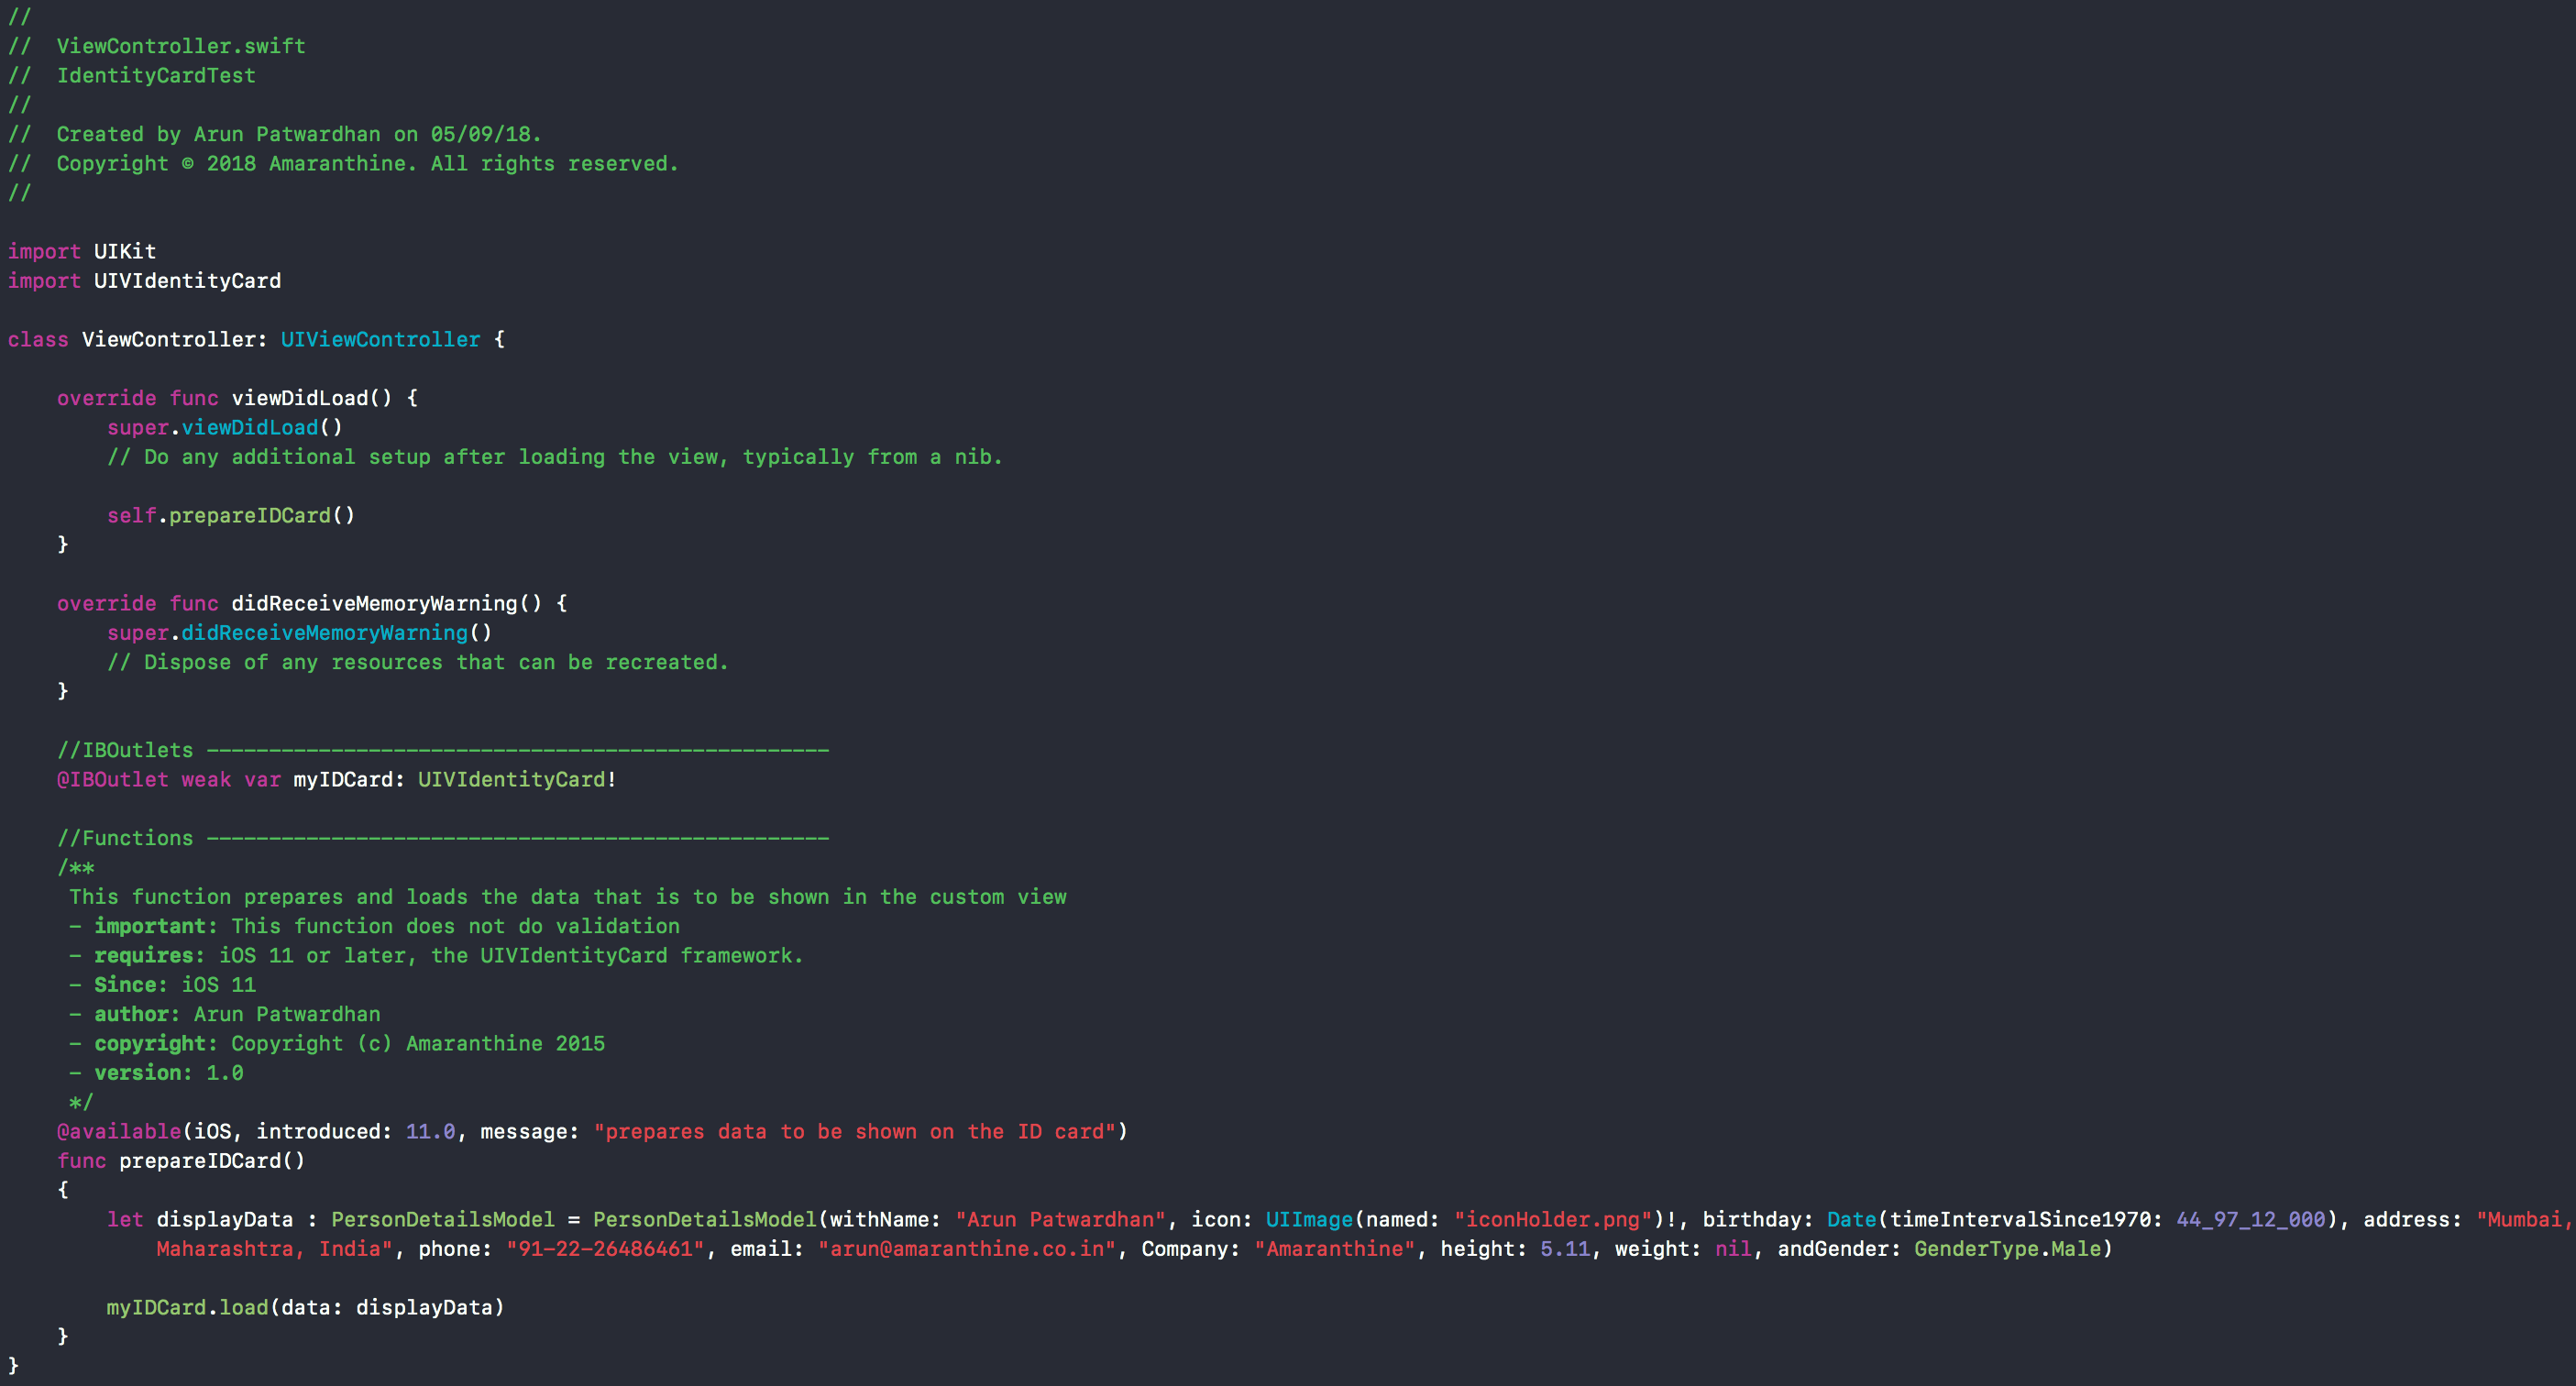
  9. Add the following code to the file. We will be creating test data and displaying it on the screen using the Custom view we just designed.
    //Functions --------------------------------------------------
    /**
        This function prepares and loads the data that is to be shown in the custom view
    
    
        - important: This function does not do validation
        - requires: iOS 11 or later, the UIVIdentityCard framework.
        - Since: iOS 11
        - author: Arun Patwardhan
        - copyright: Copyright (c) Amaranthine 2015
        - version: 1.0
    */
    @available(iOS, introduced: 11.0, message: "prepares data to be shown on the ID card")
    func prepareIDCard()
    {
         let displayData : PersonDetailsModel = PersonDetailsModel(withName: "Arun Patwardhan", icon: UIImage(named: "iconHolder.png")!, birthday: Date(timeIntervalSince1970: 44_97_12_000), address: "Mumbai, Maharashtra, India", phone: "91-22-26486461", email: "arun@amaranthine.co.in", Company: "Amaranthine", height: 5.11, weight: nil, andGender: GenderType.Male)
    
         myIDCard.load(data: displayData)
    }
  10. Your completed ViewController.swift should look like this.
    Screen Shot 2018-09-07 at 12.44.32 PM
  11. Run the project. See if the view loads the way we wish.

Link to Sample Code

https://github.com/AmaranthineTech/ReusuableUIFramework

Video

Creating Reusable UI
Advertisement

Using Swift Package Manager

About Swift Package Manager

The Swift Package Manager is the tool used to build Applications and Libraries. it streamlines the process of managing multiple Modules & Packages. Before we go ahead and learn to use Swift Package Manager we need to get familiar with some basic terminology.

Modules

Modules are used to specify a namespace and used to control access to that particular piece of code. Everything in Swift is organised as a module. An entire app can fit into a module or an app can be made using multiple modules. The fact that we can build modules using other modules means that reusing code becomes a lot easier. So, when we make an iOS App with Xcode and Swift. The entire app is considered a single module.

Targets

Targets are the end product that we want to make. So an app for iOS is a separate target. A library is a target. An app for macOS is a separate target. You can have many targets. Some can be for testing purposes only.

Packages

Packages group the necessary source files together. A package can contain more than one target. Normally one would create a package for a family of products. For example: you want to make a photo editing app that runs on macOS & iOS. You would create one package for it. That package would have 2 targets: an iOS App & a macOS App.

Products

This is a categorisation of your packages. There are 2 types of products. Executables or Libraries. A library contains the module which can be reused elsewhere. Executables are application that run & may make use of other modules.

Dependencies

Dependencies are the modules or the pieces of code that are required to make the different targets within the package. These are normally provided as URLs.

End Products

*NOTE: Before you get started you must be familiar with Setting up Swift on Linux. If you haven’t done that then please go through the updated article: UPDATE: Swift on Linux. This also makes use of Swift Package Manager.

Example

So let us get started with an example. We are going to learn how to create:

  • a library package called ErrorTypes
  • a library package, called MathOperations, that uses the ErrorTypes library package
  • an executable package called Calc that makes use of the MathOperations package.

We will see how to create all three elements. Also I have uploaded the ErrorTypes & MathOperations packages to the http://www.github.com repository to demonstrate the use of dependencies. You can also create your own local git repositories if you wish.

To illustrate the folder hierarchy: I have created a folder called “Developer” in my Ubuntu linux home folder. Within that I have created a folder called “SPMDEMO“. All the paths that I will be using will be with reference to these folders. You should see a structure like this:

/home/admin/Developer/SPMDEMO/ErrorTypes
/home/admin/Developer/SPMDEMO/MathOperations
/home/admin/Developer/SPMDEMO/Calc

You are free to follow this exercise using your own folder locations. Just modify the paths accordingly.

swift package init
swift package init --type executable
swift build

If you need help with the commands run:

swift package --help
swift --help

Creating a Package

  1. First let us start off by creating the ErrorTypes package.
    mkdir ErrorTypes
  2. Navigate to the folder and create the package:
  3. cd ErrorTypes
    swift package init
    

    By default init will create a library package type.

  4. Navigate to the folder containing the source files:
    cd ./Sources/ErrorTypes/
  5. Open the ErrorTypes.swift file and write the following code
    public enum ErrorCodes : Error
    {
         case FileNotFound(String)
         case DivideByZero(String)
         case UnknownError(String)
    }
    
    public struct MathConstants
    {
         static let pi : Float = 3.14159
         static let e  : Float = 2.68791
    }
    

    Feel free to add some code of your own. The above is just an example.

  6. Run the command to build to make sure that there aren’t any issues. You shouldn’t have any as there are no dependencies of any kind. Its a simple straightforward piece of code.
    swift build
  7. If everything is fine check your code into a git repository. This can be local or on the web. Remember that we will need the URL to this repository.
  8. Navigate back to the SPMDEMO folder.
    cd ~/Developer/SPMDEMO/
  9. Create a folder called MathOperations.
    mkdir MathOperations
  10. Navigate to the newly created folder and run the command to create a library package.
    cd MathOperations
    swift package init
    
  11. Navigate to the sources folder:
    cd ./Sources/MathOperations/
  12. Open the MathOperations.swift file and write the following code.
    import ErrorTypes
    
    public struct MathOperations
    {
         public static func add(Number num1 : Int, with num2 : Int) -> Int
         {
              return num1 + num2
         }
    
         public static func mult(Number num1 : Int, with num2 : Int) -> Int
         {
              return num1 * num2
         }
    
         public static func div(Number num1 : Int, by num2 : Int) throws -> Int
         {
              guard num2 > 0
              else
              {
              throw ErrorCodes.DivideByZero("You are dividing by zero. The second argument is incorrect.")
              }
    
              return num1 / num2
         }
    
         public static func sub(_ num1 : Int, from num2 : Int) -> Int
         {
              return num2 - num1
         }
    }
    
  13. Before we build we need to modify the Packages.swift file to indicate there is a dependency.
    Notice that in the MathOperations.swift file we are importing a module called ErrorTypes. We just created it. But just because we created it doesn’t mean it will be added automatically. We need to pull that module into our own

    Also notice that I have provided access specifiers “public” everywhere. This ensures that the code written in one module is accessible in the other.

    Navigate to the MathOperations parent folder.

    cd ~/Developer/SPMDEMO/MathOperations/
  14. Open the Packages.swift file and make the changes as shown below:
    // swift-tools-version:4.0
    // The swift-tools-version declares the minimum version of Swift required to build this package.
    
    import PackageDescription
    
    let package = Package(name: "MathOperations",
         products: [
              // Products define the executables and libraries produced by a package, and make them visible to other packages.
              .library(name: "MathOperations", targets: ["MathOperations"]),
         ],
    
         dependencies: [
              // Dependencies declare other packages that this package depends on.
              .package(url:"https://github.com/AmaranthineTech/ErrorTypes.git", from:"1.0.0"),
         ],
    
         targets: [
              // Targets are the basic building blocks of a package. A target can define a module or a test suite.
              // Targets can depend on other targets in this package, and on products in packages which this package depends on.
              .target(name: "MathOperations", dependencies: ["ErrorTypes"]),
              .testTarget(name: "MathOperationsTests", dependencies:   ["MathOperations"]),]
    )
    
  15. Once these changes are made save the file and run the command
    swift build

    If you typed everything correctly then you should see the source code for the ErrorTypes module being pulled in and the build being successful.Here are some common mistakes:
    – Forgetting to write the import ErrorTypes statement
    – Error in the URL
    – The from tag not matching the tag in the repository
    – Access specifiers are incorrect or missing
    – Not mentioning the dependencies in the target

  16. Just like with the ErrorTypes module create a git repository for the MathOperations module.
  17. Now let us make the Calc executable that will use the MathOperations library. First navigate back to the SPMDEMO folder and create a folder called Calc.
    cd ~/Developer/SPMDEMO/
    mkdir Calc
    
  18. This time we are going to create an executable package. Run the command:
    swift package init --type executable

    This also creates a similar folder structure as in the case of the library.

  19. Navigate to the folder containing the main.swift file.
    cd ./Sources/Calc/
  20. Modify the main.swift file as shown below:
    import MathOperations
    
    //testing addition
    var result : Int = MathOperations.add(Number: 33, with: 29)
    print("Result of adding 33 with 29 is: \(result)")
    
    //testing multiplication
    result = MathOperations.mult(Number: 33, with: 29)
    print("Result of multiplying 33 with 29 is: \(result)")
    
    //testing division
    do
    {
         result = try MathOperations.div(Number: 33, by: 0)
         print("Result of dividing 33 by 29 is: \(result)")
    }
    catch let error
    {
         print("ERROR: \(error)")
    }
    
    //testing subtraction
    result = MathOperations.sub(3, from: 29)print("Result of subtracting 3 from 29 is: \(result)")
    
  21. Navigate back to the main Calc folder.
    cd ~/Developer/SPMDEMO/Calc/
  22. Modify the Packages.swift file as shown below:
    // swift-tools-version:4.0
    // The swift-tools-version declares the minimum version of Swift required to build this package.
    
    import PackageDescription
    
    let package = Package(name: "Calc",
    dependencies: [
         // Dependencies declare other packages that this package depends on.
         .package(url: "https://github.com/AmaranthineTech/MathOperations.git", from: "1.0.1"),
    ],
    targets: [
         // Targets are the basic building blocks of a package. A target can define a module or a test suite.
         // Targets can depend on other targets in this package, and on products in packages which this package depends on.
         .target(name: "Calc", dependencies: ["MathOperations"]),
    ]
    )
    
  23. Save the file and run the build command:
    swift build
  24. Like before you should see both the MathOperationsErrorType module being pulled in. We are ready to run the executable. Navigate to the debug folder which contains the executable. Make sure you are in the main Calc folder when you run this command.
    cd ./build/debug/
  25. You should see an executable file called Calc. Run it.
    ./Calc
  26. If everything went okay then you should see the output on the console.

As you can see it is pretty straightforward to develop Applications written in Swift on Linux.

Adding System Modules

In the previous example we saw how to import our own custom made modules. However, there are some modules provided by the system which offers functionality we may wish to use. For example if we wanted to use the random number generator in our application we would need to use the random() method. This is in the glib module.

  1. Quickly create a package called SystemLibs. This is an executable.
  2. Write the following code in the main.swift.
    #if os(Linux)
    import Glibc
    #else
    import Darwin.C
    #endif
    extension Int
    {
         func toString() -> String
         {
              return "\(self)"
         }
    }
    
    var luckyNumber : Int = Int(random())
    
    var luckyNumberStr : String = luckyNumber.toString()
    
    print("The lucky number is \(luckyNumberStr)")
    
  3. Build the code and run the executable.

Adding system modules is direct and simple. The glibc module contains aspects of the standard library. The condition check is to make sure that we are importing the correct module based on the system that we are developing the application on.

Handling Sub-dependencies

As we saw in the earlier example, sub dependencies are handled automatically. So when our Calc application marked the MathOperations module as a dependency it was pulled during the build. However, the MathOperations module itself marked ErrorTypes module as a dependency. We did not have to modify the Packages.swift file belonging to Calc to indicate that ErrorTypes module also needs to be pulled. This was handled automatically by Swift Package Manager.

Conclusion

In this article we have seen:

  • How to create a library package
  • How to create a library package that depends on another library package
  • How to create an executable that depends on a library package
  • How to import the system Glibc module into our executables.

The Swift Package Manager simplifies many aspects of the development process for us. Many of the things we have discussed also work on macOS. Going forward reusing code and planning for the same should be done keeping Swift Package Manager in mind.