This article lists out different macOS terminal commands you might encounter. You can use this list as a starting point in your search for a command to perform a specific task. This list is by no means exhaustive.
Many of the commands have also been used in the article I wrote some time back. You can have a look at the scripts to see some of the commands being used.
To get more information about the commands simply run the following command from within Terminal Application. For example, to view the manual page for tmutil simply type:
man tmutil
For fdesetup
man fdesetup
Here is a nice command to quickly open the man page in the Preview App.
man -t tmutil | open -f -a /System/Applications/Preview.app
Note
This is not a complete list of commands
Some commands are available through the macOS Recovery Volume only
Some commands required other resources such as the OS installer
Some commands are available with certain versions of the OS only
Please read the documentation for more details. Use the commands with care. Improper use of commands may result in loss of data or damage to the computer.
Commands
Installation
Command
Description
startosinstall
Used to start the installation of macOS from the command line.
createinstallmedia
Used to create an external install disk.
Security
Command
Description
fdesetup
Manage FileVault configuration.
security
Manage keychain and security settings
spctl
Manage security assessment policy
csrutil
Configure System Integrity Protection (SIP) settings
resetpassword
Password reset utility located in the Recovery Partition
File System
Command
Description
hdiutil
Used to manipulate and manage disk images.
diskutil
Used to modify, verify, & repair local disks.
Data Management
Command
Description
tmutil
Used to configure Time Machine settings in macOS
screencapture
Takes screenshot of the specified screen and saves the image at the specified location.
mdls
Used to get metadata attributes for a given file
mdutil
Used to manage metadata stores that are used by Spotlight
Settings
Command
Description
defaults
Used to modify plist files. Typically used to update preference files.
ioreg
Used to view the I/O kit registry
system_profiler
Used to generate system hardware & software reports.
plutil
Used to check syntax of property lists or covert property lists from one format to another
AssetCacheManagerUtil
Used to configure content caching settings.
open
Used to open documents from within the command line.
networksetup
Perform network configuration.
systemsetup
Used to configure machine settings in System Preferences.
launchctl
Used to manage and inspect daemons, agents, & XPC Services
Applications
Command
Description
codesign
Used to create, check, display code signatures.
pkgbuild
Used to build installer packages
productbuild
Builds a product archive
installer
System software and package installer tool
User Account Management
Command
Description
dscl
This is a command line Directory service utility that allows us to create, read, and manage Directory Service data.
sysadminctl
User account management
passwd
Change user password
login
Used to login to another user account.
Server & Device Management
Command
Description
profiles
Used to install, remove, list, or manage Configuration profiles.
serveradmin
Used to manage the services in macOS
mdmclient
Located in /usr/libexec/mdmclient it is used to manage interactions with the MDM.
asr
Apple Software restore: Used to copy volumes.
Scripting
Command
Description
osascript
Used to execute the given AppleScript
Share any commands you may know of in the comments window.
Disclaimer
The information Is Provided “As Is”, Without Warranty Of Any Kind, Express Or Implied, Including But Not Limited To The Warranties Of Merchantability, Fitness For A Particular Purpose And Noninfringement. In No Event Shall The Authors Or Copyright Holders Be Liable For Any Claim, Damages Or Other Liability, Whether In An Action Of Contract, Tort Or Otherwise, Arising From, Out Of Or In Connection With The information provided Or The Use Or Other Dealings In The information.
One of the advantages with scripts is the fact that you can easily automate many tasks. Here is an article that walks you through that process.
If you come across a situation where you want to perform a set of tasks on multiple computers then scripts come in very handy.
I will be providing the Shell Script version of the task. Feel free to make changes to the scripts as required. I will try to provide an AppleScript version of the tasks a little later.
This is not the only way to implement the scripts. There may be multiple approaches towards achieving the same result. You will have to explore and examine the correct approach.
This is not a comprehensive list. The scripts should give you some ideas and act as a useful reference when you are creating your own scripts.
I have tested these scripts on macOS Catalina 10.15
The Software Is Provided “As Is”, Without Warranty Of Any Kind, Express Or Implied, Including But Not Limited To The Warranties Of Merchantability, Fitness For A Particular Purpose And Noninfringement. In No Event Shall The Authors Or Copyright Holders Be Liable For Any Claim, Damages Or Other Liability, Whether In An Action Of Contract, Tort Or Otherwise, Arising From, Out Of Or In Connection With The Software Or The Use Or Other Dealings In The Software.
WARNING
Please try these scripts on a test computer. Some of the scripts do make changes to the system. Always test before using these scripts.
Disk images are a means of archiving data. They are created using a tool called Disk Utility which is a File System Management Utility of macOS. Disk Images follow the extension ‘.dmg‘ and are only compatible with macOS.
Disk Images are a popular way of distributing applications for macOS. They provide the capability of compressing large files and make delivery over the internet very easy.
In this article we are going to look at how we can create disk images for application distribution.
Creating the DMG Folder for distribution
Create a Background image. This can have any design. It’s a good idea to have arrows or other visual aids to assist others during installation.
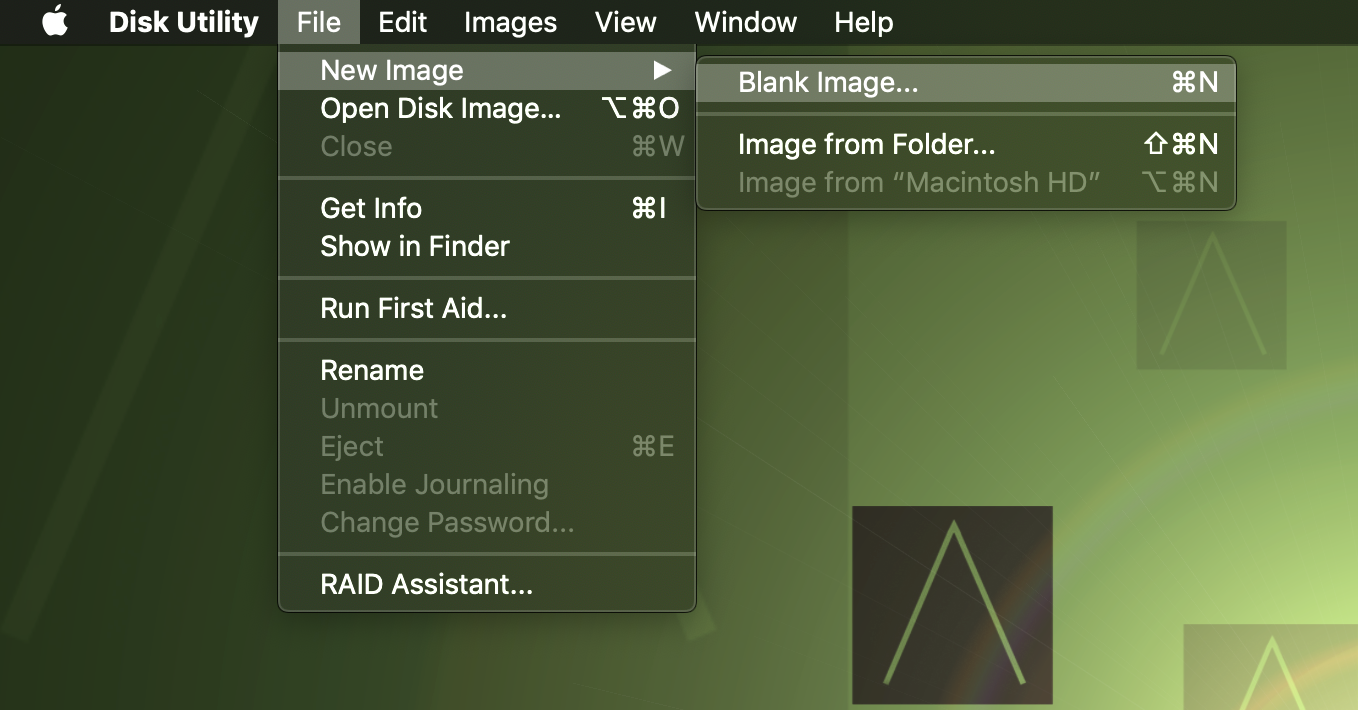
Create a new Disk Image. Open Disk Utility.
Click on File > New Image > Blank Image
Leave the default settings as is. Choose the size that you desire.
Mount the Disk Image.
Create a folder called background in the mounted volume.
Save the background image in the folder we just created.
Now we will hide the background folder. Switch to terminal and run the following command.
cd /Volume/InstallDMG/
mv background .background
Here we are simply renaming the background folder with a ‘.’ before it. This hides the folder from the GUI.
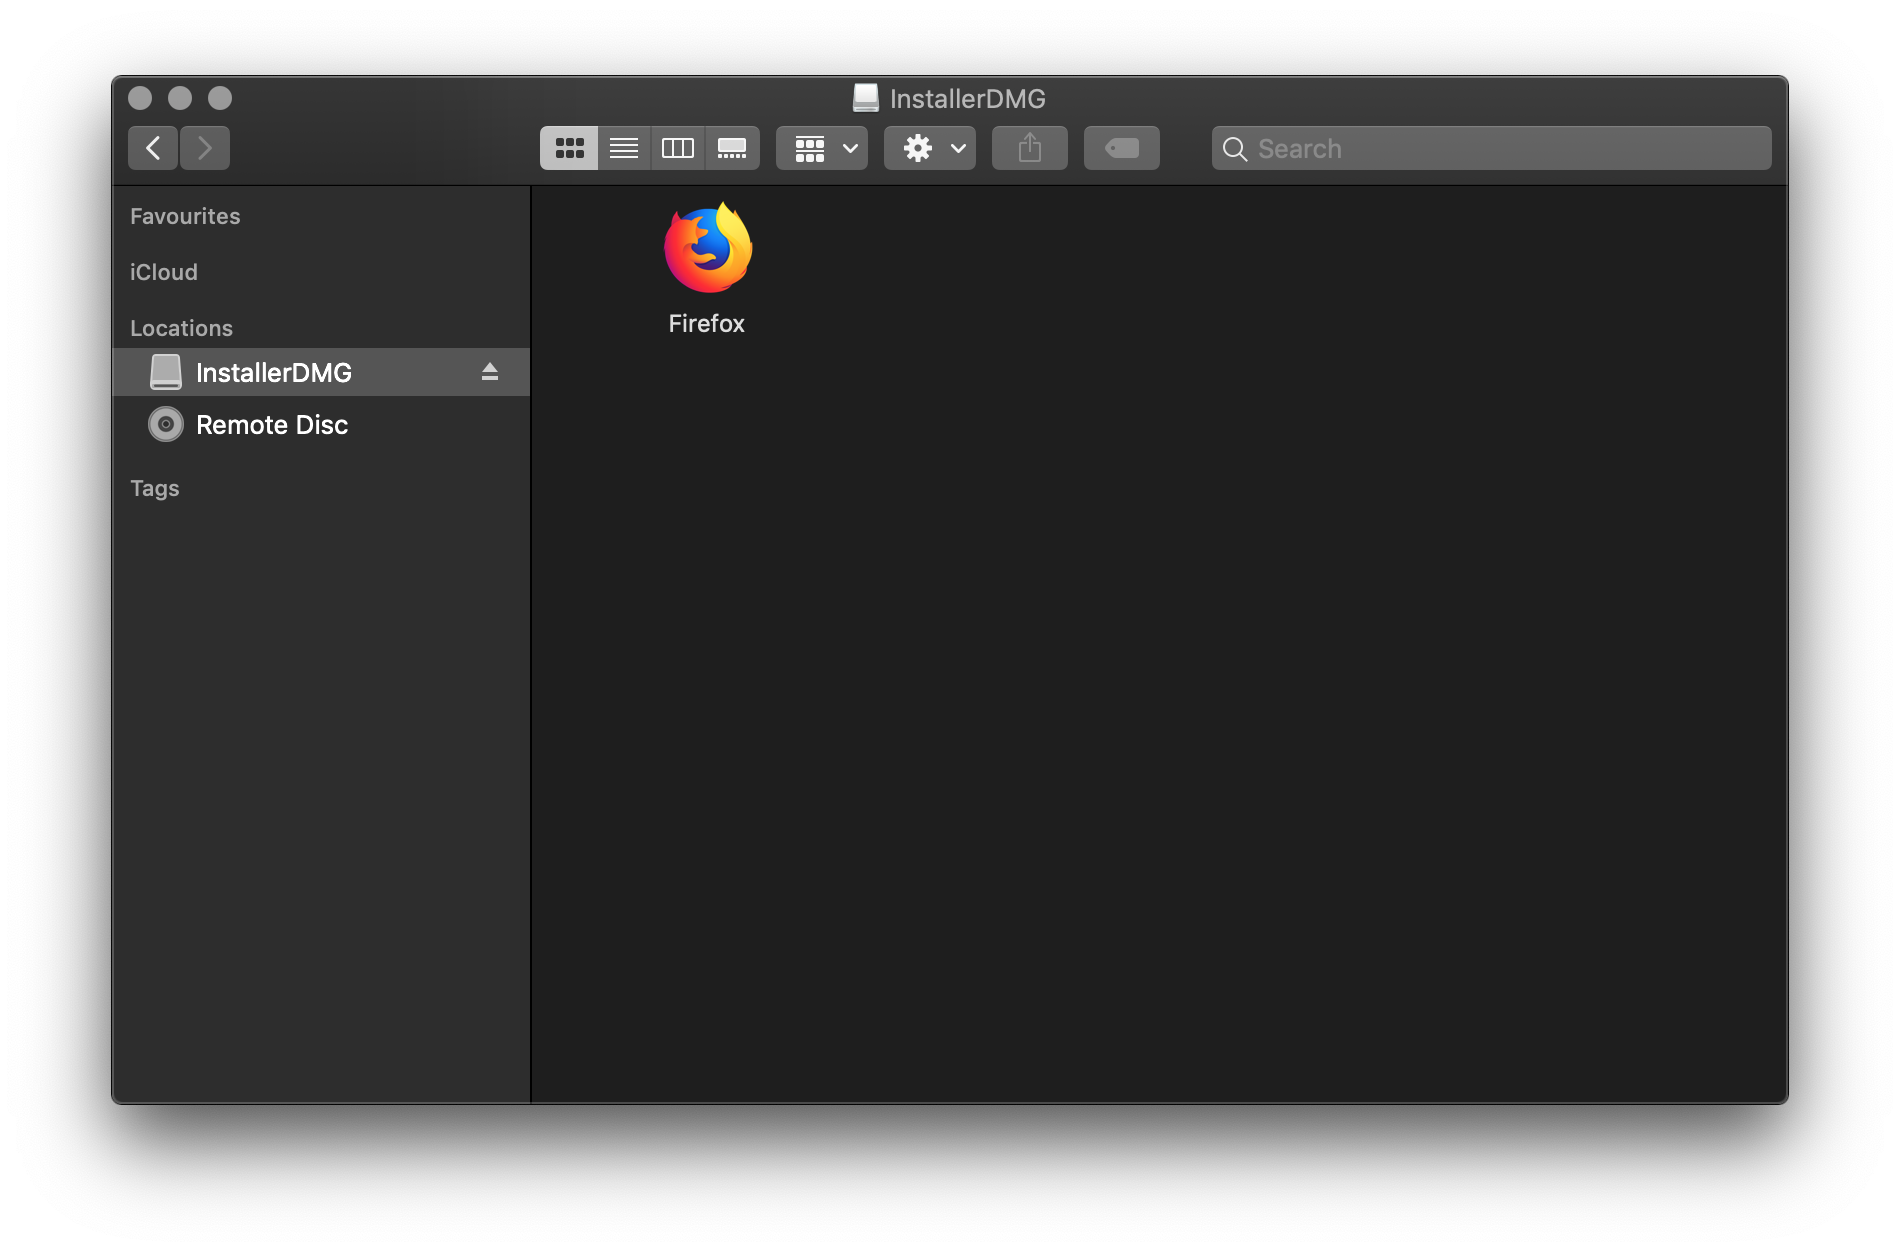
Now we will prepare the payload. This can be any file or folder we wish to install. For the sake of this demo I will be choosing Mozilla FireFox. In reality you would be distributing your own application.
Copy the FireFox app into the mounted volume.
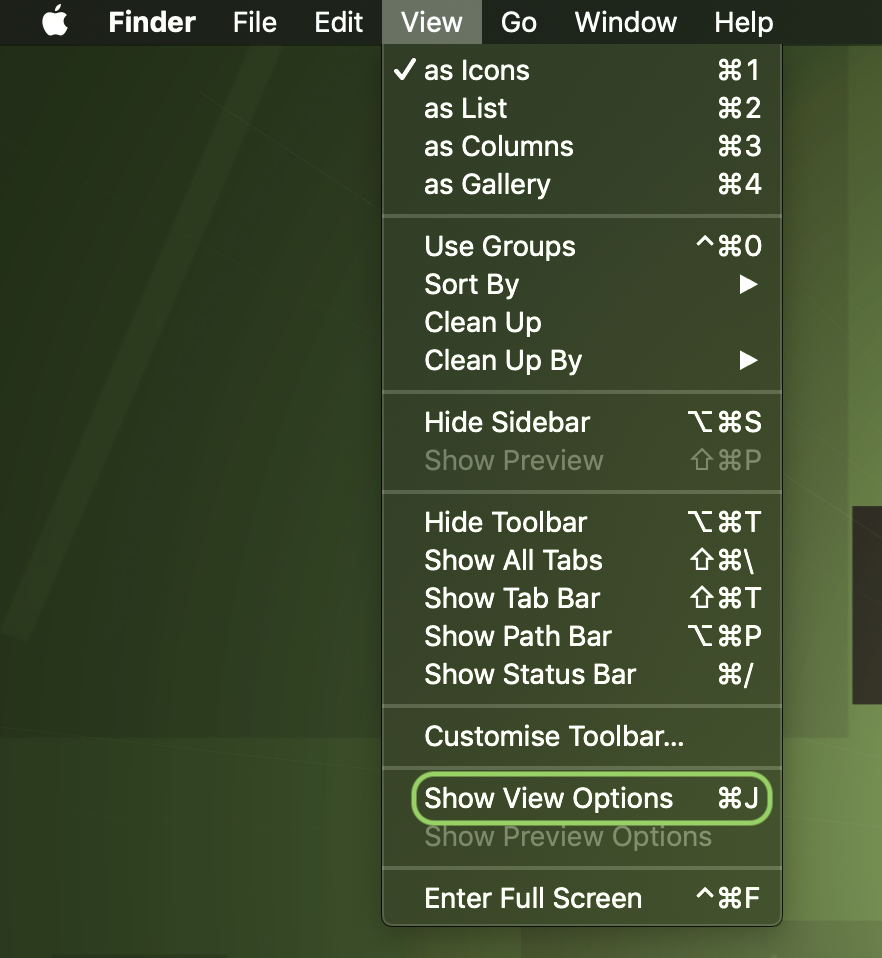
Open “Show View Options“.
Restrict the mounted volume to icon view only. Feel free to customise the other settings as you wish. This includes icon size.
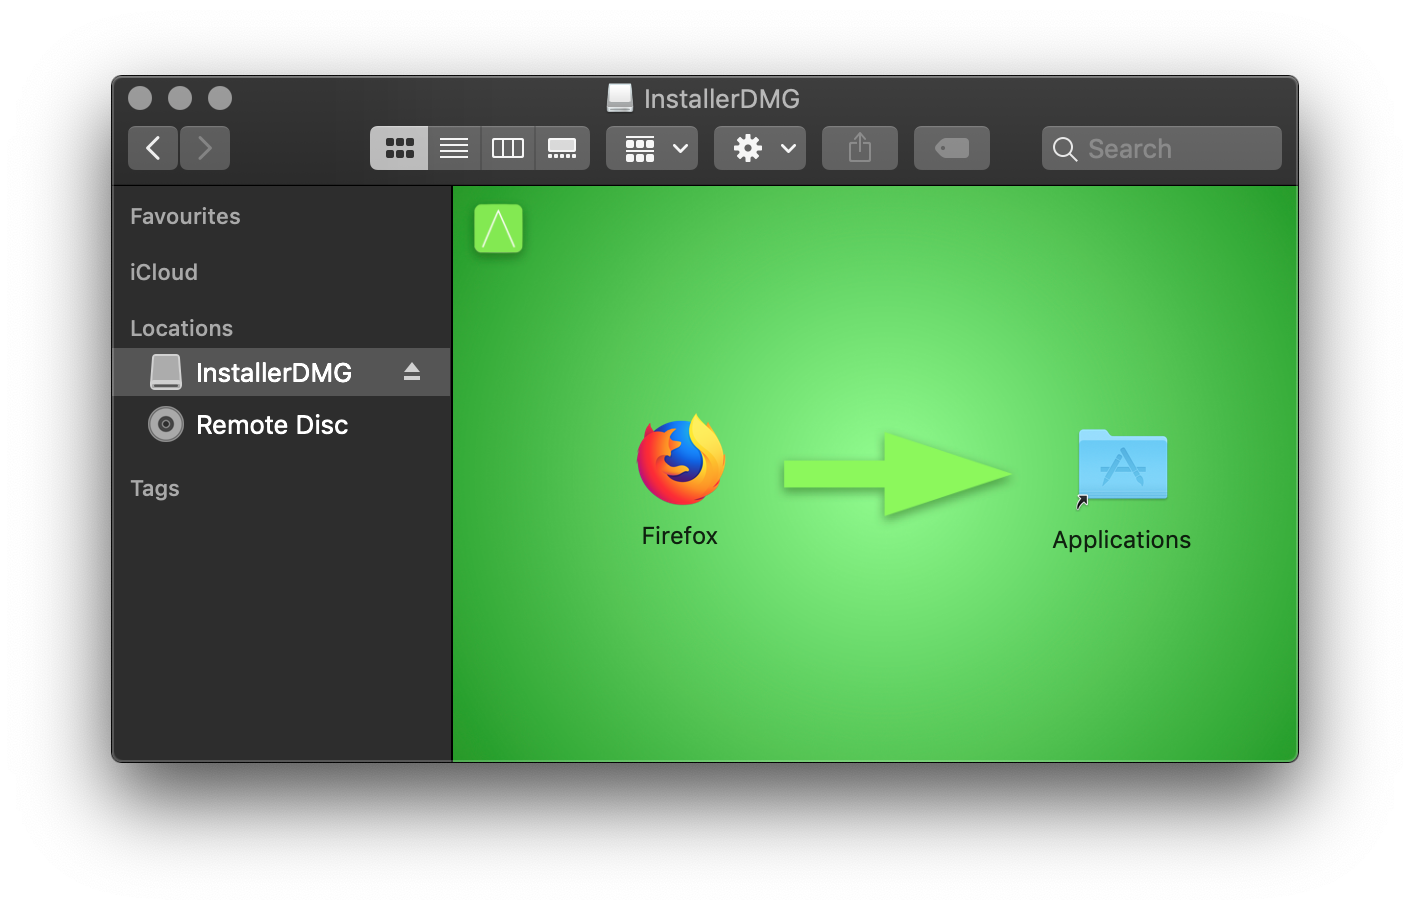
Drag and arrange the icons in your mounted window to match the background.
Eject the disk image.
Make a duplicate copy of the image file. This can act as a reference for future images you wish to create.
Now we will convert the disk image into a read only compressed disk image. This will be the one that we will use for distribution. Open Disk Utility.
Click on Images > Convert
Select the InstallerDMG.dmg from Desktop or wherever you had saved it.
Give it a new name and convert it to compressed format.
That’s it. You now have your own drag drop window ready for distribution.
In this article we are going to look at how we can use the built in Application: QuickTime to record a screen or a movie. In fact, the videos that you are about to see in the article below were created using QuickTime.
A good reason to record the activity on the screen would be to create a visual step by step guide which can be distributed to employees in the organisation. For example, you can create a video to show employees how they can sign into their company’s email account and access it from their iPhone or Mac.
Recording your Mac’s screen
Follow the steps given below to record your Mac’s screen:
Open QuickTime Player
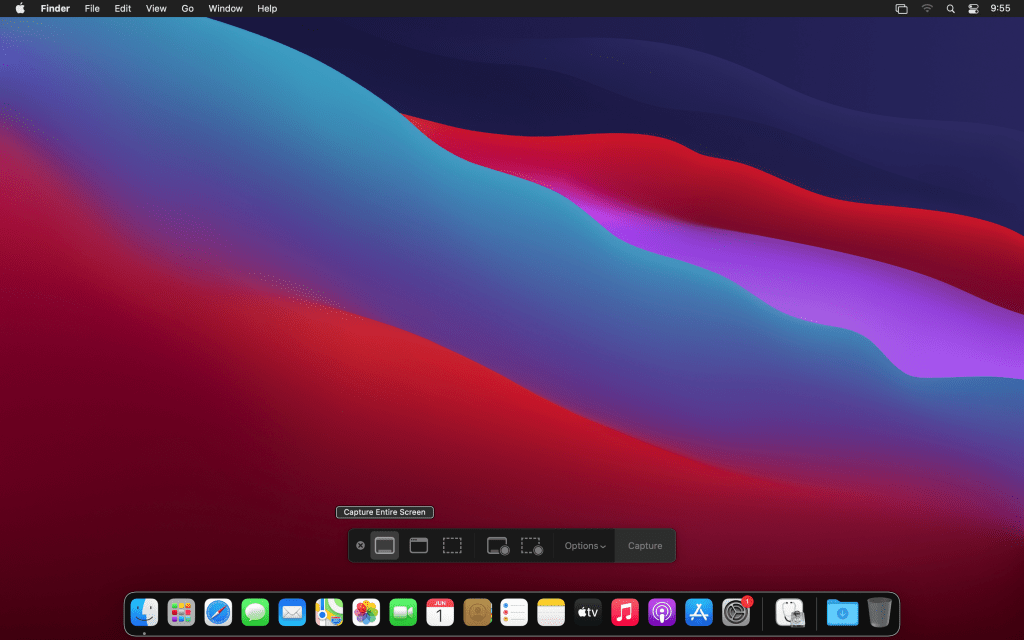
Click on File > New Screen Recording
You should see the window popping up.
From the drop down next to the Record button select the audio input & whether mouse clicks should be shown.
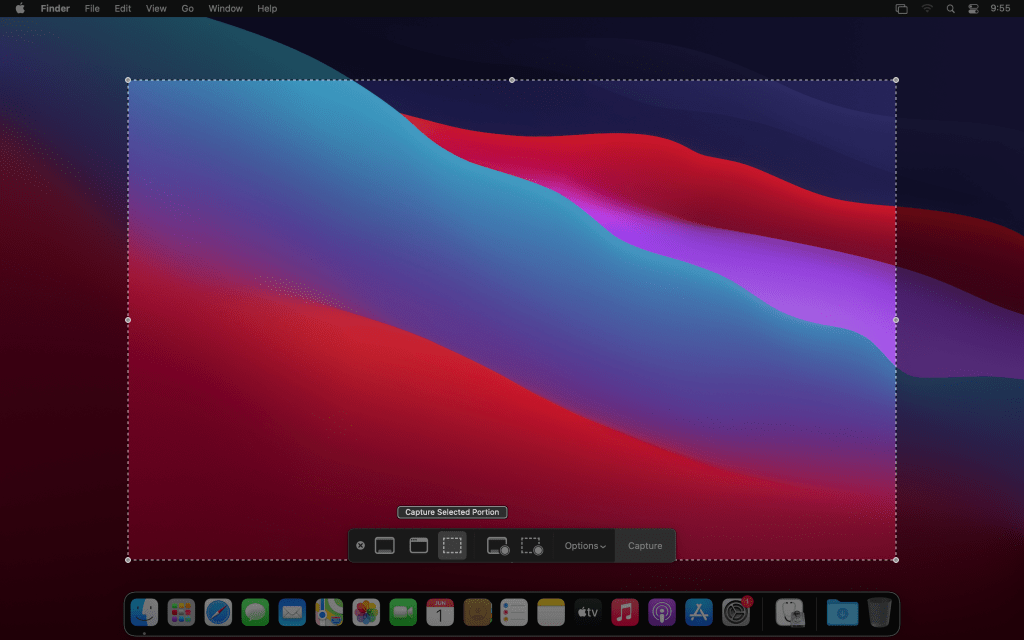
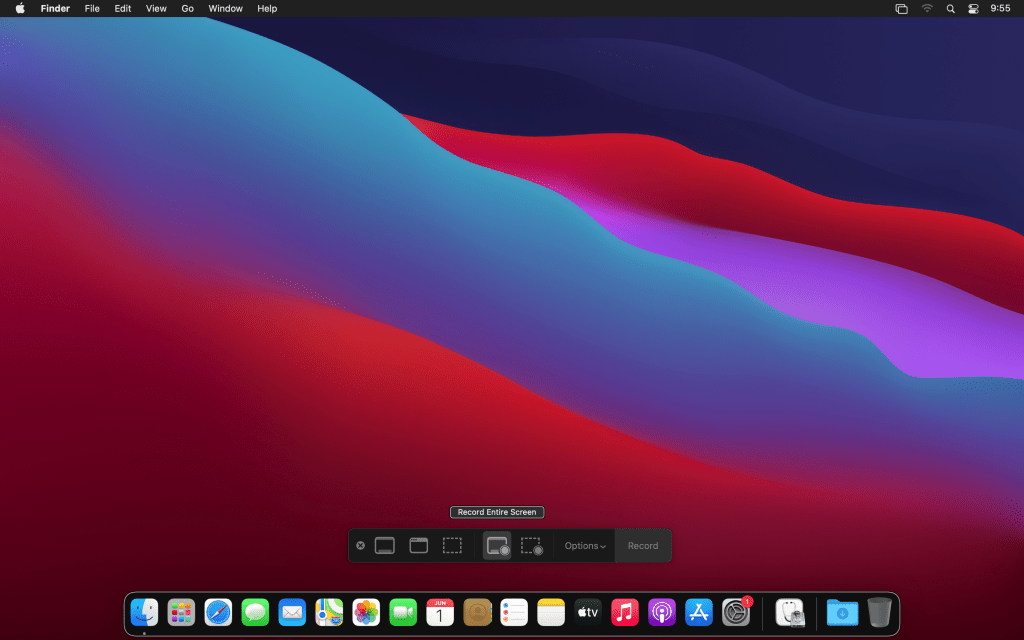
Click on the Record Button. You should see a dialog asking you whether you want to record a small area or a full screen.
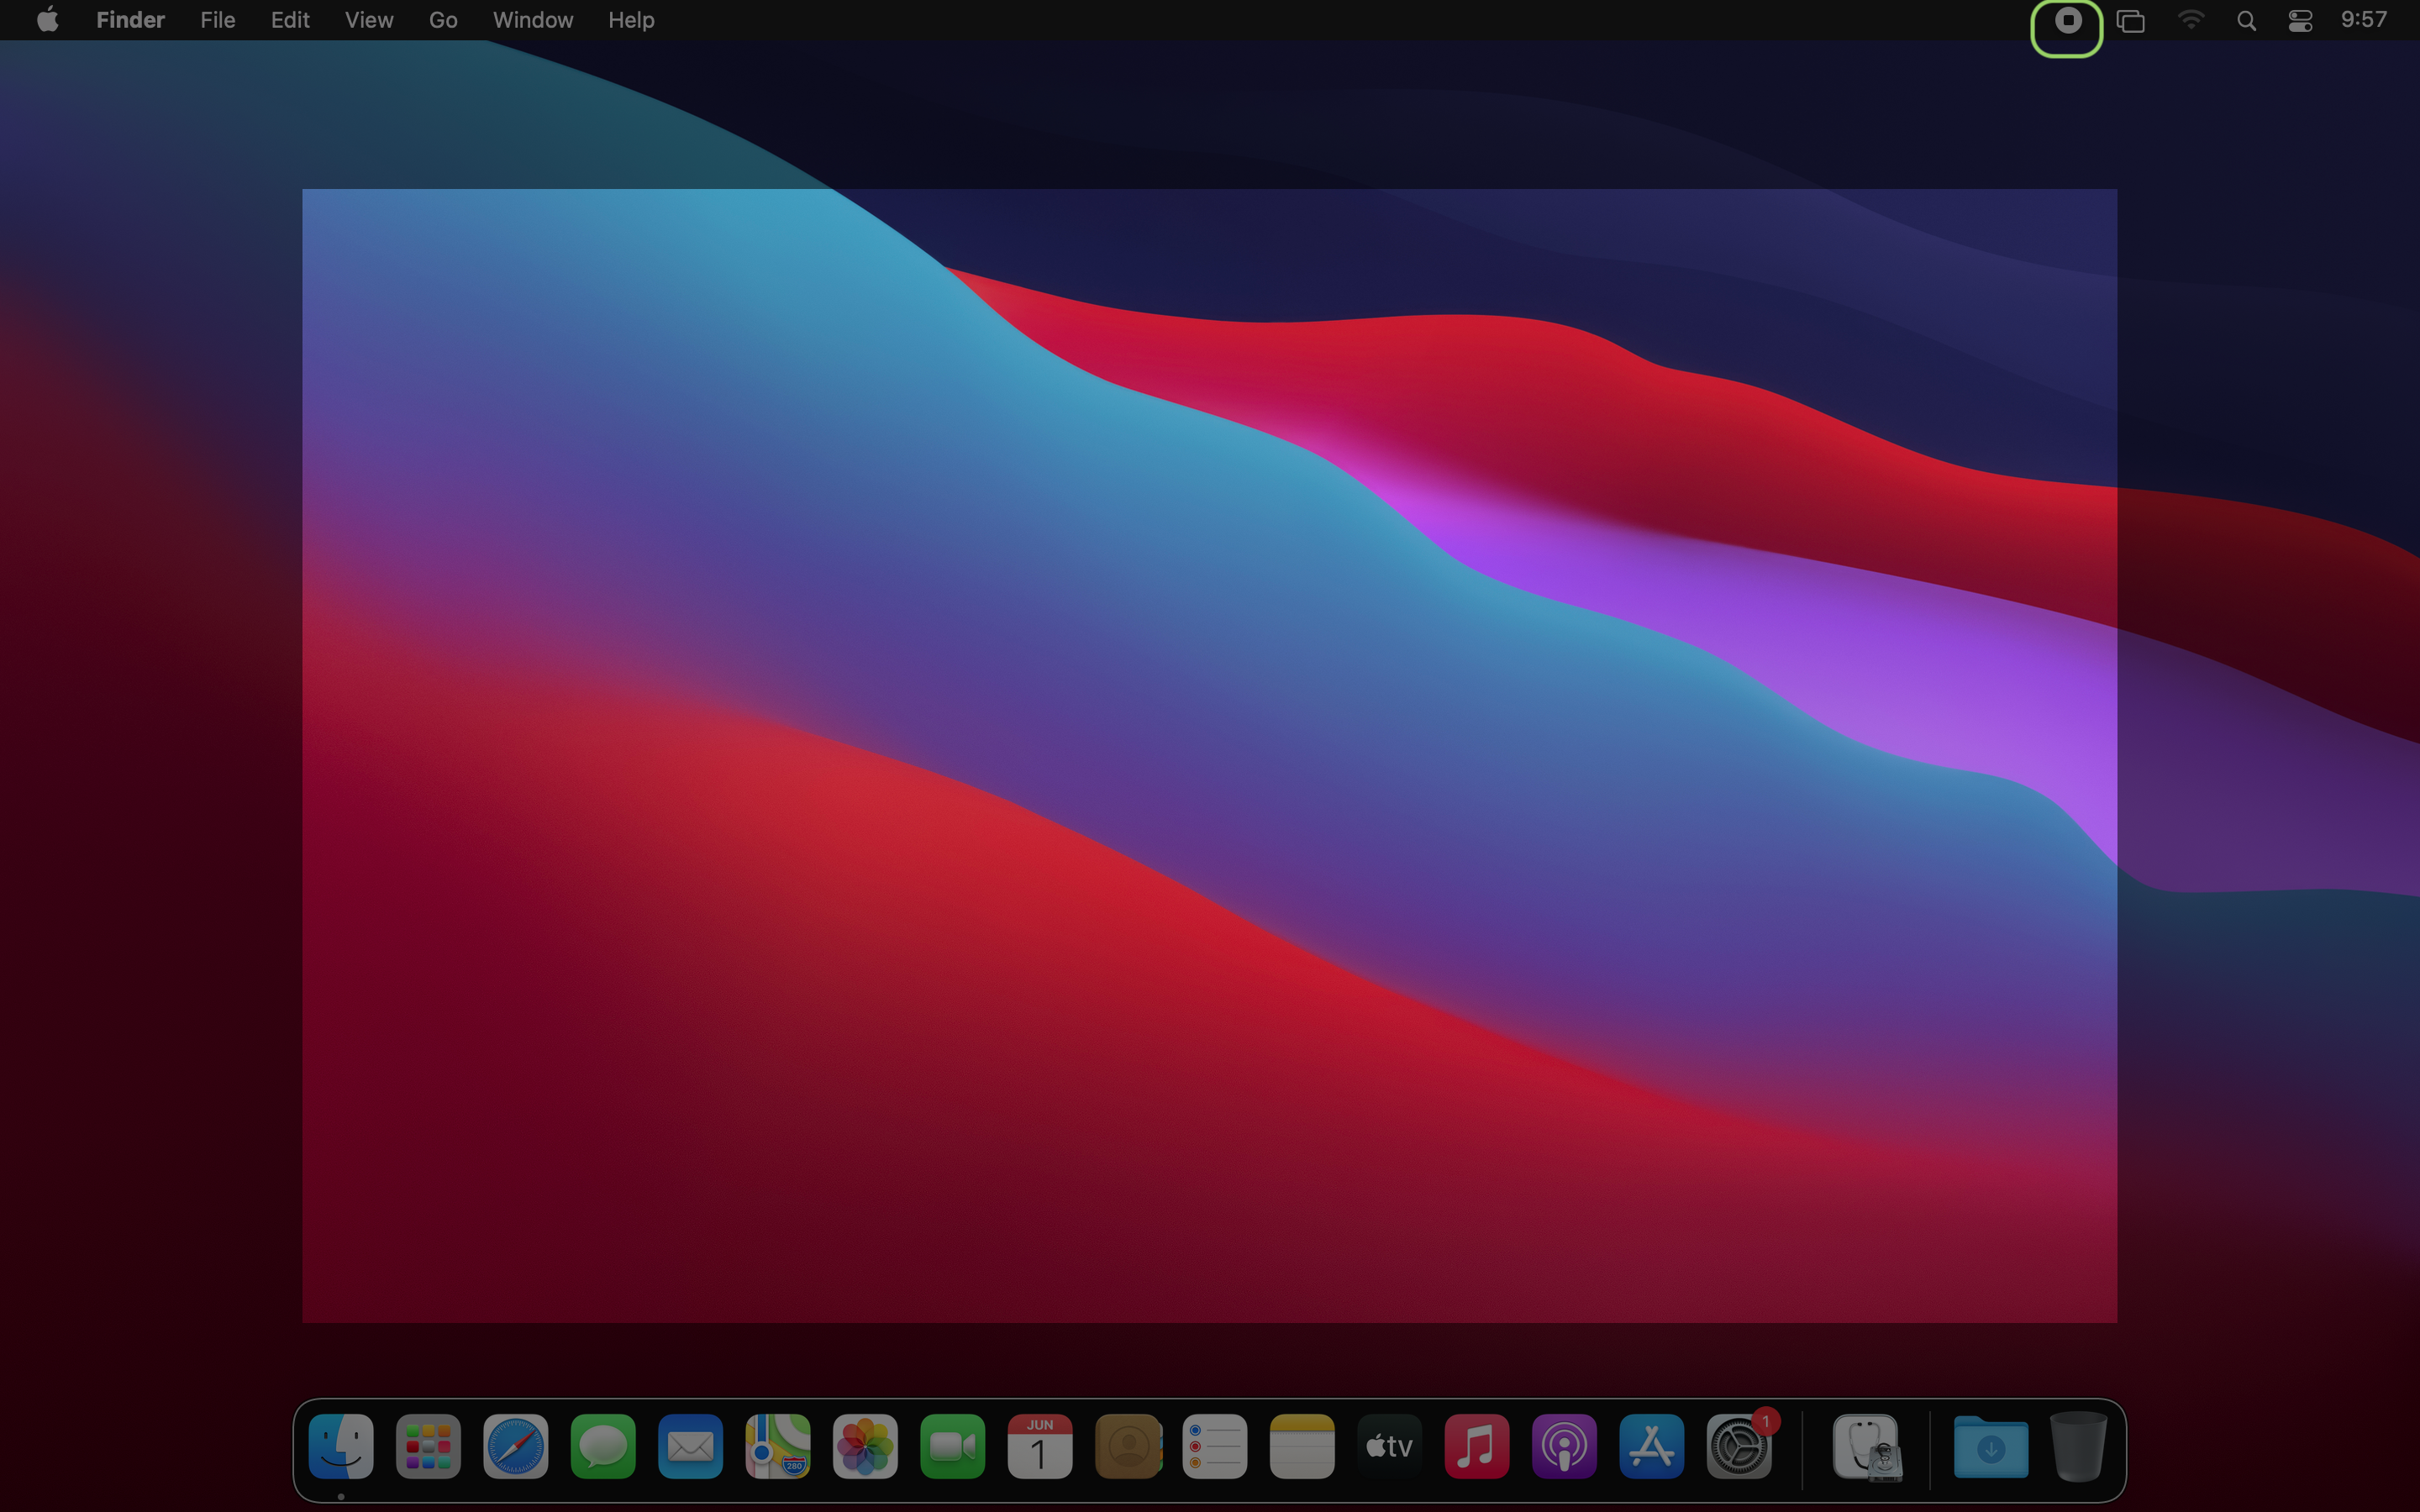
The recording starts once the stop button in the menu bar becomes dark.
Click on the stop button to stop the recording.
Save the file that was created.
Recording your iPhone/iPad Screen
(Mirroring your iPhone Screen on the Projector)
The process of recording the iPhone/iPad screen is quite similar to recording your computer’s screen. The key thing to remember is to connect your iPhone/iPad to the Mac with the lightning cable.
Follow the steps given below to record your iPhone/iPad screen:
Open QuickTime Player
Click on File > New Movie Recording
You should see the window popping up.
From the drop down next to the Record button select the audio input & whether mouse clicks should be shown. The difference now is the fact that you get an extra option to choose the source.
Recording a Movie
Follow the steps given below to record a Movie on your Mac:
Open QuickTime Player
Click on File > New Movie Recording
You should see the window popping up.
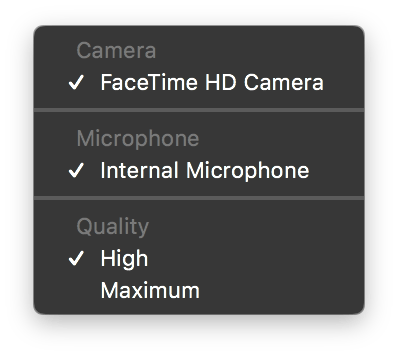
From the drop down next to the Record button select the audio input. You can also select your camera source from here.
Click record to start recording & click on the stop button to stop recording.
Recording Audio
Follow the steps given below to record an Audio on your Mac:
Open QuickTime Player
Click on File > New Audio Recording
You should see the window popping up.
From the drop down next to the Record button select the audio input.
Click record to start recording and stop to stop recording.
Here is a quick video on how to perform the different tasks that we have seen above.