In this article we are going to look at how we can use the built in Application: QuickTime to record a screen or a movie. In fact, the videos that you are about to see in the article below were created using QuickTime.
A good reason to record the activity on the screen would be to create a visual step by step guide which can be distributed to employees in the organisation. For example, you can create a video to show employees how they can sign into their company’s email account and access it from their iPhone or Mac.
Recording your Mac’s screen
Follow the steps given below to record your Mac’s screen:
- Open QuickTime Player
- Click on File > New Screen Recording

- You should see the window popping up.
- From the drop down next to the Record button select the audio input & whether mouse clicks should be shown.
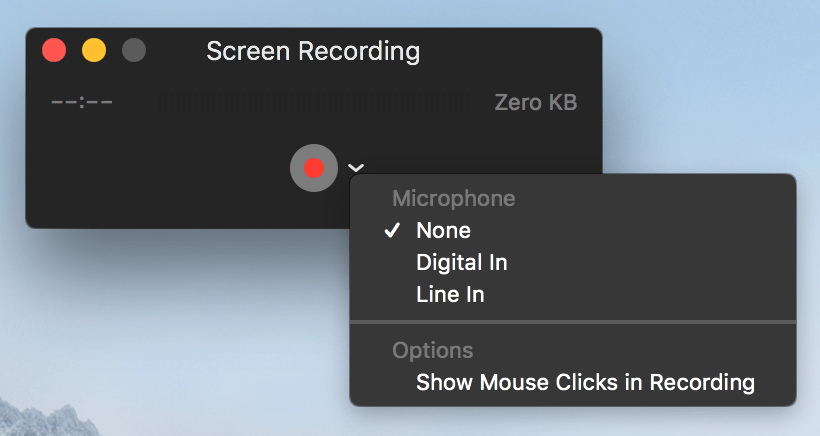
- Click on the Record Button. You should see a dialog asking you whether you want to record a small area or a full screen.

- The recording starts once the stop button in the menu bar becomes dark.
- Click on the stop button to stop the recording.

- Save the file that was created.
Recording your iPhone/iPad Screen
(Mirroring your iPhone Screen on the Projector)
The process of recording the iPhone/iPad screen is quite similar to recording your computer’s screen. The key thing to remember is to connect your iPhone/iPad to the Mac with the lightning cable.
Follow the steps given below to record your iPhone/iPad screen:
- Open QuickTime Player
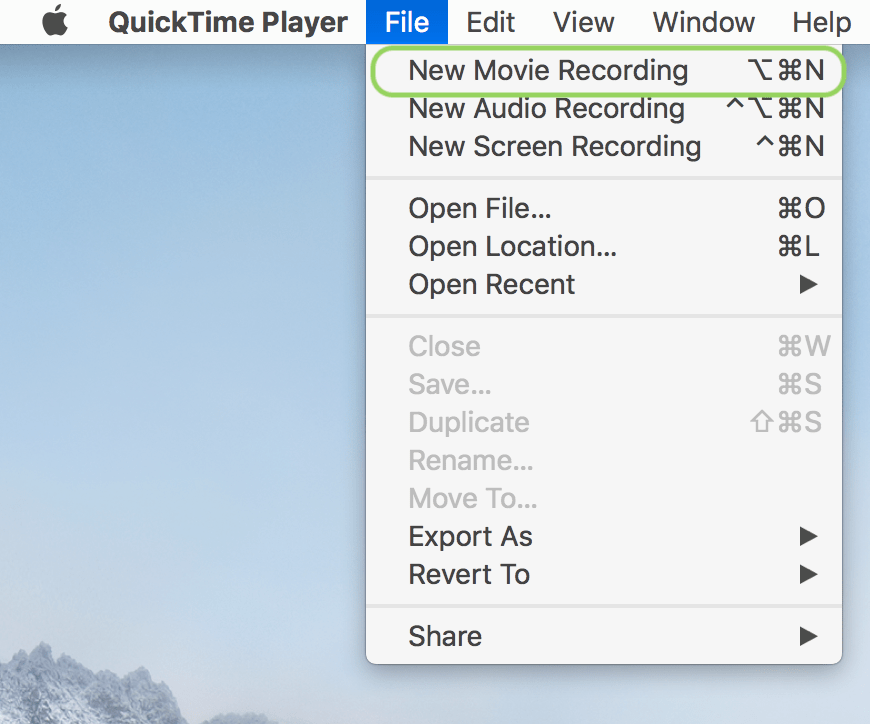
- Click on File > New Movie Recording
- You should see the window popping up.
- From the drop down next to the Record button select the audio input & whether mouse clicks should be shown. The difference now is the fact that you get an extra option to choose the source.
Recording a Movie
Follow the steps given below to record a Movie on your Mac:
- Open QuickTime Player
- Click on File > New Movie Recording
- You should see the window popping up.
- From the drop down next to the Record button select the audio input. You can also select your camera source from here.

- Click record to start recording & click on the stop button to stop recording.
Recording Audio
Follow the steps given below to record an Audio on your Mac:
- Open QuickTime Player
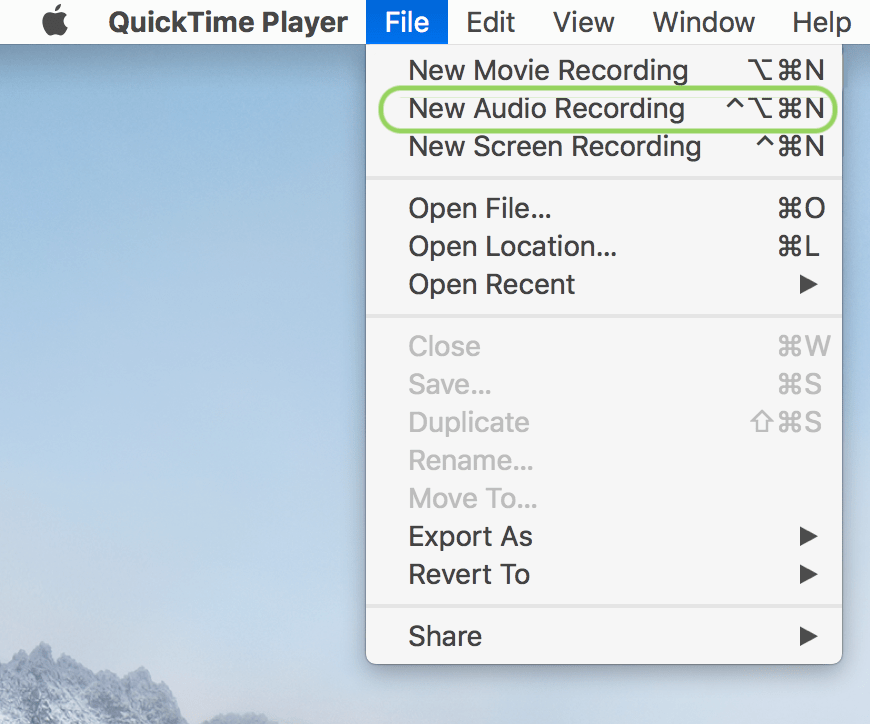
- Click on File > New Audio Recording
- You should see the window popping up.
- From the drop down next to the Record button select the audio input.
- Click record to start recording and stop to stop recording.
Here is a quick video on how to perform the different tasks that we have seen above.

Pingback: iPhone Screen Recording – Part 2 | Arun Patwardhan's Blog
For recording iOS Screens also look at the article published recently.
https://arunpatwardhan.com/2018/05/14/iphone-screen-recording-part-2/
Pingback: Screen capture and recording in macOS | Arun Patwardhan's Blog