Shell scripting in macOS – Part 9: Automating scripts

This article is NOT a continuation of the previous article. The topics covered in this article won’t be used in our folder creation script as the features covered are not required or can’t be appropriately used. We will use a different script instead. This article is a continuation of the Shell scripting series though.

Why automate?

Most of the times we or someone else will be running the desired script. However there is one major drawback with this. It assumes that there is ‘someone’ who can run the script and they have access to the computer that the script is supposed to run on. This is not always a given.

The above approach also has the problem of efficiency. If the script is to be run periodically or at regular intervals it can get very inefficient and is likely to affect the workflows of the organisation.

Automation solves these problems for us by allowing scripts to run by themselves.

How to automate?

There are 2 options that we will look at in this article:

  • Expect utility
  • Launch Daemons/Launch Agents

Expect utility

The expect utility isn’t strictly an automation solution. It’s a tool that can answer stdout prompts from another script/program/application. Let us see how it works with an example.

The script below is asking a series of questions from the user and is expecting a response. The response is stored in a variable which is echo’d out. To make it interesting the last question is a choice based questions. Based on some random value the script will ask question ‘a’ or question ‘b’.

#!/bin/zsh

# Questions
# --------------------------------------------------
echo "1) What is your name?"
read -s NAME
echo $NAME 

echo "2) What is your email address?"
read -s EMAIL
echo $EMAIL 

echo "3) Could you tell me your company's website address?"
read -s WEBSITE
echo $WEBSITE 

echo "4) Please provide your mobile number?"
read -s MOBILE
echo $MOBILE 

# Choice
# --------------------------------------------------
if [[ $RANDOM -gt 90000 ]]; then
	echo "Do you like option A?"
else 
	echo "Would you prefer option B?"
fi

read -s OPTION
echo $OPTION 

Now if we just run the above script we would see prompts on stdout for the different questions and simply answer them. But what if this script is going to be called by another script? That is where the expect utility comes in. Let us have a look at out script and then analyse it

#!/bin/zsh
#!/usr/bin/expect 

#Variables
ANS1="Arun"
ANS2="arun@amaranthine.co.in"
ARG1=$1

export ANS1
export ANS2
export ARG1 

/usr/bin/expect << "EOF"
set myValue1 $env(ANS1);
set myValue2 $env(ANS2);
set arg1 $env(ARG1);

spawn /Users/arunpatwardhan/Developer/questions.zsh
expect "1) What is your name?\r" 
send -- "$myValue1\r"

expect "2) What is your email address?"
send -- "$myValue2\r"

expect "3) Could you tell me your company website address?"
send -- "www.amaranthine.in\r"

expect "4) Please provide your mobile number?"
send -- "$arg1\r"

expect {
	"Do you like option A?" { send -- "Of course!\r" }
	"Would you prefer option B?" { send -- "Definitely!\r" }
}

expect eof
EOF

Let us analyse this file line by line.

The first line is our interpreter declaration. The second line is where we specify which expect we will be using.

#!/bin/zsh
#!/usr/bin/expect 

Next we declare some variables. We will use them in our expect utility soon.

#Variables
ANS1="Arun"
ANS2="arun@amaranthine.co.in"
ARG1=$1

In order to use them in our utility we need to export these variables. We will then access them via the environment.

export ANS1
export ANS2
export ARG1 

This is where we start writing our expect command. Notice that we are using the ‘here’ document that we learnt in the previous script. This allows use to send multiple expect commands to the expect utility.

/usr/bin/expect << "EOF"

The first thing that we do is create variables for the expect utility from the variables that we already have.

set myValue1 $env(ANS1);
set myValue2 $env(ANS2);
set arg1 $env(ARG1);

Then we use the spawn command to start the script whose questions we wish to answer.

spawn /Users/arunpatwardhan/Developer/questions.zsh

Next we tell the expect utility to ‘expect’ a question. We specify the question to expect in the string after the expect command.

expect "1) What is your name?\r"

Once the expectation has been met, we send out our response to the question using the send command.

send -- "$myValue1\r"

We can answer the rest of the questions the same way. We can use variables to pass in data or directly write our answers in there.

In case of a choice we write an expect block command with the help of braces.

expect {
	"Do you like option A?" { send -- "Of course!\r" }
	"Would you prefer option B?" { send -- "Definitely!\r" }
}

Finally we end with an eof being passed to expect.

expect eof

The last EOF is for the ‘here’ document.

EOF

That’s it! It’s that simple to write expect scripts. Note that there are more commands available for the expect utility. I would strongly recommend going through the man page for details about expect.

man expect

There is also a utility called autoexpect that builds the expect script for you. As of this article (tested on macOS 12.6) it is not installed by default.

One last thing I would like to mention. The expect utility should ideally be used in a larger script which is invoking other scripts. It is not meant to replace human interaction. Use caution when invoking scripts/binaries/tools that you cannot read as you are not fully aware of everything that is done by these scripts.


Launch Daemons/Launch Agents

The other and option is to use launch daemons/launch agents. I will be referring to them as daemons through the rest of this article unless something specific has to be mentioned.

Daemons solve a different problem as compared to the expect utility.

The expect utility allows for a script/binary/tool/program to complete execution by answering questions expected from a human.

Daemons on the other hand allow us to schedule and automatically run scripts and custom intervals. These are background processes that are started on specific events. Daemons and agents are exactly the same, but they have some key differences:

Launch DaemonsLaunch Agents
These are owned by the systemThese are owned by the currently logged in user
Start as soon as the system boots upStarts only after the user logs in. Stops as soon as the user logs out
Is system wideCan apply to all user accounts or to a specific user account

These are some of the points that you have to keep in mind while deciding whether to create a daemon or an agent. The process for creating them is exactly the same. It is plist file that provides all the information that is necessary for the system to schedule and run the processes.

I will be talking about launch daemons and agents as well as plist files in separate articles at a later point in time.

Example

Let us look at how to create a daemon with the help of an example.

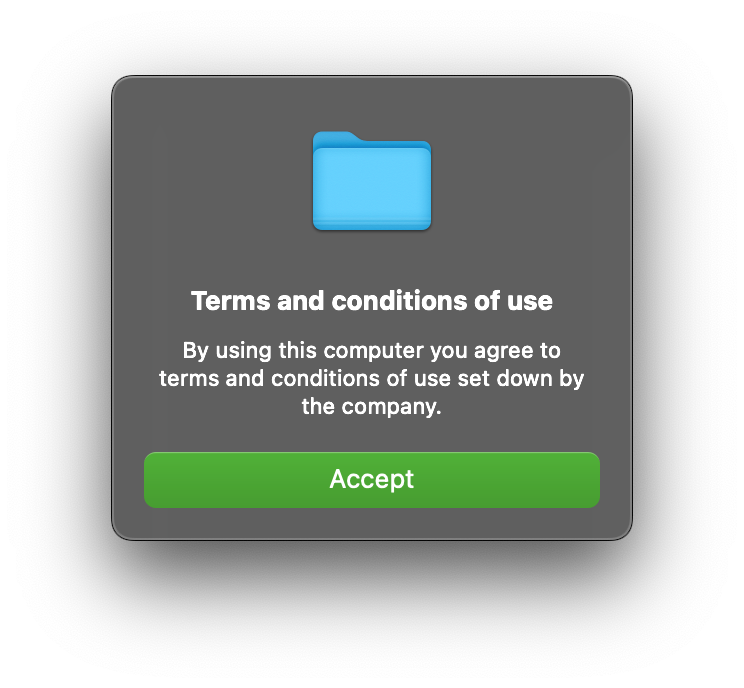
We would like to show an informational popup that appears as soon as the user logs in and at 5 minutes interval. We would also like to show a notification of the same.

Now this could also be achieved using other approaches but it gives us an opportunity to explore how to create agents. Also the scheduling is chosen so that we can see how it is done. It is not strictly required for this situation.

So why have we decided to create it as an agent?

The main reason is because it is to run only after the user logs in. Something that a Launch Agent is perfectly suited for.

We also want this to run for every user account on the computer. So this will need to be installed in the /Library folder. Specifically:

/Library/LaunchAgents/

Now that we have decided how and where let us focus first on the script that we plan to run.

#!/bin/zsh

/usr/bin/osascript << EOF 
display notification "By using this computer you agree to terms and conditions of use set down by the company." \
					  with title "Terms & Conditions" \
					  subtitle "Acknowledge" \
					  sound name "Alert"

set theAlertText to "Terms and conditions of use"
set theAlertMessage to "By using this computer you agree to terms and conditions of use set down by the company."
display alert theAlertText \
	    message theAlertMessage \
		as informational \
		buttons {"Accept"} default button "Accept"
EOF

The script simply uses the osascript command to run a few AppleScript commands. These commands show a notification as well as an alert message to the user. Let us place this script in the /Library/Scripts/ folder. This will make it easily accessible.

Next we will focus on creating the launch agent plist. Let us first list out the items we will need to put in the plist.

KeyDescription
LabelThis is the name of our Launch Agent
ProgramArgumentsThis is the action to be performed. In our case the action is to invoke the script.
StartIntervalThis is the time interval after which the program arguments must be executed.
RunAtLoadThis is a flag that indicates that the agent must be run as soon as it is loaded.

Armed with this information we will go ahead and create our plist. There are several tools available for this:

  • Xcode
  • TextEdit
  • defaults command
  • Third party tools like CodeRunner

We will use the defaults command for this. It is a built in command that allows us to work with plist files. Here is a little script that creates our plist.

#!/bin/zsh

defaults write ~/Desktop/in.amaranthine.welcomeMessage.plist Label -string "in.amaranthine.welcomeMessage"
defaults write ~/Desktop/in.amaranthine.welcomeMessage.plist ProgramArguments -array-add "/bin/zsh" "/Library/Scripts/welcome.zsh"
defaults write ~/Desktop/in.amaranthine.welcomeMessage.plist RunAtLoad -boolean true
defaults write ~/Desktop/in.amaranthine.welcomeMessage.plist StartInterval -integer 300

In the script, the defaults command is writing several key value pairs into a plist file at the specified path. Notice the key names: Label, ProgramArguments, RunAtLoad, StartInterval. These are the values we need to specify. The above commands need not be written in a specific sequence as they are being written to an XML file.

The resulting plist file should look like this:

<?xml version="1.0" encoding="UTF-8"?>
<!DOCTYPE plist PUBLIC "-//Apple//DTD PLIST 1.0//EN" "http://www.apple.com/DTDs/PropertyList-1.0.dtd">
<plist version="1.0">
<dict>
	<key>Label</key>
	<string>in.amaranthine.welcomeMessage</string>
	<key>ProgramArguments</key>
	<array>
		<string>/bin/zsh</string>
		<string>/Library/Scripts/welcome.zsh</string>
	</array>
	<key>RunAtLoad</key>
	<true/>
	<key>StartInterval</key>
	<integer>300</integer>
</dict>
</plist>

Lets explore the different parts of this plist file. It contains a dictionary with several key value pairs.

<key>Label</key>
<string>in.amaranthine.welcomeMessage</string>

The first key value pair we encounter is ‘Label’. This is the name of our agent.

<key>ProgramArguments</key>
<array>
	<string>/bin/zsh</string>
	<string>/Library/Scripts/welcome.zsh</string>
</array>

The next key value pair is extremely important. It is telling our agent the task that needs to be performed. In this case use the zsh shell to run the welcome.zsh script. This is the same as running the following command in terminal:

/bin/zsh /Library/Scripts/welcome.zsh
<key>RunAtLoad</key>
<true/>

The second key value pair indicates that the agent must run as soon as it is loaded and not only when the user logs in. This is not strictly required but is very handy when we try to test our agent.

<key>StartInterval</key>
<integer>300</integer>

The last key value pair will schedule the agent to run at an interval of 5 minutes or 300 seconds.

You can check if the plist if properly formatted using the command:

plutil -lint /path/to/plist

Also, if you try to open the plist file in an editor it is likely that the formatting may not appear correctly. Run the following command to make it readable:

plutil -convert xml1 /path/to/plist

This does not affect the plist file in any way. So it is safe to perform.

The next bit is to place the file in correct location. Copy the plist file to the path:

/Library/LaunchAgents/

Next we will look at loading the agent

While the agent will be loaded automatically every time the user logs in. However, we would like to test the results immediately. We will use the launchctl command to load the agent.

launchctl bootstrap gui/501 /Library/LaunchAgents/in.amaranthine.welcomeMessage.plist

Let us explore the launchctl command.

The bootstrap option informs the system that an agent is being loaded.

The next bit tells launchctl that its for gui user 501. We can get the user number using the command id -u.

This is followed by the path to the plist file.

Run this command.

To find out if the launch agent has loaded correctly we will use the list option on launchctl to list out all the current agents.

launchctl list

To get more specific results:

launchctl list | grep "in.ama"

This will show a list of agents whose name starts with “in.ama”.

And that’s it. We have now scheduled the agent. If you have run the command to bootstrap the agent then you should see the popup appearing on the screen.

You should also see the notification:

If you wish to stop the agent run:

launchctl bootout gui/501 /Library/LaunchAgents/in.amaranthine.welcomeMessage.plist

It’s the same command as before. Except with the bootout option instead of the bootstrap.

NOTE: The agent will start running again the next time the user logs in.

Summary

As you can see there are several options available when it comes to automating scripts. This opens up more possibilities when it comes to performing management tasks on the device.

Video

Download

You can download the scripts from here:

Advertisement

Shell scripting in macOS – Part 8: Arrays & Dictionaries

This article is a continuation of the previous article. We will be taking the previous script and using it to build on the concepts we will learning in this article.

So far we have been working with a single piece of data. This was stored in a single variable. For each new piece of information we created a new variable. However, we often come across situations where there is more than one value for a given item. This is where collections like arrays and dictionaries come in.

Arrays

An array is a sequential collection of data. It allows us to store more than one value in a variable. This is good for situations like the contents of a folder, list of users, list of applications. Creating, reading, modifying, and iterating over an array is very easy. Let us have a look.

Creating

To create an array simply declare a variable followed by the '=' operator followed by values within round brackets.

# Declaring an array of items 
items=("ABC" "DEF" "GHI" "JKL" "MNO" "PQR")

Note that if you assign another set of values to the items variable it will replace the original values. We will see how to add values to an existing array a little later in the article.

Reading

We need to use the ${ } to read an array. This expands the array and allows us to read different values. There are different operations possible. I have listed some of those in the code snipper below.

# Getting a specific element from the array
echo "\${items[0]} 		= ${items[0]}"

# Getting all the elements of the array
echo "\${items[@]} 		= ${items[@]}"

# Getting the count of the elements in the array
echo "\${#items[@]} 	= ${#items[@]}"

# Getting a range of values
echo "\${items[@]:3:2} 	= ${items[@]:3:2}"

Modifying

To modify we simply need to use the '+' operator before the equals. This will add the value to the existing array without disturbing the other values.

# Pushing a value into the array
items+=("STU")

# Remove a specific item
unset items[2]

A small point to note. The unset is available with /bin/sh interpreter.

Iterating

for entry in "${items[@]}"
do 
	echo "-> $entry"
done

Here is a nice example of the user of arrays. The output of the list command is stored as an array in the variable named ‘directories’. Then using the for loop we can step through each folder and in turn printing its contents out.

directories=($(ls $HOME))

for folder in "${directories[@]}"
do 
	echo $folder
	eval "ls -l $HOME/$folder"
done

Dictionaries

Dictionaries are also collections just like arrays. However, there is one major difference. While arrays are indexed using integers, dictionaries are indexed using strings.

There is one small thing to note about dictionaries. They only work with bash version 4.0 or later. So if you face issues, make sure you are running bash 4.0 or later. In my example I am using zsh version 5.8.1. To find out which version you are running simply run the following command in terminal:

bash --version

or

zsh --version

Let us look at how to create and use dictionaries.

Creating

Creating a dictionary is very easy. We simply declare an associative array and give the dictionary variable a name.

declare -A contactDetails

Modifying

Editing or adding values to a dictionary is easy too. We use the variable name followed by the '[]' index brackets with the key value inside the brackets. This is followed by the '=' operator and the value to be assigned for that key after that.

contactDetails[name]="Arun"
contactDetails[email]="arun@amaranthine.co.in"
contactDetails[website]="www.amaranthine.in"
contactDetails[blog]="www.arunpatwardhan.com"
contactDetails[phone]="+91-9821000000"
contactDetails[dob]="$(date)"

Reading

We use the ‘@{ }’ operator to expand and read values from the dictionary, just as we did with an array. The only additional detail here is that we are using the key in order to get the specific value.

# Getting the value for a specific key
echo ${contactDetails[name]}

# Getting all the values
echo ${contactDetails[@]}

# Getting all the keys
echo ${(k)contactDetails[@]}

# Getting all the values
echo ${(v)contactDetails[@]}

# Getting all the keys and values
echo ${(kv)contactDetails[@]}

# Getting number of entries
echo ${#contactDetails[@]}

Iterating

There are several different ways of iterating over a dictionary. In the example below, the for loop is iterating over all the keys from the dictionary. Inside the loop we are using each key to extract the corresponding value.

for item in "${(k)contactDetails[@]}"
do 
	printf "%-10s \t%-40s" $item ${contactDetails[$item]}
	echo " "
done

Script

Let us update out script to use arrays.

#!/bin/zsh

#-------------------------------------------------------------------------------------------------
#NAME:		Folder creator
#AUTHOR:	Arun Patwardhan
#CONTACT:	arun@amaranthine.co.in
#DATE:		15th September 2022
#WEBSITE:	https://github.com/AmaranthineTech/ShellScripts
#-------------------------------------------------------------------------------------------------

#LEGAL DISCLAIMER --------------------------------------------------------------------------------
#THE SOFTWARE IS PROVIDED "AS IS", WITHOUT WARRANTY OF ANY KIND, EXPRESS OR
#IMPLIED, INCLUDING BUT NOT LIMITED TO THE WARRANTIES OF MERCHANTABILITY,
#FITNESS FOR A PARTICULAR PURPOSE AND NONINFRINGEMENT. IN NO EVENT SHALL THE
#AUTHORS OR COPYRIGHT HOLDERS BE LIABLE FOR ANY CLAIM, DAMAGES OR OTHER
#LIABILITY, WHETHER IN AN ACTION OF CONTRACT, TORT OR OTHERWISE, ARISING FROM,
#OUT OF OR IN CONNECTION WITH THE SOFTWARE OR THE USE OR OTHER DEALINGS IN THE
#SOFTWARE.
#-------------------------------------------------------------------------------------------------

#LICENSE/TERMS AND CONDITIONS --------------------------------------------------------------------
#MIT License

#Copyright (c) Amaranthine 2021.

#Permission is hereby granted, free of charge, to any person obtaining a copy
#of this software and associated documentation files (the "Software"), to deal
#in the Software without restriction, including without limitation the rights
#to use, copy, modify, merge, publish, distribute, sublicense, and/or sell
#copies of the Software, and to permit persons to whom the Software is
#furnished to do so, subject to the following conditions:

#The above copyright notice and this permission notice shall be included in all
#copies or substantial portions of the Software.
#-------------------------------------------------------------------------------------------------

#ABOUT -------------------------------------------------------------------------------------------
# fileCreator.zsh
# 1.7
#-------------------------------------------------------------------------------------------------

#DESCRIPTION ------------------------------------------------------------------------------------- 
# - THis script is intended for creating the custom folders that are required on all corporate computers. 
# - Run this script on a new computer or a computer being reassigned to another employee.
# - This script can run on all computers.
#-------------------------------------------------------------------------------------------------

#USAGE -------------------------------------------------------------------------------------------
# - To create folders with default names run the command: ./folderCreator.zsh
# - To define your own folder names: ./folderCreator.zsh <folder1> <folder2> <folder3>
# - Available options  : Only the help option is available
# - Getting help       : Use the -h or the -help options to get more information. Or you can use the man command to view the man page.
#-------------------------------------------------------------------------------------------------

#WARNING/CAUTION ---------------------------------------------------------------------------------
#******************************************************************************************************************
#******************************************************************************************************************
#******************************************************************************************************************
#******************************************************************************************************************
# This script doesn't perform any validation of the folder names being passed in by the user. 
# If the script does not see the -h or the -help options then it will assume that the data being passed in is the name of the folder.
# The user of the script must ensure that the desired folder names are passed in.
#******************************************************************************************************************
#******************************************************************************************************************
#******************************************************************************************************************
#******************************************************************************************************************
#-------------------------------------------------------------------------------------------------

#INSTALLATION ------------------------------------------------------------------------------------
# Instructions for placing the script in the correct place are listed here. 
# Location:		/Library/Scripts/
# Permissions:	rwx r-x r-x
#-------------------------------------------------------------------------------------------------

#REQUIREMENTS ------------------------------------------------------------------------------------
# Shell:		/bin/zsh
# OS:			macOS Big Sur 11.4 or later
# Dependencies:	None
#-------------------------------------------------------------------------------------------------

#HELP/SUPPORT ------------------------------------------------------------------------------------
# You can get help by running the following commands.
# ./folderCreator.zsh -h
# ./folderCreator.zsh -help
# OR
# man folderCreator.zsh
# You can also view the log file for the same at: ~/Library/Logs/folderCreator_log_v1-7.log
#-------------------------------------------------------------------------------------------------

#HISTORY -----------------------------------------------------------------------------------------
# ------------------------------------------------------------------------------------------------
# Version 1.0: Basic script which creates the folders
# Version 1.1: Gives user the ability to specify the folder names at run time.
# Version 1.2: Adds safety checks to the scripts
# Version 1.3: Includes documentation as well as ability to get help.
# Version 1.4: Includes optimisation using for loop
# Version 1.5: Prompts the user in the GUI for names for the different folders.
# Version 1.6: Updated the log mechanism with the help of a function and here document.
# Version 1.7: Replaced the folder variables with an array
#-------------------------------------------------------------------------------------------------

#-------------------------------------------------------------------------------------------------
# ------------------------------ SCRIPT STARTS HERE ----------------------------------------------
#-------------------------------------------------------------------------------------------------
#-------------------------------------------------------------------------------------------------
#-------------------------------------------------------------------------------------------------

#These are the default values used for the folder names incase the user doesn't provide any.
FOLDERS=("Tools" "Reports" "Help")

#Script version number
VERSION_NUMBER="1.7"

#Command name
COMMAND_NAME="folderCreator.zsh"

#1. Check to see if the user is asking for help. In which case we will have to provide information about the command.
if [[ $1 == "-h" ]] || [[ $1 == "-help" ]]; then
	echo "ABOUT 
-----
fileCreator_v1-7.zsh
Version $VERSION_NUMBER

NAME 
----
$COMMAND_NAME — Folder creation utility SYNOPSIS
$COMMAND_NAME folder names [ verbs ]

DESCRIPTION 
-----------
$COMMAND_NAME creates 3 folders in the home folder. In case the folder names are not provided then the command will create folders with default names 'Tools', 'Reports', \"Help\".

There is also the option of getting help via the help verb.
- This script is intended for creating the custom folders that are required on all corporate computers. 
- Run this script on a new computer or a computer being reassigned to another employee.
- This script can run on all computers.

VERBS 
-----
[ −h −help] Both the options are used to invoke the help documentation.
[ −v −version] Both the options are used to get the version number of the folderCreator command.

REQUIREMENTS 
------------
The following are the minimum requirements to get the script running.
Shell:\t\t zsh
OS:\t\t macOS Big Sur 11.4 or later
Dependencies:\t None

INSTALLATION 
------------
$COMMAND_NAME can be installed anywhere you wish. However, there are certain locations that are recommended.
Location:\t /Library/Scripts/ 
Permissions: \t rwxr-xr-x

USAGE  
-----
$COMMAND_NAME folder1 folder2 folder3 
Will create folders with your own names. 

$COMMAND_NAME -h OR $COMMAND_NAME -help 
Will invoke the help utility.

$COMMAND_NAME -v OR $COMMAND_NAME -version 
will print the version number in stdout.

WARNING/CAUTION  
---------------
$COMMAND_NAME does not perform any validation of names. The only options that folderCreator accepts are -h and -help verbs or the -v and 
-version verbs. If the script does not see the -h , -help or the -v , -version options then it will assume that the data being passed in is 
the name of the folder. The user of the folderCreator command must ensure that the desired folder names are passed in. The user will also be 
prompted, via the graphical user interface, if he/she wishes to provide the names for the folders. If yes, then there will be subsequent 
prompts asking for the folder names.

EXAMPLES 
--------
$COMMAND_NAME Resources Results Assistant
This will create 3 folders Resources , Results , Assistant , in the user’s home folder. 

$COMMAND_NAME
This will create 3 folders with the default names

$COMMAND_NAME Apps
This will use the Apps name for the first folder but the default names for the last 2 folders. 

NOTE
----
The user will be asked if he/she wishes to provide custom names in all the examples mentioned above. The user's value will always override 
whatever is being provided to the script or defaults.

DIAGNOSTICS 
-----------
The script produces a log file called ~/Library/Logs/folderCreator_log_v1-x.log
This file is typically located in the user’s home folder log folder. The x represents the version number of $COMMAND_NAME
You can view the logs for each respective version.

COPYRIGHT  
---------
Copyright (c) Amaranthine 2015-2021. All rights reserved. https://amaranthine.in

EXIT STATUS  
-----------
In most situations, $COMMAND_NAME exits 0 on success"
	exit 0
fi

PATH_TO_LOG="$HOME/Library/Logs/folderCreator_log_v1-7.log"

# Function to log activity
function recordActivity() {
	cat << EOF >> $PATH_TO_LOG
[$(date)] $1
EOF
}


echo "$(date) Running script $0 to create folders."
echo ""

TODAY=$(date)

recordActivity "Starting"

#2. Check to see if the version number is 
if [[ $1 == "-version" ]] || [[ $1 == "-v" ]]; then
	echo "Version: $VERSION_NUMBER"
	exit 0
fi

#3. The following if statements check to see if the script is receiving any arguments. It then picks those arguments and assigns them to the respective variables for use in the script.
if [[ $1 != "" ]]; then
	FOLDERS[0]=$1
fi

if [[ $2 != "" ]]; then
	FOLDERS[1]=$2
fi

if [[ $3 != "" ]]; then
	FOLDERS[2]=$3
fi

#4. We can prompt the user to see if they wish to provide folder names themselves. This will override any values provided as arguments.
userClicked=$(/usr/bin/osascript -e 'button returned of (display dialog "Would you like to provide names for the folders or use the defaults instead?" buttons {"Custom", "Default"} default button 2 with icon POSIX file "/System/Library/CoreServices/HelpViewer.app/Contents/Resources/AppIcon.icns")')
	
# if the user decides to provide custom names then go ahead and ask the user via GUI prompts. Otherwise use the values sent as arguments or defaults.	
if [[ $userClicked == "Custom" ]]; then
	recordActivity "The user decided to provide custom names."
	
	FOLDERS[0]=$(/usr/bin/osascript -e 'text returned of (display dialog "Enter the name of folder 1" default answer "Utilities" buttons {"OK"} default button 1 with title "Folder that will hold the utilities" with icon POSIX file "/Users/Shared/Finder.icns")')
	
	FOLDERS[1]=$(/usr/bin/osascript -e 'text returned of (display dialog "Enter the name of folder 2" default answer "Tools" buttons {"OK"} default button 1 with title "Folder that will hold the tools" with icon POSIX file "/Users/Shared/Finder.icns")')
	
	FOLDERS[2]=$(/usr/bin/osascript -e 'text returned of (display dialog "Enter the name of folder 3" default answer "Help" buttons {"OK"} default button 1 with title "Folder that will hold the support documents" with icon POSIX file "/Users/Shared/Finder.icns")')
		
	recordActivity "User provided: ${FOLDER[@]}"
else
	recordActivity "User decided to use default values: ${FOLDER[@]}"
fi

#5. Go to the home folder.
cd $HOME

#6. Check to see if each of the folders exists. If it exists then do not create it. Else create the folder. 
recordActivity "Creating folders: ${FOLDER[@]}"

for item in ${FOLDER[@]}; do
	if [[ -d $item ]]; then
		recordActivity "Not creating $item as it already exists."
	else
		recordActivity "Creating $item"
		mkdir $item
	fi
	
	#7. Create the task completion file inside each folder.
	recordActivity "Creating hidden file for $item folder."
	cd $item
	#8. Generate the file names based on the folder names.
	touch ".$item-FolderCreated"
	cd ..
done

echo "$(date) Task completed. Have a nice day!"
	
#-------------------------------------------------------------------------------------------------
#-------------------------------------------------------------------------------------------------
#-------------------------------------------------------------------------------------------------
# ------------------------------ END OF SCRIPT ---------------------------------------------------

Summary

Both arrays and dictionaries now allow us to store collections of data in a single variable. This enables us to write compact scripts and deal with complex data.

Download

You can download the completed script from here.

Shell scripting in macOS – Part 7: Miscellaneous

This article is a continuation of the previous article. We will be taking the previous script and using it to build on the concepts we will learning in this article.

We will be covering a few different features, available in shell scripting, in this article.

Functions

Often times, you will find that there are some operations that you perform repeatedly across different points in the script. It would be extremely useful to write this logic once and reuse it over and over in a quick and efficient manner. Functions allow us to do just that.

#!/bin/bash

#function syntx ----------
repeat() {
	echo "Function without the function keyword"
}

repeat 

#function with function keyword ----------
function message() {
	echo "The argument is $1"
}

message "Arun"

#function with a local variable
#--------------------------------------------------
function localVar() {
	local value="ABC"
	echo $value
}

localVar 

#function with an argument being passed in
#--------------------------------------------------
function report() {
	echo "Argument passed in: $1"
}

report "Value 1"

function argsParameters() {
	echo "\$# -> Number of arguments"
	echo "\$* -> All positional arguments as a single word"
	echo "\$@ -> All positional arguments as separate strings"
	echo "\$1 -> First argument"
	echo "\$_ -> last argument of previous command"
}

argsParameters 

#function returning value
#--------------------------------------------------
function operation() {
	echo "XYZ"
}

answer="$(operation)"
echo $answer

function retCode() {
	echo "Return code"
	return 10
}

retCode 
echo $?

Environment

#!/bin/bash

#list environment variables
echo "Print environment variables"
echo "--------------------------------------------------"
printenv 
echo ""


#print specific environment variable value
echo "Print specific environment variables"
echo "--------------------------------------------------"
printenv SHELL
printenv USER
printenv LOGNAME
printenv HOME
echo ""

#path to the printenv command
echo "Print path to printenv command"
echo "--------------------------------------------------"
which printenv

The output would look like:

Print environment variables
--------------------------------------------------
CR_RUNID=19455
TERM_PROGRAM=CodeRunner
CR_SANDBOXED=1
TERM=dumb
SHELL=/bin/zsh
TMPDIR=/var/folders/ts/gm470rbx4xv0t507dt7xmj7c0000gn/T/com.coderunnerapp.CodeRunner/
CR_INPUT=
CR_SCRIPTS_DIR=/Users/arunpatwardhan/Library/Containers/com.coderunnerapp.CodeRunner/Data/Library/Application Support/CodeRunner/Languages/Shell Script.crLanguage/Scripts
USER=arunpatwardhan
COMMAND_MODE=unix2003
SSH_AUTH_SOCK=/private/tmp/com.apple.launchd.P9J71uVoN9/Listeners
filename=envDemo.sh
__CF_USER_TEXT_ENCODING=0x1F5:0x0:0x0
CR_DEVELOPER_DIR=/Applications/CodeRunner.app/Contents/SharedSupport/Developer
CR_UNSAVED_DIR=/Users/arunpatwardhan/Library/Containers/com.coderunnerapp.CodeRunner/Data/Library/Application Support/CodeRunner/Unsaved
CR_LANGUAGE_DIR=/Users/arunpatwardhan/Library/Containers/com.coderunnerapp.CodeRunner/Data/Library/Application Support/CodeRunner/Languages/Shell Script.crLanguage
CR_ENCODING_NAME=utf-8
CR_FILENAME=envDemo.sh
PATH=/Applications/Xcode.app/Contents/Developer:/usr/local/bin:/usr/bin:/bin:/usr/sbin:/sbin:/Applications/VMware Fusion.app/Contents/Public:/Library/Apple/usr/bin:/Applications/CodeRunner.app/Contents/SharedSupport/Developer/bin
__CFBundleIdentifier=com.coderunnerapp.CodeRunner
PWD=/Users/arunpatwardhan/Developer
APP_SANDBOX_CONTAINER_ID=com.coderunnerapp.CodeRunner
CFFIXED_USER_HOME=/Users/arunpatwardhan/Library/Containers/com.coderunnerapp.CodeRunner/Data
CR_FILE=/Users/arunpatwardhan/Developer/envDemo.sh
XPC_FLAGS=0x0
CR_TMPDIR=/var/folders/ts/gm470rbx4xv0t507dt7xmj7c0000gn/T/com.coderunnerapp.CodeRunner/CodeRunner
XPC_SERVICE_NAME=0
SHLVL=2
HOME=/Users/arunpatwardhan/Library/Containers/com.coderunnerapp.CodeRunner/Data
CR_SUGGESTED_OUTPUT_FILE=/var/folders/ts/gm470rbx4xv0t507dt7xmj7c0000gn/T/com.coderunnerapp.CodeRunner/CodeRunner/envDemo
CR_VERSION=62959
LOGNAME=arunpatwardhan
LC_CTYPE=UTF-8
CR_RUN_COMMAND=bash "$filename"
compiler=
CR_ENCODING=4
_=/usr/bin/printenv

Print specific environment variables
--------------------------------------------------
/bin/zsh
arunpatwardhan
arunpatwardhan
/Users/arunpatwardhan/Library/Containers/com.coderunnerapp.CodeRunner/Data

Print path to printenv command
--------------------------------------------------
/usr/bin/printenv

Redirection

We have already covered a little bit of redirection in an earlier article. There are some more redirection options available that we will look at out here.

OperatorDescriptionExample
>Writes the output of the preceding command to the fileecho "ABC" > file
>>Appends information to the file being pointed to another fileecho "ABC" >> file
|Passes the output of the preceding command to the next commandls -l | grep "*.sh"

Using the above redirections there are some interesting actions that we can perform.

ActionDescription
command >> /dev/nullThis will completely discard the output of the command.
command 2>&1This will redirect stderr to stdout and show both together on stdout.
command 1>&2This will redirect stdout to stderr and show both together on stderr.

Here document

One interesting application fo the redirection operator is the concept of here documents. A here document is used to send multiple lines of input to a command. The general structure is:

command << endOfMessageFlag
message
message
message
endOfMessageFlag

In this case the endOfMessageFlag is used to inform the command that the message has come to an end. A popular example is ‘EOF’ but any text can be used. Here are some examples of here documents.

#Writing to a file
cat << EOF >> /Users/Shared/temp.log
"This is a demo "
$(date)
EOF

The above script write the message within the ‘EOF’ to the file: /Users/Shared/temp.log. The message being:

This is a demo. 
Mon Sep 25 12:31:07 IST 2022

Here is another example:

#Multiple statements to a command
osascript << EOF
display dialog "Would you like to provide names for the folders or use the defaults instead?" buttons {"Custom", "Default"} default button 2 with icon POSIX file "/System/Library/CoreServices/HelpViewer.app/Contents/Resources/AppIcon.icns"
text returned of (display dialog "Enter the name of folder 1" default answer "Utilities" buttons {"OK"} default button 1 with title "Folder that will hold the utilities" with icon POSIX file "/System/Library/CoreServices/CoreTypes.bundle/Contents/Resources/AlertStopIcon.icns")
EOF

The ‘here’ document allows us to send multiple AppleScript statements to ‘osascript‘.

Folder creator script update

Let us try to use some of these features in our folder creator script.

#!/bin/zsh

#-------------------------------------------------------------------------------------------------
#NAME:		Folder creator
#AUTHOR:	Arun Patwardhan
#CONTACT:	arun@amaranthine.co.in
#DATE:		15th September 2022
#WEBSITE:	https://github.com/AmaranthineTech/ShellScripts
#-------------------------------------------------------------------------------------------------

#LEGAL DISCLAIMER --------------------------------------------------------------------------------
#THE SOFTWARE IS PROVIDED "AS IS", WITHOUT WARRANTY OF ANY KIND, EXPRESS OR
#IMPLIED, INCLUDING BUT NOT LIMITED TO THE WARRANTIES OF MERCHANTABILITY,
#FITNESS FOR A PARTICULAR PURPOSE AND NONINFRINGEMENT. IN NO EVENT SHALL THE
#AUTHORS OR COPYRIGHT HOLDERS BE LIABLE FOR ANY CLAIM, DAMAGES OR OTHER
#LIABILITY, WHETHER IN AN ACTION OF CONTRACT, TORT OR OTHERWISE, ARISING FROM,
#OUT OF OR IN CONNECTION WITH THE SOFTWARE OR THE USE OR OTHER DEALINGS IN THE
#SOFTWARE.
#-------------------------------------------------------------------------------------------------

#LICENSE/TERMS AND CONDITIONS --------------------------------------------------------------------
#MIT License

#Copyright (c) Amaranthine 2021.

#Permission is hereby granted, free of charge, to any person obtaining a copy
#of this software and associated documentation files (the "Software"), to deal
#in the Software without restriction, including without limitation the rights
#to use, copy, modify, merge, publish, distribute, sublicense, and/or sell
#copies of the Software, and to permit persons to whom the Software is
#furnished to do so, subject to the following conditions:

#The above copyright notice and this permission notice shall be included in all
#copies or substantial portions of the Software.
#-------------------------------------------------------------------------------------------------

#ABOUT -------------------------------------------------------------------------------------------
# fileCreator.zsh
# 1.6
#-------------------------------------------------------------------------------------------------

#DESCRIPTION ------------------------------------------------------------------------------------- 
# - THis script is intended for creating the custom folders that are required on all corporate computers. 
# - Run this script on a new computer or a computer being reassigned to another employee.
# - This script can run on all computers.
#-------------------------------------------------------------------------------------------------

#USAGE -------------------------------------------------------------------------------------------
# - To create folders with default names run the command: ./folderCreator.zsh
# - To define your own folder names: ./folderCreator.zsh <folder1> <folder2> <folder3>
# - Available options  : Only the help option is available
# - Getting help       : Use the -h or the -help options to get more information. Or you can use the man command to view the man page.
#-------------------------------------------------------------------------------------------------

#WARNING/CAUTION ---------------------------------------------------------------------------------
#******************************************************************************************************************
#******************************************************************************************************************
#******************************************************************************************************************
#******************************************************************************************************************
# This script doesn't perform any validation of the folder names being passed in by the user. 
# If the script does not see the -h or the -help options then it will assume that the data being passed in is the name of the folder.
# The user of the script must ensure that the desired folder names are passed in.
#******************************************************************************************************************
#******************************************************************************************************************
#******************************************************************************************************************
#******************************************************************************************************************
#-------------------------------------------------------------------------------------------------

#INSTALLATION ------------------------------------------------------------------------------------
# Instructions for placing the script in the correct place are listed here. 
# Location:		/Library/Scripts/
# Permissions:	rwx r-x r-x
#-------------------------------------------------------------------------------------------------

#REQUIREMENTS ------------------------------------------------------------------------------------
# Shell:		/bin/zsh
# OS:			macOS Big Sur 11.4 or later
# Dependencies:	None
#-------------------------------------------------------------------------------------------------

#HELP/SUPPORT ------------------------------------------------------------------------------------
# You can get help by running the following commands.
# ./folderCreator.zsh -h
# ./folderCreator.zsh -help
# OR
# man folderCreator.zsh
# You can also view the log file for the same at: ~/Library/Logs/folderCreator_log_v1-6.log
#-------------------------------------------------------------------------------------------------

#HISTORY -----------------------------------------------------------------------------------------
# ------------------------------------------------------------------------------------------------
# Version 1.0: Basic script which creates the folders
# Version 1.1: Gives user the ability to specify the folder names at run time.
# Version 1.2: Adds safety checks to the scripts
# Version 1.3: Includes documentation as well as ability to get help.
# Version 1.4: Includes optimisation using for loop
# Version 1.5: Prompts the user in the GUI for names for the different folders.
# Version 1.6: Updated the log mechanism with the help of a function and here document.
#-------------------------------------------------------------------------------------------------

#-------------------------------------------------------------------------------------------------
# ------------------------------ SCRIPT STARTS HERE ----------------------------------------------
#-------------------------------------------------------------------------------------------------
#-------------------------------------------------------------------------------------------------
#-------------------------------------------------------------------------------------------------

#These are the default values used for the folder names incase the user doesn't provide any.
TOOLS_FOLDER="Tools"
REPORTS_FOLDER="Reports"
HELP_FOLDER="Help"

#Script version number
VERSION_NUMBER="1.6"

#Command name
COMMAND_NAME="folderCreator.zsh"

#1. Check to see if the user is asking for help. In which case we will have to provide information about the command.
if [[ $1 == "-h" ]] || [[ $1 == "-help" ]]; then
	echo "ABOUT 
-----
fileCreator_v1-6.zsh
Version $VERSION_NUMBER

NAME 
----
$COMMAND_NAME — Folder creation utility SYNOPSIS
$COMMAND_NAME folder names [ verbs ]

DESCRIPTION 
-----------
$COMMAND_NAME creates 3 folders in the home folder. In case the folder names are not provided then the command will create folders with default names 'Tools', 'Reports', \"Help\".

There is also the option of getting help via the help verb.
- This script is intended for creating the custom folders that are required on all corporate computers. 
- Run this script on a new computer or a computer being reassigned to another employee.
- This script can run on all computers.

VERBS 
-----
[ −h −help] Both the options are used to invoke the help documentation.
[ −v −version] Both the options are used to get the version number of the folderCreator command.

REQUIREMENTS 
------------
The following are the minimum requirements to get the script running.
Shell:\t\t zsh
OS:\t\t macOS Big Sur 11.4 or later
Dependencies:\t None

INSTALLATION 
------------
$COMMAND_NAME can be installed anywhere you wish. However, there are certain locations that are recommended.
Location:\t /Library/Scripts/ 
Permissions: \t rwxr-xr-x

USAGE  
-----
$COMMAND_NAME folder1 folder2 folder3 
Will create folders with your own names. 

$COMMAND_NAME -h OR $COMMAND_NAME -help 
Will invoke the help utility.

$COMMAND_NAME -v OR $COMMAND_NAME -version 
will print the version number in stdout.

WARNING/CAUTION  
---------------
$COMMAND_NAME does not perform any validation of names. The only options that folderCreator accepts are -h and -help verbs or the -v and 
-version verbs. If the script does not see the -h , -help or the -v , -version options then it will assume that the data being passed in is 
the name of the folder. The user of the folderCreator command must ensure that the desired folder names are passed in. The user will also be 
prompted, via the graphical user interface, if he/she wishes to provide the names for the folders. If yes, then there will be subsequent 
prompts asking for the folder names.

EXAMPLES 
--------
$COMMAND_NAME Resources Results Assistant
This will create 3 folders Resources , Results , Assistant , in the user’s home folder. 

$COMMAND_NAME
This will create 3 folders with the default names

$COMMAND_NAME Apps
This will use the Apps name for the first folder but the default names for the last 2 folders. 

NOTE
----
The user will be asked if he/she wishes to provide custom names in all the examples mentioned above. The user's value will always override 
whatever is being provided to the script or defaults.

DIAGNOSTICS 
-----------
The script produces a log file called ~/Library/Logs/folderCreator_log_v1-x.log
This file is typically located in the user’s home folder log folder. The x represents the version number of $COMMAND_NAME
You can view the logs for each respective version.

COPYRIGHT  
---------
Copyright (c) Amaranthine 2015-2021. All rights reserved. https://amaranthine.in

EXIT STATUS  
-----------
In most situations, $COMMAND_NAME exits 0 on success"
	exit 0
fi

PATH_TO_LOG="$HOME/Library/Logs/folderCreator_log_v1-6.log"

# Function to log activity
function recordActivity() {
	cat << EOF >> $PATH_TO_LOG
[$(date)] $1
EOF
}


echo "$(date) Running script $0 to create folders."
echo ""

TODAY=$(date)

recordActivity "Starting"

#2. Check to see if the version number is 
if [[ $1 == "-version" ]] || [[ $1 == "-v" ]]; then
	echo "Version: $VERSION_NUMBER"
	exit 0
fi

#3. The following if statements check to see if the script is receiving any arguments. It then picks those arguments and assigns them to the respective variables for use in the script.
if [[ $1 != "" ]]; then
	TOOLS_FOLDER=$1
fi

if [[ $2 != "" ]]; then
	REPORTS_FOLDER=$2
fi

if [[ $3 != "" ]]; then
	HELP_FOLDER=$3
fi

#4. We can prompt the user to see if they wish to provide folder names themselves. This will override any values provided as arguments.
userClicked=$(/usr/bin/osascript -e 'button returned of (display dialog "Would you like to provide names for the folders or use the defaults instead?" buttons {"Custom", "Default"} default button 2 with icon POSIX file "/System/Library/CoreServices/HelpViewer.app/Contents/Resources/AppIcon.icns")')
	
# if the user decides to provide custom names then go ahead and ask the user via GUI prompts. Otherwise use the values sent as arguments or defaults.	
if [[ $userClicked == "Custom" ]]; then
	recordActivity "The user decided to provide custom names."
	
	TOOLS_FOLDER=$(/usr/bin/osascript -e 'text returned of (display dialog "Enter the name of folder 1" default answer "Utilities" buttons {"OK"} default button 1 with title "Folder that will hold the utilities" with icon POSIX file "/Users/Shared/Finder.icns")')
	
	REPORTS_FOLDER=$(/usr/bin/osascript -e 'text returned of (display dialog "Enter the name of folder 2" default answer "Tools" buttons {"OK"} default button 1 with title "Folder that will hold the tools" with icon POSIX file "/Users/Shared/Finder.icns")')
	
	HELP_FOLDER=$(/usr/bin/osascript -e 'text returned of (display dialog "Enter the name of folder 3" default answer "Help" buttons {"OK"} default button 1 with title "Folder that will hold the support documents" with icon POSIX file "/Users/Shared/Finder.icns")')
		
	recordActivity "User provided: $TOOLS_FOLDER $REPORTS_FOLDER $HELP_FOLDER"
else
	recordActivity "User decided to use default values: $TOOLS_FOLDER $REPORTS_FOLDER $HELP_FOLDER"
fi

#5. Go to the home folder.
cd $HOME

#6. Check to see if each of the folders exists. If it exists then do not create it. Else create the folder. 
recordActivity "Creating folders: $TOOLS_FOLDER, $REPORTS_FOLDER, $HELP_FOLDER"

for item in $TOOLS_FOLDER $REPORTS_FOLDER $HELP_FOLDER; do
	if [[ -d $item ]]; then
		recordActivity "Not creating $item as it already exists."
	else
		recordActivity "Creating $item"
		mkdir $item
	fi
	
	#7. Create the task completion file inside each folder.
	recordActivity "Creating hidden file for $item folder."
	cd $item
	#8. Generate the file names based on the folder names.
	touch ".$item-FolderCreated"
	cd ..
done

echo "$(date) Task completed. Have a nice day!"
	
#-------------------------------------------------------------------------------------------------
#-------------------------------------------------------------------------------------------------
#-------------------------------------------------------------------------------------------------
# ------------------------------ END OF SCRIPT ---------------------------------------------------

One of the big advantages with using a function and a here document to generate log files is that we can change the format and structure simply by modifying the function. The message itself remains unique.

We have seen some really interesting features in this article. In the next article we will take scripting a little further by exploring Arrays and dictionaries

Download

You can download the completed script from here.

List of macOS Terminal commands

This article lists out different macOS terminal commands you might encounter. You can use this list as a starting point in your search for a command to perform a specific task. This list is by no means exhaustive.

Basic terminal commands are not listed here. Some of them are listed in the following Terminal command articles.
Terminal Commands – Basic
Terminal Commands – Part 2
Terminal Commands – Part 3

Many of the commands have also been used in the article I wrote some time back. You can have a look at the scripts to see some of the commands being used.

To get more information about the commands simply run the following command from within Terminal Application. For example, to view the manual page for tmutil simply type:

man tmutil

For fdesetup

man fdesetup
Here is a nice command to quickly open the man page in the Preview App.
man -t tmutil | open -f -a /System/Applications/Preview.app

Note

  • This is not a complete list of commands
  • Some commands are available through the macOS Recovery Volume only
  • Some commands required other resources such as the OS installer
  • Some commands are available with certain versions of the OS only

Please read the documentation for more details. Use the commands with care. Improper use of commands may result in loss of data or damage to the computer.

Commands


Installation

CommandDescription
startosinstallUsed to start the installation of macOS from the command line.
createinstallmediaUsed to create an external install disk.

Security

CommandDescription
fdesetupManage FileVault configuration.
securityManage keychain and security settings
spctlManage security assessment policy
csrutilConfigure System Integrity Protection (SIP) settings
resetpasswordPassword reset utility located in the Recovery Partition

File System

CommandDescription
hdiutilUsed to manipulate and manage disk images.
diskutilUsed to modify, verify, & repair local disks.

Data Management

CommandDescription
tmutilUsed to configure Time Machine settings in macOS
screencaptureTakes screenshot of the specified screen and saves the image at the specified location.
mdlsUsed to get metadata attributes for a given file
mdutilUsed to manage metadata stores that are used by Spotlight

Settings

CommandDescription
defaultsUsed to modify plist files. Typically used to update preference files.
ioregUsed to view the I/O kit registry
system_profilerUsed to generate system hardware & software reports.
plutilUsed to check syntax of property lists or covert property lists from one format to another
AssetCacheManagerUtilUsed to configure content caching settings.
openUsed to open documents from within the command line.
networksetupPerform network configuration.
systemsetupUsed to configure machine settings in System Preferences.
launchctlUsed to manage and inspect daemons, agents, & XPC Services

Applications

CommandDescription
codesignUsed to create, check, display code signatures.
pkgbuildUsed to build installer packages
productbuildBuilds a product archive
installerSystem software and package installer tool

User Account Management

CommandDescription
dsclThis is a command line Directory service utility that allows us to create, read, and manage Directory Service data.
sysadminctlUser account management
passwdChange user password
loginUsed to login to another user account.

Server & Device Management

CommandDescription
profilesUsed to install, remove, list, or manage Configuration profiles.
serveradminUsed to manage the services in macOS
mdmclientLocated in /usr/libexec/mdmclient it is used to manage interactions with the MDM.
asrApple Software restore: Used to copy volumes.

Scripting

CommandDescription
osascriptUsed to execute the given AppleScript

Share any commands you may know of in the comments window.

Disclaimer

The information Is Provided “As Is”, Without Warranty Of Any Kind, Express Or Implied, Including But Not Limited To The Warranties Of Merchantability, Fitness For A Particular Purpose And Noninfringement. In No Event Shall The Authors Or Copyright Holders Be Liable For Any Claim, Damages Or Other Liability, Whether In An Action Of Contract, Tort Or Otherwise, Arising From, Out Of Or In Connection With The information provided Or The Use Or Other Dealings In The information.

Automation on the Mac

Automating tasks on the Mac is very useful for a wide variety of reasons. In this article we are going to look at the different technologies available for automating tasks.

TOOLS

Automator

The simplest way of achieving automation. Automator which is a built in application allows you to create task workflows by simply dragging in a set of predefined routines into a specified sequence. Let us explore how it works by creating a watermarking print plugin

Let us look at how we can create a print plugin that automatically adds a watermark to the pdf file.

  1. First get hold of an image that you will use as a watermark.
  2. Open Automator.
  3. Click on “New Document”
  4. Choose Print Plugin as the type of task to createScreen Shot 2018-03-21 at 11.58.26 AM
  5. From the left hand side drag the “Watermark PDF Documents” option. You will be able to locate this from the PDF library on the extreme right.1
  6. Add the image that will be used as a watermark. Customise the settings to your desired level. You may have to use trial and error till you get the desired output.
  7. Similarly drag the Move finder Items to the right. You will be able to locate this from the Files & Folders library.2
  8. Save the task as WatermarkCreator.
  9. Open a text file.
  10. Select File > Print
  11. Click on the PDF drop down in the print dialog.3.4
  12. Select the newly created task.
    3
  13. You have now successfully setup your own watermark creator.

Shell Scripting

For those coming from a Linux/Unix background this might be a familiar option. Very often users need to run a series of terminal commands repeatedly. While it is not difficult to do this, wouldn’t it be nice if we could write all the commands in a single file? Shell Scripts help users do just that.

To create a shell script:

  1. Open TextEdit
  2. Write the following code in there (We will write code to create a series of files and folders in our home folder for a user called admin):
    #! /bin/sh
    cd /Users/admin/
    if [ -d "/Users/admin/Applications/" ]; then
    echo "Applications Folder Exists"
    else
    mkdir Applications
    fi
    if [ -d "/Users/admin/Sites/" ]; then
    echo "Sites Folder Exists"
    else
    mkdir Sites
    fi
    if [ -d "/Users/admin/Developer/" ]; then
    echo "Developer Folder Exists"
    else
    mkdir Developer
    fi
    cd Developer
    if [ -d "/Users/admin/Developer/iOSProjects/" ]; then
    echo "iOSProjects Folder Exists"
    else
    mkdir iOSProjects
    fi
    if [ -d "/Users/admin/Developer/macOSProjects/" ]; then
    echo "macOSProjects Folder Exists"
    else
    mkdir macOSProjects
    fi
    
  3. Save the file with the name FolderCreator on the Desktop.
  4. Open the Terminal Application
  5. Let us make the script executable. To do that, run the commands:
    cd ~/Desktop
    chmod 777 FolderCreator
    
  6. Now run the command:
    ./FolderCreator

You have now easily created your own shell script. For more information about terminal commands you can read the following articles: Terminal Commands for OS X – BasicTerminal Commands for OS X – Part 2Terminal Commands – Part 3, & Configuring/Troubleshooting OS X Using Command Line

AppleScript

AppleScript is Apple’s proprietary scripting technology. It comes bundled as a part of macOS. To create AppleScript tasks we need to use the built in AppleScript editor.

Here is an example of a small AppleScript

tell application “Finder” to set the view for all Finder Windows as column view
tell application “Finder” to close every Finder Window
tell application “Safari”
open location “<a href="http://www.arunpatwardhan.com">http://www.arunpatwardhan.com</a>
open location “<a href="http://www.amaranthine.in/feedback">http://www.amaranthine.in/feedback</a>
open location “<a href="http://www.amaranthine.in/gallery">http://www.amaranthine.in/gallery</a>
end tell

Copy that block of commands in your AppleScript editor and see what comes up.

There are many more things that can be done with AppleScript. You can have popup windows asking users for commands, turn off the computer. Change the settings for different parts of the OS and for different applications. All this with commands written in a single file. All the user has to do is double click the file.

For more information about AppleScript visit Apple’s Developer site.

Launch Agents, Launch Daemons

NOTE: Scheduling Launch Agents/Launch Daemons improperly may leave your computer in an unusable state. Always test this on a computer that does not contain important data. If you are unsure, please consult someone with knowledge of the same before proceeding ahead.

Launch Agents/Launch Daemons allow you to schedule tasks which are to be performed at intervals. You can also use them to ensure that tasks are kept running and that the user does not have the possibility to quit them. To setup a launch daemon:

  1. First create a Plist file that looks like the one below. I have created a script called echoer and placed it in the /Users/admin/Applications folder where admin is the user.Screen Shot 2018-03-22 at 10.34.18 AM
  2. Place the file in the ~/Library/LaunchAgents folder. Name it in.amaranthine.demod.plist
  3. Run the command in terminal to load the Launch Agent.
    launchctl load ~/Library/LaunchAgent/in.amaranthine.demod.plist

That’s it you have just setup a simple launch agent which will ensure that your script runs every 6 seconds.

For more information or to create detailed Launch Agents/Launch Daemons visit:Creating Launch Agents & Launch Daemons

Login Items

An easy way to automatically load, Applications/Files/Folder, as soon as well login is to use Login Items. This is very easy to do.

  1. Open System Preferences > Users & Groups
  2. Switch to the Login Items tab.IMG_1560
  3. Click on the ‘+’ sign at the bottom to add new Applications. Let’s add Maps so that it launches as soon as we login. You should see it appear in the list.IMG_1561

That’s it. You have setup login items. You can repeat this process for as many applications as you wish.

Others

PHP, Perl, Python, Javascript, Swift allow you to create custom automated tasks and routines. These require knowledge of programming.

Choosing the right approach

Which one to choose depends on a lot of factors but we can break it down to 2:

  • You are a technically qualified person and understand things like programming, scripting and command line
  • You are an end user working either at home or in office.

End User

If you are an End user then you should really stick to Automator and Login Items. These are the ones that are the easiest to implement and least likely to cause any issues. You could venture and explore other options if you have a good understanding of them. Or you can ask the IT or Tech Support teams to help you with scripting and other technologies.

Tech Support or IT Person

Any of the tools mentioned above can be used by you. Make sure that you have a good command over the tools and are able to troubleshoot issues arising out of their usage.

Note: The programs/applications/tools and languages mentioned in this article may not cover all the available options. Also, anyone who uses or implements the items mentioned in the article does so at their own risk. The author does not take responsibility for any loss or damage that may arise from the use of the programs/applications/tools and languages mentioned above.


Screen and Audio recording on macOS & iOS

In this article we are going to look at how we can use the built in Application: QuickTime to record a screen or a movie. In fact, the videos that you are about to see in the article below were created using QuickTime.

A good reason to record the activity on the screen would be to create a visual step by step guide which can be distributed to employees in the organisation. For example, you can create a video to show employees how they can sign into their company’s email account and access it from their iPhone or Mac.

Recording your Mac’s screen

Follow the steps given below to record your Mac’s screen:

  1. Open QuickTime Player
  2. Click on File > New Screen RecordingScreen Shot 2018-01-24 at 4.46.22 PM
  3. You should see the window popping up.
  4. From the drop down next to the Record button select the audio input & whether mouse clicks should be shown.Screen Shot 2018-01-24 at 4.47.29 PM
  5. Click on the Record Button. You should see a dialog asking you whether you want to record a small area or a full screen.Screen Shot 2018-01-24 at 4.47.52 PM
  6. The recording starts once the stop button in the menu bar becomes dark.
  7. Click on the stop button to stop the recording.
    Screen Shot 2018-01-24 at 4.57.49 PM
  8. Save the file that was created.

Recording your iPhone/iPad Screen

(Mirroring your iPhone Screen on the Projector)

The process of recording the iPhone/iPad screen is quite similar to recording your computer’s screen. The key thing to remember is to connect your iPhone/iPad to the Mac with the lightning cable.

Follow the steps given below to record your iPhone/iPad screen:

  1. Open QuickTime Player
  2. Click on File > New Movie Recording
  3. You should see the window popping up.
  4. From the drop down next to the Record button select the audio input & whether mouse clicks should be shown. The difference now is the fact that you get an extra option to choose the source.

Recording a Movie

Follow the steps given below to record a Movie on your Mac:

  1. Open QuickTime Player
  2. Click on File > New Movie RecordingScreen Shot 2018-01-29 at 4.11.38 PM
  3. You should see the window popping up.
  4. From the drop down next to the Record button select the audio input. You can also select your camera source from here.
    Screen Shot 2018-01-29 at 4.21.41 PM
  5. Click record to start recording & click on the stop button to stop recording.

Recording Audio

Follow the steps given below to record an Audio on your Mac:

  1. Open QuickTime Player
  2. Click on File > New Audio RecordingScreen Shot 2018-01-29 at 4.11.38 PM copy
  3. You should see the window popping up.
  4. From the drop down next to the Record button select the audio input.
  5. Click record to start recording and stop to stop recording.

Here is a quick video on how to perform the different tasks that we have seen above.

Buyers Guide for macOS & iOS in the Enterprise

This article is more of a productivity article aimed at getting first time users up and running quickly on their Mac, iPhones or iPads. Anyone looking to buy one of these products or Tech Support teams that help employees with their computers would find this article helpful. The thoughts shared here are personal, readers are welcome to share their own thoughts and experiences.

The article is not a comprehensive guide. Its aim is to give potential users some idea as to how the devices can be used in their work environment. Specifically from an Application perspective.

Macintosh

macFamily


Which one to buy?

This depends on how the device is going to be used. Here are 3 general classifications:

Basic Usage

Basic usage would mean simple day to day tasks. These are the tasks that would qualify for:

  • Checking emails
  • Browsing the web
  • Social Media
  • Listening to Music
  • Watching Movies
  • Composing letters
  • Preparing Presentations & running presentations
  • Note taking

In such a case you may want to consider buying a MacBook or a MacBook Air. If portability is not required then a Mac Mini would also do.

At entry level configurations these devices would do the job very well.

Intermediate Usage

If the tasks being performed are a little more demanding then you may want to consider higher configuration devices. Again in most cases the  MacBook or a MacBook Air would do. If portability is not required then a Mac Mini would also do. In all these cases consider one with slightly higher configuration.

For situations where the compute power is important you may even consider the MacBook Pro. For example, if there are programmers who need to work with a high configuration Mac and they need portability, then you can consider the MacBook Pro.

Pro Usage

This indicates that the tasks being performed are very compute intensive. These are some of the job profiles which may demand compute intensive resources:

  • Programmers
  • Video Editors
  • Audio Editors
  • Post Production Teams
  • Marketing & Creative Teams
  • Scientific Research

For such situations the higher end desktops & MacBook Pros would be required. So the iMac or the highest configuration Mac Mini, or the 15″ MacBook Pro would be best suited for such environments.

In some situations even more powerful computers would be required. The iMac Pro & Mac Pro should then be considered.


Built In Applications that might be useful

Productivity Tools

There are 3 applications which are a part of the suite called iWork that are very useful in organisations.

  • PAGES: Built in word processing application. You can easily created documents, letters, reports and even have them exported in Microsoft Office compatible format.
  • KEYNOTE: Built in presentation applications. Enables you to create powerful presentations from scratch. Like Pages it is possible to create presentations that are compatible with PowerPoint.
  • NUMBERS: Built in spreadsheet application. Enables you to quickly create spreadsheets and export them to Excel if needed.

The other advantage is the fact that these applications are also accessible from the cloud. Tight integration with iCloud means that you can make changes to documents from your Mac, iPhone, iPad, or iCloud.com.

Creative Tools

There are 2 applications which are available for creative purpose. These might be handy for people working in the creative departments.

  • IMOVIE: Quick create movies using videos, audios and photos that you have.
  • GARAGEBAND: A simple Music creation application that comes with a library of different instruments.

Popular Third Party Applications

These are just some of the applications.

Office Suite

Productivity

Cloud

Creative

Security

Communication

Data Backup

Virtualisation (Running Windows or Windows Applications on the Mac)


Some tasks that can be done with built in Applications

  • Scanning Documents using Preview
  • Signing Documents using Preview
  • Record Screen Activity using QuickTime
  • Record a quick movie using QuickTime
  • Automate Tasks & create workflows using Automator
  • Encrypt Data using FileVault
  • Show your iPhone/iPad screen on a projector using QuickTime on Mac
  • Backup data using Time Machine

iPhone/iPad

iosFamily


Which one to buy?

The decision on whether to buy the iPhone &/or the iPad depends a lot on what you intend to use it for. As such the major differences between the 2 devices are:

  • iPads tend to have larger screens
  • iPhone has cellular communication capability
  • iPhones are more portable as compared to iPads
  • iPads are better suited for long duration usage
  • iPads tend to be higher powered devices

While it appears that iPads are better than iPhones, that is not necessarily the case. iPhones being smaller and more compact have many advantages too.

Ideally speaking having both, an iPhone and an iPad, is the best thing to do.

To make a decision use the task list below to help find out if you need an iPhone or an iPad or both.

Note, even though I mention that the tasks can be performed easily on an iPhone, many of the tasks can also be done very easily on the iPad. The point is to illustrate ease of use in situations where you have to perform tasks with a single hand or when you are on the move.

Tasks easily performed on an iPhone

  • Making calls
  • Messaging
  • Scheduling activities such as: Reminders, Appointments, Events
  • Taking Photos & Videos
  • Emails
  • Banking Transactions
  • Finding Transit Directions
  • Finding a Taxi
  • Making E-Payments

Tasks easily performed on the iPad

  • Writing letters & blogs
  • Creating Presentations
  • Working with spreadsheets
  • Creating posters, flyers
  • Working with business applications
  • Content creation

If you do a mixture of tasks from both the lists then getting both an iPhone as well as an iPad is a good idea.

A thing to keep in mind is that the Pro version of the iPad also has a nice keyboard accessory as well as the  Pencil available. These 2 products make the whole experience so much better.

Screen size consideration

iPhone and iPad screen sizes vary quite a bit. Here are some tips on the tasks which can be best performed on specific screen sizes.

Creative Work

Generally speaking, creative tasks require a large screensize. So for an iPhone the smallest screen you should have is 4.7″. Similarly for the iPad the smallest screen you should have is the  9.7″.

Documents, letters, spreadsheets

These tasks are better performed on the iPads as such you can go for any screen size in them. Of the lot, its a lot easier to create documents and letters on the phone than spreadsheets. Again, for phones one should the larger the screen size the better.

Presentations

Like documents and spreadsheets presentations are a lot easier to create on the iPad. They can also be created from the phones. The larger the phone the better.

Messaging & Communication

This is one aspect where the screen size is not so much of an issue. In fact, some users may find the smaller screen size a lot better. Typically, the iPhone is a much better device than the iPad for this.

Productivity & General Tasks

This includes calling taxis, ordering food, taking notes, control keynote presentations, setting up appointments and reminders. These tasks are also best performed on iPhones. They can be done well with the iPad too.


Built In Applications that might be useful

Productivity Tools

There are 3 applications which are a part of the suite called iWork that are very useful in organisations.

  • PAGES: Built in word processing application. You can easily created documents, letters, reports and even have them exported in Microsoft Office compatible format.
  • KEYNOTE: Built in presentation applications. Enables you to create powerful presentations from scratch. Like Pages it is possible to create presentations that are compatible with PowerPoint.
  • NUMBERS: Built in spreadsheet application. Enables you to quickly create spreadsheets and export them to Excel if needed.

The other advantage is the fact that these applications are also accessible from the cloud. Tight integration with iCloud means that you can make changes to documents from your Mac, iPhone, iPad, or iCloud.com.

Creative Tools

There are 2 applications which are available for creative purpose. These might be handy for people working in the creative departments.

  • IMOVIE: Quick create movies using videos, audios and photos that you have.
  • GARAGEBAND: A simple Music creation application that comes with a library of different instruments.

Other Apps

  • Notes
  • Voice Memos
  • Files

Popular Third Party Applications

Office Suite

Productivity

Cloud

Creative

Security

Communication


Some tasks that can be done with built in Applications

  • Scanning Documents using Notes
  • Recording Voice Memos
  • Control HomeKit devices
  • Edit PDFs through iBooks
  • Create PDF documents through pages & then edit the PDFs either through iBooks or markup utilities
  • Record and Edit videos using the camera & iMovie

Useful iPad Accessories

 TV

There are a few things that can be done with the  TV. It can be used to mirror both macOS & iOS Devices. In which case apps such as Reflector are not really required.

It is very easy to setup and use. This can make projecting both the iPad screen as well as the iOS Screen very easy & it allows you to move across the room as you are not physically wired to the projector.

Final Word

As we can see there are a wide variety of apps available both for macOS & iOS. These include built in apps as well as Third party apps. The community of developers creating these apps is strong and growing. There are many more apps which can be used for a wide variety of purposes.

This article should give the user a fair idea as to the capabilities of devices such as iPads, MacBooks and the rest of the line up. The good thing is that for enterprise environments its easily possible to create apps that are tailored to the needs of that organisation and this makes the devices much more attractive.

macOS & iOS IT Tool List

This list is based on questions that I have been asked by various IT admins.

It is more of a collection of tools (mainly software, but a few hardware tools too) that Enterprise IT Teams might find useful while supporting/managing Macs & iPhones in the enterprise. Some of the tools are free, while others are paid. Also, it is not necessary that all the tools will be required. Of course, some tools are not meant for troubleshooting but provide a service themselves.

The below list is not an endorsement or recommendation of any of the products mentioned. These are just some of the products I have come across. You may have to do your own research to see which tool fits your organisation’s needs. The author is not responsible for any damages or loss of data that might occur from usage of these tools.

*This list is not a complete list but an ongoing project. Feel free to share your comments on tools that you may have used & I will add them to this list.

DEPLOYMENT

DeployStudio

Munki

macOS Server – NetInstall Service. To be used along with System image Utility

PACKAGE MANAGEMENT

Iceberg

pkgbuild

Suspicious Package

REMOTE MANAGEMENT

RealVNC

TeamViewer

Apple Remote Desktop

LogMeIn

BACKUPS

macOS Server – Time Machine Service

Retrospect

Carbon Copy Cloner

Chronosync

Crash Plan

DEVICE MANAGEMENT

Centrify

JAMF Casper Suite

AirWatch

Mobile Iron

macOS Server – Profile Manager Service

Apple Configurator 2

Heat LANRev

Cisco Meraki

filewave

Absolute Software

BoxTone

Maas 360 – IBM

Tangoe

Lightspeed Systems

VIRTUALIZATION

Parallels Desktop

VMWare Fusion

Oracle VirtualBox

DISK MANAGEMENT

Tuxera

Disk Drill

APPLE APPLICATIONS FOR THIRD PARTY OS

iTunes

iCloud Control Panel

Move to iOS from Android

Migration Assistant

AUTOMATION

Workflow for iOS

Automator – Built in app for creating Workflows.

AppleScript

Command Line Script

NETWORK TROUBLESHOOTING

iNetTools

Network Diagnostics

Network Ping

Wireshark

DISPLAY

Air Squirrel

SYSTEM TROUBLESHOOTING

Install Disk – I will be talking about how to create a multi-OS install disk in a later article.

SOFTWARE MANAGEMENT

macOS Server – Caching Service

Reposado

AutoPKG

Munki

HARDWARE

Thunderbolt 1,2,3 Cables
Thunderbolt 1,2
USB-C Cable

FireWire 400/800 Cables

Portable disk with macOS installed on it. Not the same as install disk. Its an external bootable hard drive with the OS installed on it. You can plug this into any Mac & boot from the external HDD.

VGA to MiniDisplay adapter

HDMI to HDMI Cable

Thunderbolt Ethernet Bridge

USB Ethernet Bridge

Adapters for the different ports supported by Macs & iPhones

Lightning Cables

Creating multi-OS Install Disk

In this article we are going to look at how to create a multi-OS Install Disk. We are going to look at the example of creating a multi-OS Install Disk for the following versions of the OS:

  • 10.9.1
  • 10.10
  • 10.10.4
  • 10.11.5
  • 10.12
  • 10.12.1
  • 10.12.2
  • 10.12.3

The idea is to have a single disk with multiple versions of the Install Disk on it. The versions should reflect the need of the organisation.

REQUIREMENTS

  1. USB Drive at least 75GB in Size. This depends on the number of Install drives you wish to have. At the very least there should be enough space to create 2 partitions of 8 GB each. 
    While I have mentioned USB drive, it need not be restricted to that interface. You can use Thunderbolt, FireWire or even an SDXC slot for this. Ideally the port should be one that is supported on maximum possible computers.
  2. Install setup for each version of the OS for which you want to create the install disk. The setup must match the version desired.
  3. A Mac running the same major version of the OS. You can only create an install disk for 10.9.x on a Mac running OS X 10.9.x, the same applies for the other versions of the OS.

The process is the same. It’s just that it needs to be repeated.

STEPS

  1. Create 8 partitions on a USB Drive. Assume that the USB Drive is called Recovery Drive. Give the partitions names Partition 1, Partition 2,….
  2. Connect the USB Drive to a Mac running 10.9.1 or later.
  3. Make sure that the OS Installer setup is located in the Applications folder.
  4. Run the following command in the command line.
    sudo /Applications/Install\ OS\ X\ Mavericks.app/Contents/Resources/createinstallmedia --volume /Volumes/Partition\ 1 --applicationpath  /Applications/Install\ OS\ X\ Mavericks.app
  5. Rename the partition as Install disk for OS X 10.9.1, if necessary.
  6. Once completed eject the USB Drive & connect it to a Mac running 10.10
  7. Make sure that the OS Installer setup is located in the Applications folder.
  8. Run the following command in the command line.
    sudo /Applications/Install\ OS\ X\ Yosemite.app/Contents/Resources/createinstallmedia --volume /Volumes/Partition\ 2 --applicationpath  /Applications/Install\ OS\ X\ Yosemite.app
  9. Rename the partition as Install disk for OS X 10.10, if necessary.
  10. Once completed eject the USB Drive & connect it to a Mac running 10.10.4
  11. Make sure that the OS Installer setup is located in the Applications folder.
  12. Run the following command in the command line.
    sudo /Applications/Install\ OS\ X\ Yosemite.app/Contents/Resources/createinstallmedia --volume /Volumes/Partition\ 3 --applicationpath  /Applications/Install\ OS\ X\ Yosemite.app
  13. Rename the partition as Install disk for OS X 10.10.4, if necessary.
  14. Once completed eject the USB Drive & connect it to a Mac running 10.11.5 or later.
  15. Make sure that the OS Installer setup is located in the Applications folder.
  16. Run the following command in the command line.
    sudo /Applications/Install\ OS\ X\ El\ Capitan.app/Contents/Resources/createinstallmedia --volume /Volumes/Partition\ 4 --applicationpath  /Applications/Install\ OS\ X\ El\ Capitan.app
  17. Rename the partition as Install disk for OS X 10.11.5, if necessary.
  18. Once completed eject the USB Drive & connect it to a Mac running 10.12 or later.
  19. Make sure that the OS Installer setup is located in the Applications folder.
  20. Run the following command in the command line.
    sudo /Applications/Install\ macOS\ Sierra.app/Contents/Resources/createinstallmedia --volume /Volumes/Partition\ 5 --applicationpath  /Applications/Install\ macOS\ Sierra.app
  21. Rename the partition as Install disk for OS X 10.12., if necessary.
  22. Once completed eject the USB Drive & connect it to a Mac running 10.12.1 or later.
  23. Make sure that the OS Installer setup is located in the Applications folder.
  24. Run the following command in the command line.
    sudo /Applications/Install\ macOS\ Sierra.app/Contents/Resources/createinstallmedia --volume /Volumes/Partition\ 6 --applicationpath  /Applications/Install\ macOS\ Sierra.app
  25. Rename the partition as Install disk for OS X 10.12.1., if necessary.
  26. Once completed eject the USB Drive & connect it to a Mac running 10.12.2 or later.
  27. Make sure that the OS Installer setup is located in the Applications folder.
  28. Run the following command in the command line.
    sudo /Applications/Install\ macOS\ Sierra.app/Contents/Resources/createinstallmedia --volume /Volumes/Partition\ 7 --applicationpath  /Applications/Install\ macOS\ Sierra.app
  29. Rename the partition as Install disk for OS X 10.12.2, if necessary.
  30. Once completed eject the USB Drive & connect it to a Mac running 10.12.3 or later.
  31. Make sure that the OS Installer setup is located in the Applications folder.
  32. Run the following command in the command line.
    sudo /Applications/Install\ macOS\ Sierra.app/Contents/Resources/createinstallmedia --volume /Volumes/Partition\ 8 --applicationpath  /Applications/Install\ macOS\ Sierra.app
  33. Rename the partition as Install disk for OS X 10.12.3, if necessary.

The commands shown above might be different from what appears on your screen. A lot will depend on what you have named your partitions as, the name you may have given to the OS Installer file, and the location of the OS Installer.

The process of renaming the partitions post creation of the install disk is not necessary, but very useful because that will help you identify the appropriate partition when using the drive.

The above process is very scalable & can be done for even more versions of the OS if required.

Screen Shot 2017-04-17 at 11.11.39 AM
This diagram illustrates the layout of the different partitions on a single USB Drive.

When to use Swift & when to use Objective-C?

Over the past few years I have received a number of questions with regards to Swift & Objective-C. Specifically related to the future of the 2. I will try to address those questions in the form of an FAQ.

Should I learn Swift or Objective-C?

This is a question that I get from developers new to iOS/macOS App Development. Ideally speaking, you should learn Swift. As that is going to become the main language for App development on Apple’s ecosystem. However, the reality is a little different. There are a large number of applications that are written in Objective-C. You are likely to encounter them at your workplace. You may also have to maintain, upgrade & improve those apps. In such a case, it makes sense to learn Objective-C too.

Can I mix Swift & Objective-C in the same project?

Yes! But remember that you should check for feature compatibility between the 2 languages. Adding Swift code to an Objective-C project may not be very beneficial as only those features that are compatible with Objective-C can be written in Swift.

Going the other way round is not a problem. You can read more about that here:Mixing Swift & Objective-C

Will Objective-C be deprecated in the future?

That is an interesting question. There is no formal announcement from Apple stating the Objective-C is going to be deprecated. However, one can expect more attention to be paid to Swift. That is where most of the newest techniques, tools & technologies are going to be available. Objective-C will keep running as it is as of now.

Can I mix Swift with other Programming Languages?

Swift can easily be mixed with Objective-C. If you wish to incorporate C++ or C code in your Swift Project then wrapping them in Objective-C code allows you to achieve this.

Apart from that Swift does support working with C code code. You can read about that here:Interacting with C APIs.

Swift does not provide interoperability support for any other languages as of now.

Which version of Swift should I use?

It is recommended that you use the latest available version of Swift. However, the actual version that you work on depends on many other factors like: compatibility with OS Versions, support & business related choices.

Why shouldn’t we just convert all our Objective-C code to Swift and keep things simple?

A very tempting proposition. However, practical realities prevent us from doing this. The process of converting from Objective-C to Swift is time consuming. Apart from having to convert the syntax, the code also needs to be optimised taking into account the new features that are available. This will mean extensive testing and quality assurance. Most companies will not invest their resources into this endeavour.

A better approach is to migrate to Swift gradually. Here are some ways to do this:

  1. If its a brand new product/app that you are creating, start it in Swift.
  2. Any new reusable code components that are being created should be done in Swift (they should be Objective-C compatible if you intend to use this code in Objective-C projects).
  3. If any part of a product is going to undergo heavy change, either due to a bug fix or a new feature. This is a good time to convert it into Swift.

A good example is how Apple is approaching the process of migrating to Swift. They are doing it component by component.

I have been developing apps in Objective-C for some time. I am able to create any reasonably complicated app now. If Objective-C hasn’t been deprecated then should I start making apps in Swift?

This is a choice that you have to make. It is recommended that new apps (at the very least) be made in Swift as that is the language that will undergo the maximum amount of changes & improvements in the future.

What do you suggest as a trainer?

Another question that I get very often. It depends on the situation. I would say learn both Swift & Objective-C. You can skip learning Objective-C if you are confident that you will not have to work with any projects written in that language.

If I am starting on a brand new project I would use Swift. But if its an Objective-C project I would stick to Objective-C.

Can Swift development only be done on macOS?

No! Swift development can also be done on Linux. However, iOS/macOS/tvOS/watchOS App Development can only be done on macOS through Xcode.

How should I migrate to Swift?

There are different approaches that one can use. It all depends on the situation and needs of your organisation. Here are some things that you can do:

  • Start development of brand new apps (from scratch) in Swift.
  • If you are creating a brand new library which will be used for future projects then go ahead with Swift.
  • If a major component of an existing app is going to be changed significantly then you can go ahead with Swift.

You can do all or some of the above. There may be other strategies too. You should also factor in the cost of migration from one language to another.