In this article we are going to look at how to create a multi-OS Install Disk. We are going to look at the example of creating a multi-OS Install Disk for the following versions of the OS:
- 10.9.1
- 10.10
- 10.10.4
- 10.11.5
- 10.12
- 10.12.1
- 10.12.2
- 10.12.3
The idea is to have a single disk with multiple versions of the Install Disk on it. The versions should reflect the need of the organisation.
REQUIREMENTS
- USB Drive at least 75GB in Size. This depends on the number of Install drives you wish to have. At the very least there should be enough space to create 2 partitions of 8 GB each.
While I have mentioned USB drive, it need not be restricted to that interface. You can use Thunderbolt, FireWire or even an SDXC slot for this. Ideally the port should be one that is supported on maximum possible computers. - Install setup for each version of the OS for which you want to create the install disk. The setup must match the version desired.
- A Mac running the same major version of the OS. You can only create an install disk for 10.9.x on a Mac running OS X 10.9.x, the same applies for the other versions of the OS.
The process is the same. It’s just that it needs to be repeated.
STEPS
- Create 8 partitions on a USB Drive. Assume that the USB Drive is called Recovery Drive. Give the partitions names Partition 1, Partition 2,….
- Connect the USB Drive to a Mac running 10.9.1 or later.
- Make sure that the OS Installer setup is located in the Applications folder.
- Run the following command in the command line.
sudo /Applications/Install\ OS\ X\ Mavericks.app/Contents/Resources/createinstallmedia --volume /Volumes/Partition\ 1 --applicationpath /Applications/Install\ OS\ X\ Mavericks.app
- Rename the partition as Install disk for OS X 10.9.1, if necessary.
- Once completed eject the USB Drive & connect it to a Mac running 10.10
- Make sure that the OS Installer setup is located in the Applications folder.
- Run the following command in the command line.
sudo /Applications/Install\ OS\ X\ Yosemite.app/Contents/Resources/createinstallmedia --volume /Volumes/Partition\ 2 --applicationpath /Applications/Install\ OS\ X\ Yosemite.app
- Rename the partition as Install disk for OS X 10.10, if necessary.
- Once completed eject the USB Drive & connect it to a Mac running 10.10.4
- Make sure that the OS Installer setup is located in the Applications folder.
- Run the following command in the command line.
sudo /Applications/Install\ OS\ X\ Yosemite.app/Contents/Resources/createinstallmedia --volume /Volumes/Partition\ 3 --applicationpath /Applications/Install\ OS\ X\ Yosemite.app
- Rename the partition as Install disk for OS X 10.10.4, if necessary.
- Once completed eject the USB Drive & connect it to a Mac running 10.11.5 or later.
- Make sure that the OS Installer setup is located in the Applications folder.
- Run the following command in the command line.
sudo /Applications/Install\ OS\ X\ El\ Capitan.app/Contents/Resources/createinstallmedia --volume /Volumes/Partition\ 4 --applicationpath /Applications/Install\ OS\ X\ El\ Capitan.app
- Rename the partition as Install disk for OS X 10.11.5, if necessary.
- Once completed eject the USB Drive & connect it to a Mac running 10.12 or later.
- Make sure that the OS Installer setup is located in the Applications folder.
- Run the following command in the command line.
sudo /Applications/Install\ macOS\ Sierra.app/Contents/Resources/createinstallmedia --volume /Volumes/Partition\ 5 --applicationpath /Applications/Install\ macOS\ Sierra.app
- Rename the partition as Install disk for OS X 10.12., if necessary.
- Once completed eject the USB Drive & connect it to a Mac running 10.12.1 or later.
- Make sure that the OS Installer setup is located in the Applications folder.
- Run the following command in the command line.
sudo /Applications/Install\ macOS\ Sierra.app/Contents/Resources/createinstallmedia --volume /Volumes/Partition\ 6 --applicationpath /Applications/Install\ macOS\ Sierra.app
- Rename the partition as Install disk for OS X 10.12.1., if necessary.
- Once completed eject the USB Drive & connect it to a Mac running 10.12.2 or later.
- Make sure that the OS Installer setup is located in the Applications folder.
- Run the following command in the command line.
sudo /Applications/Install\ macOS\ Sierra.app/Contents/Resources/createinstallmedia --volume /Volumes/Partition\ 7 --applicationpath /Applications/Install\ macOS\ Sierra.app
- Rename the partition as Install disk for OS X 10.12.2, if necessary.
- Once completed eject the USB Drive & connect it to a Mac running 10.12.3 or later.
- Make sure that the OS Installer setup is located in the Applications folder.
- Run the following command in the command line.
sudo /Applications/Install\ macOS\ Sierra.app/Contents/Resources/createinstallmedia --volume /Volumes/Partition\ 8 --applicationpath /Applications/Install\ macOS\ Sierra.app
- Rename the partition as Install disk for OS X 10.12.3, if necessary.
The commands shown above might be different from what appears on your screen. A lot will depend on what you have named your partitions as, the name you may have given to the OS Installer file, and the location of the OS Installer.
The process of renaming the partitions post creation of the install disk is not necessary, but very useful because that will help you identify the appropriate partition when using the drive.
The above process is very scalable & can be done for even more versions of the OS if required.
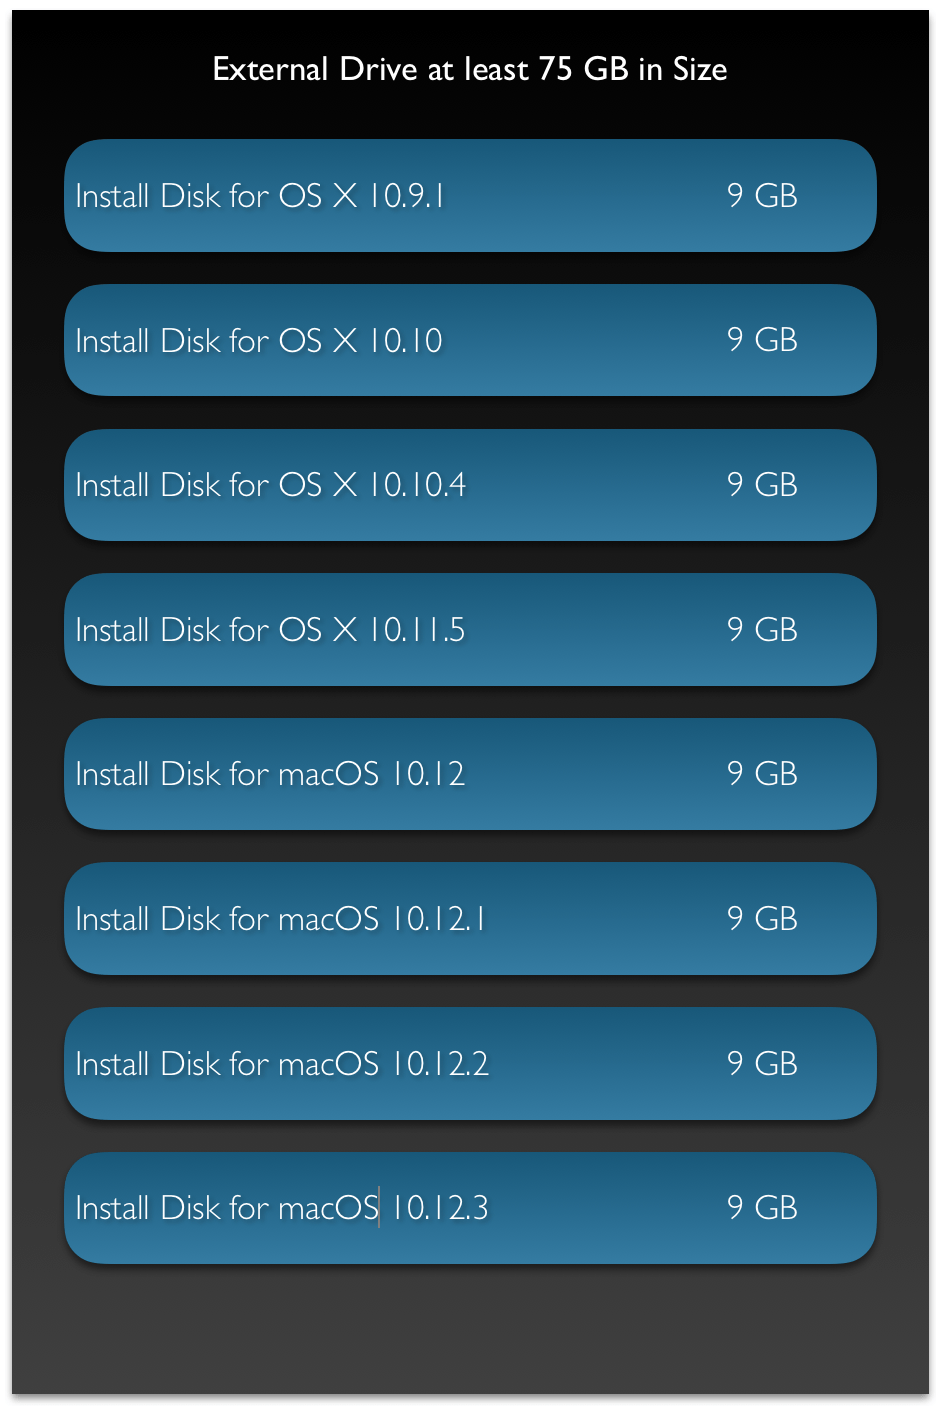
- This diagram illustrates the layout of the different partitions on a single USB Drive.

Pingback: macOS & iOS IT Tool List | Arun Patwardhan's Blog