Formatting in Playgrounds and Xcode projects is achieved using Markups in comments. The following article describes some of the things that you can do. Note that there are many more ways of acheiving some of the effects shown here.
The idea behind markups is to make your code more readable whether you are using Playgrounds or Xcode.
If you can only see the commented code in playgrounds and not the rendered markup then click on Editor > Show Rendered Markup to view the rendering. You can use this option to toggle back and forth.
Formatting in Playgrounds
Plain Text
There are different kinds of text you can place in a Playground. Let us look at the code below to see what all is achieved.
//: # Documentation
//: ## Contents
//: * Text Description
//: * Documentation for Functions
//: * Documentation for Types
//: * Formatting Text
//:  - Code
//:  - Italics
//:  - Bold
//: * Inserting Items
//: * Links
//: * Assets
//: * Callouts
The comments here are in the format //:.

This is how the rendered output looks.
Line 1 shows how to render a Title Text. This is achieved using the # before the text.
Line 2 shows how to get a lower sized text by using ## instead of #. We can achieve more levels if we wish.
For multi line text with bullets use the *, +, – symbols. This is seen on lines 7-13.
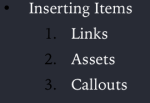
It is also possible to create numbered lists too. Simply type the numbered list & it renders accordingly.
//: * Inserting Items
//: 1. Links
//: 2. Assets
//: 3. Callouts
This renders as:
Playground Pages
It is possible to have multiple pages in Playgrounds. This way we can create a more readable experience that makes the code structured, compartmentalised and easier to understand.
To do that open a playground and then simply add a playground by clicking File > New > Playground Page.
To move from one page to the next simply write the comment.
//: [Next Topic](@next)
This will automatically place a link to jump to the next page.
Similarly you can add a link to move to the previous page.
//: [Previous](@previous)
Code block
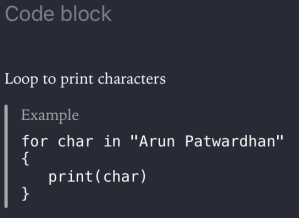
We can even show a code block in the text. It is formatted in a different manner to tell the user that it is a code block.
//: ### Code block
/*:
Loop to print characters
````
for char in "Arun Patwardhan"
{
    print(char)
}
*/
This is how it appears:
Function Help
There is also some formatting that can be done for functions, types and other pieces of code written in a playground. This also appears on the quick help of the sidebar.
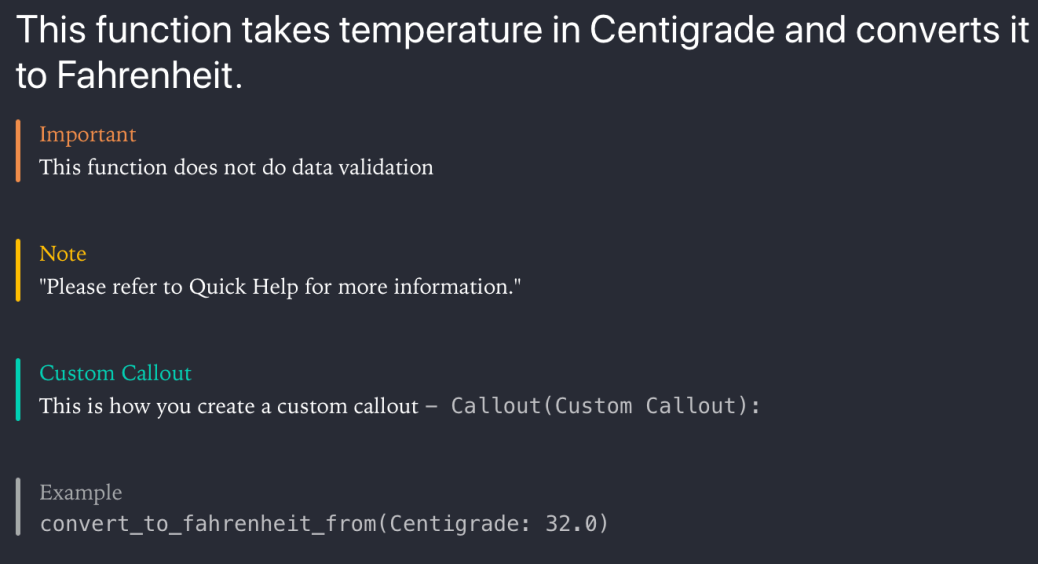
We will look at how to create formatted markup for playgrounds.
/*:
## This function takes temperature in Centigrade and converts it to Fahrenheit.
- important: This function does not do data validation
*/
/*:
- Note: "Please refer to Quick Help for more information."
*/
/*:
- Callout(Custom Callout): This is how you create a custom callout ` - Callout(Custom Callout):`
*/
/*:
- Example: `convert_to_fahrenheit_from(Centigrade: 32.0)`
*/
This renders as:
Formatted Markup for Functions.
We will look at formatting the comments to appear in Quick Help in the Formatting for Xcode section.
Inserting Links
The last bit is related to inserting links. We have already seen how to insert links for moving between Playground pages.
Redirecting to URL
/*:
For more articles on Programming, see [Programming articles @ arunpatwardhan.com](https://arunpatwardhan.com/category/programming/)
*/
This renders as:

Formatting for Xcode
Function Help
As we saw in the earlier section we can create a lot of documentation for Functions. The approach is similar to the one we used in Playgrounds. We will be using callouts to provide information. We will use some callouts for Playgrounds, however, there are many more callouts available for Xcode Symbol Documentation as compared to Playground. The main difference here is the fact that the comments begin with /** instead of /*:.
“The code shown below will work in both, regular Xcode projects as well as Playgrounds.”
/**
This function takes temperature in Centigrade and converts it to Fahrenheit.
- important: This function does not do data validation
- parameter temp: This is the temperature in Centigrade. It can be a negative value too.
- returns: This is the temperature in Fahrenheit.
- requires: `temp > -273.0 && temp < 1000.0` - Note: The requirement mentioned is not enforced. - Since: iOS 11 - author: Arun Patwardhan - copyright: Copyright (c) Amaranthine 2015 - version: 1.0 */
func convert_to_fahrenheit_from(Centigrade temp : Float) -> Float
{
    return ((temp * 9.0 / 5.0) + 32.0)
}
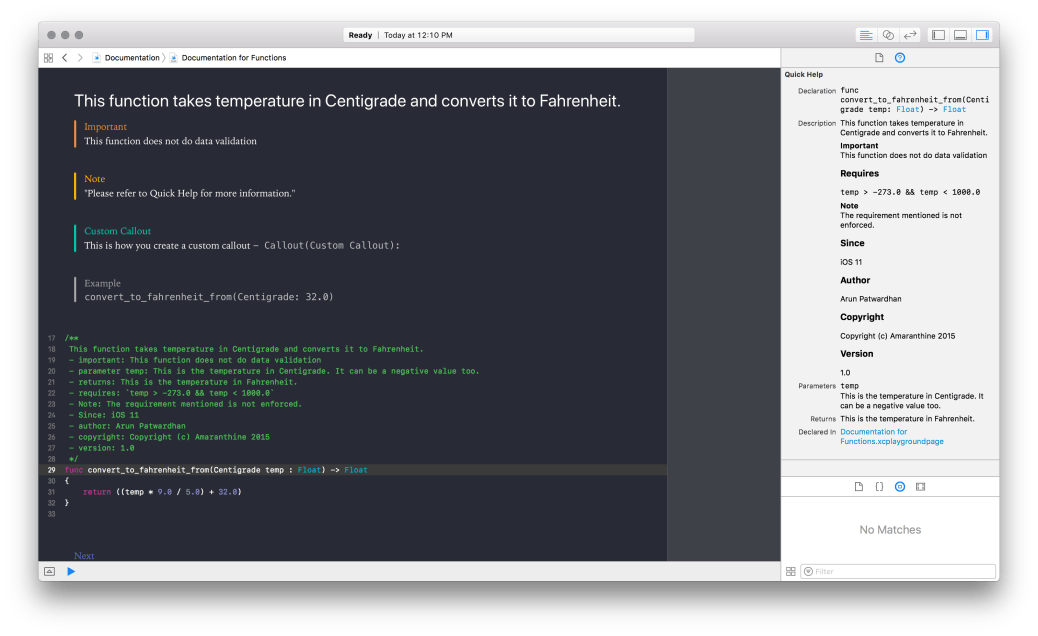
This renders as:
Formatted Markup for Playgrounds as well as Quick Help
Note that the quick help appears in the Right hand side sidebar. That too only after you select the function.
As we can see this makes the function a lot more readable. The real advantage of Quick Help comes in the fact that the documentation is now easily accessible no matter which file we are in within the project. The also helps the developer put in the right kind of information, required for proper usage of the function, in the help section.
Note that the rendered markup for Playgrounds will only appear in Playgrounds.
Inserting Links
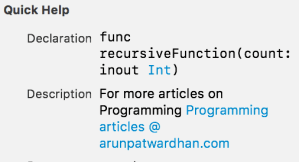
Just like in the previous section where we introduced links we can add links to the symbol documentation.
/**
   For more articles on Programming [Programming articles @ arunpatwardhan.com (https://arunpatwardhan.com/category/programming/)
*/
func recursiveFunction(count : inout Int)
{
   while 0 <= count
   {
      count -= 1
      recursiveFunction(count: &count)
   }
}
This renders in Quick Help as:
Callouts supported by Playgrounds
- Custom Callout
- Example
Callouts supported by Symbol Documentation
- Attention
- Author
- Authors
- Bug
- Complexity
- Copyright
- Date
- Invariant
- Precondition
- Postcondition
- Remark
- Requires
- See Also
- Since
- Version
- Warning
Callouts supported by both Playgrounds & Symbol Documentation
- Experiment
- Important
- Note

