Its a safe assumption that most of us use WhatsApp for our everyday communication. In fact, it is one of the most widely used methods of communication.
People use it for all kinds of things: Staying in touch with friends, family. Collaborating with people on an office project, conducting team meetings, communicating with a client. This means that our conversations are of utmost importance to us. So one should take care & back these messages up on a regular basis. The big advantage with backup is that one can even restore past conversations from the backup when the user switches from one iOS device to the other.
Use the following steps to backup your messages to iCloud
-
First make sure you have turned on iCloud.
-
Open Settings > iCloud
-
Sign in with your Apple ID
-
Switch to Whatsapp
-
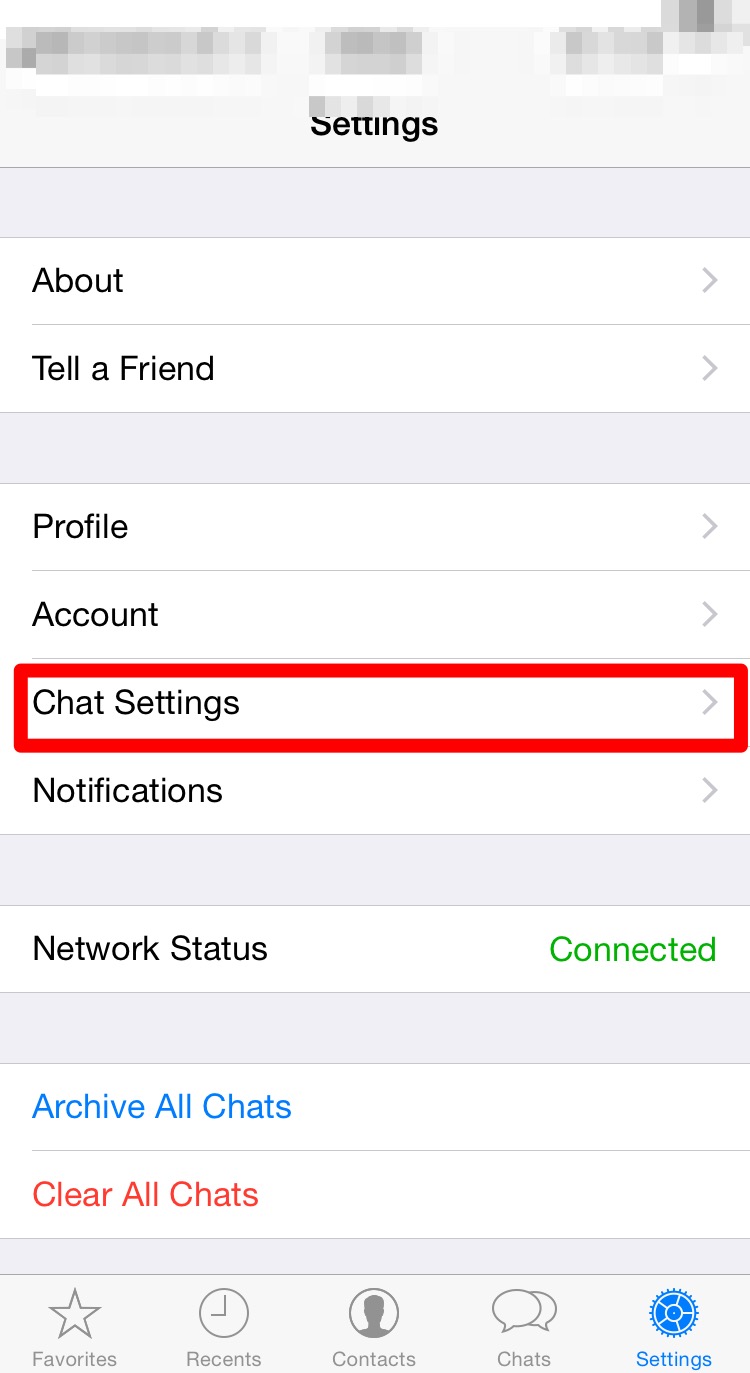
Click on Settings
-
Click on Chat Settings
-
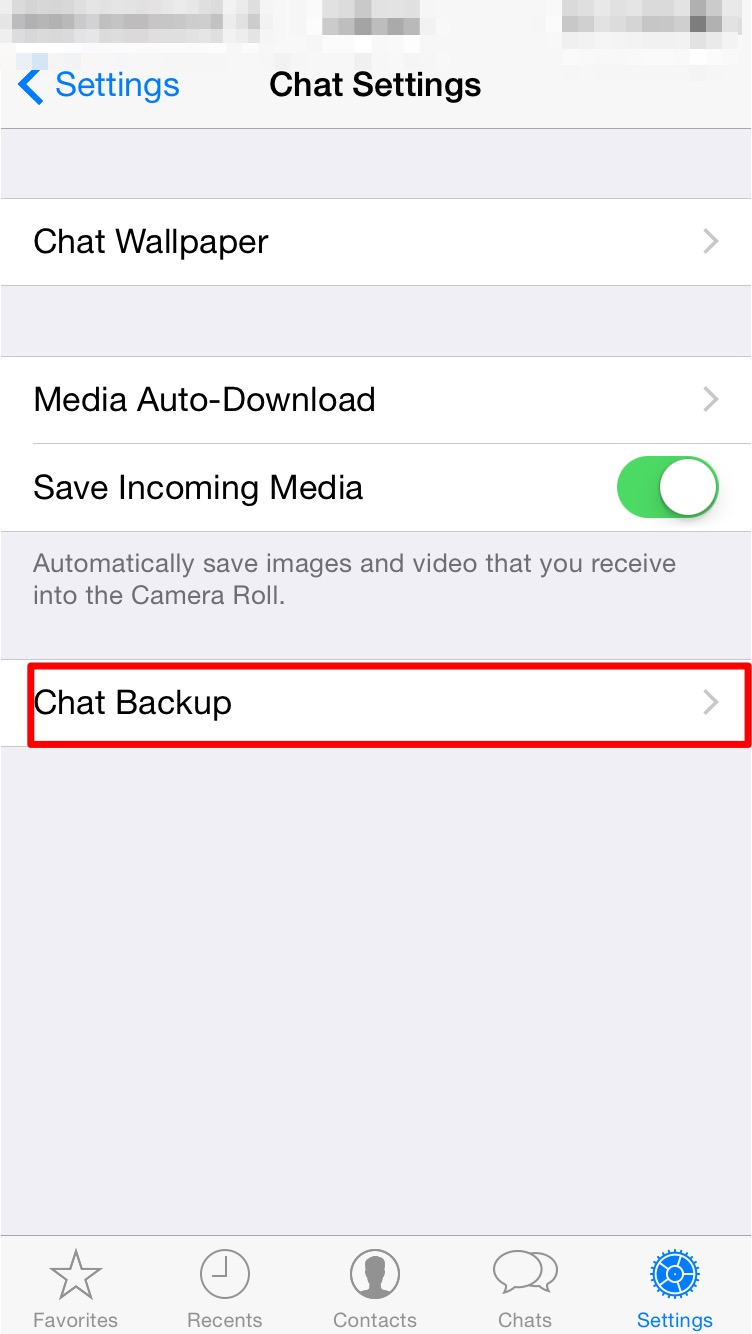
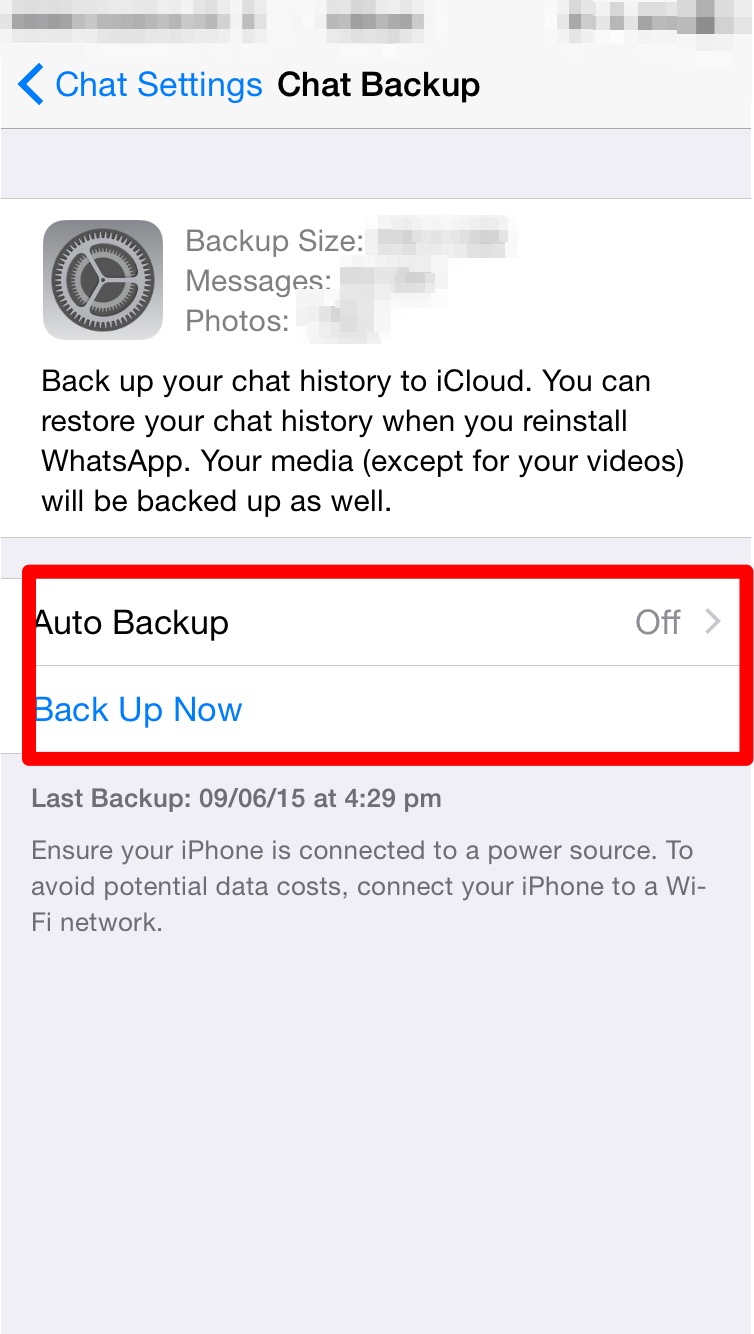
Click on Chat Backup
-
Here you can set the auto backup feature or manually take a backup.
-
Thats it, your Whatsapp messages are now being backed up.
While restoring the process is straightforward.
-
Make sure you are signed into iCloud.
-
Install Whatsapp.
-
Enter your Phone number to verify.
-
Enter the Code sent via SMS to your phone.
-
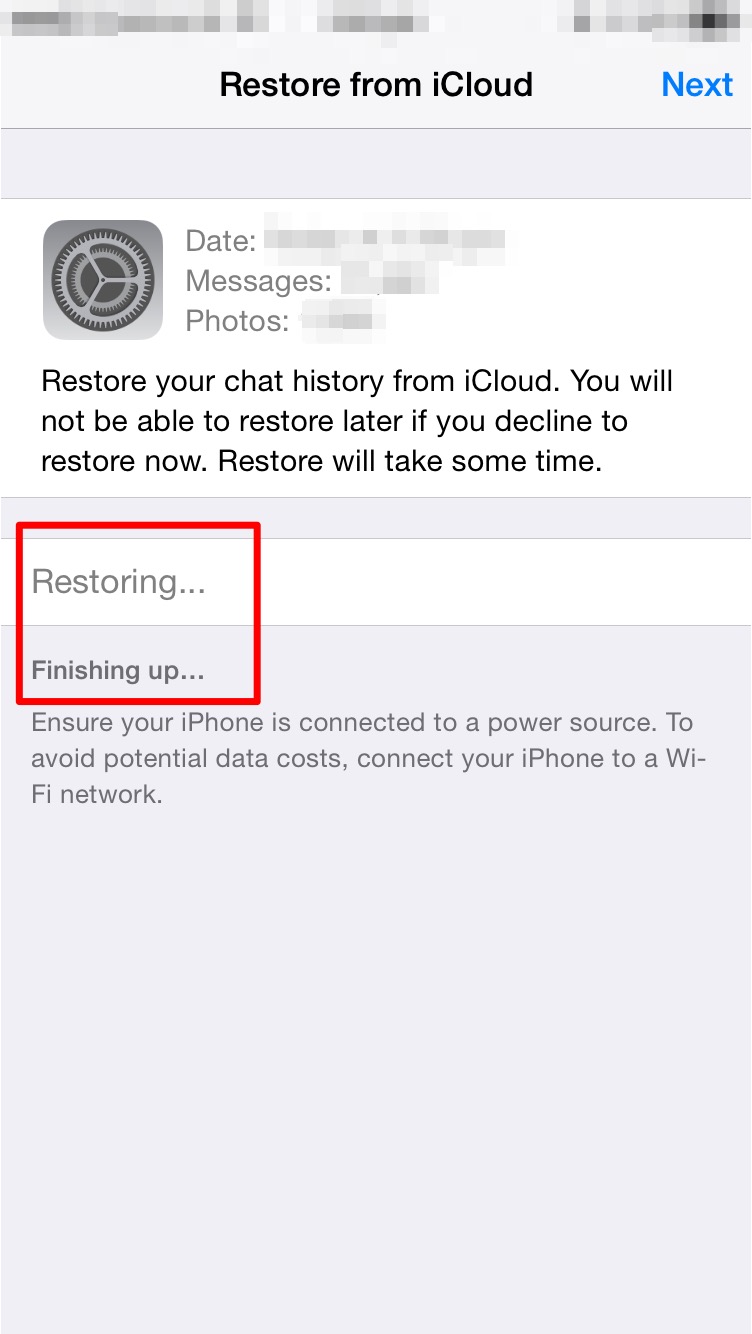
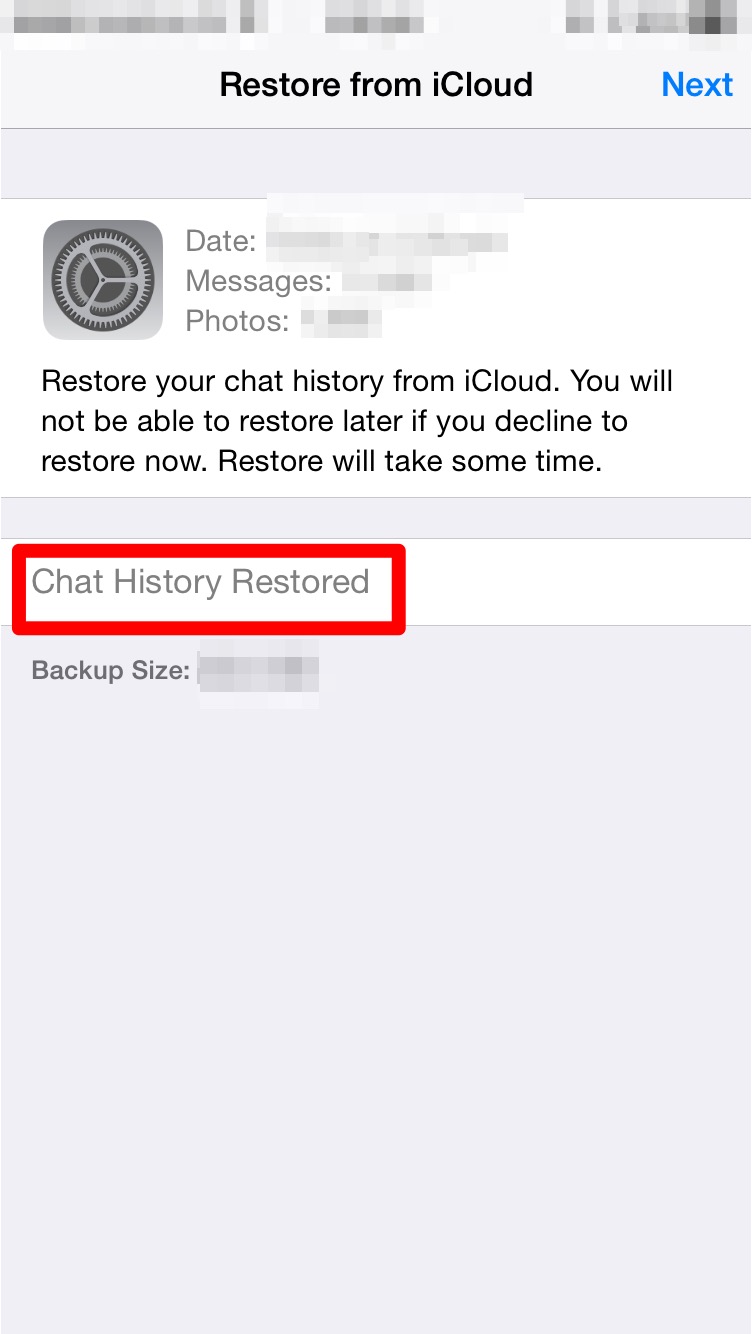
You will be asked whether you want to restore your previous chats from iCloud.

-
Just click restore.


-
All your previous conversations should come up now.