Creating Project Templates
The process of creating project templates is quite similar to the one for creating file templates. In fact, depending on how you design things, file templates may be used in project templates too. In this example we are going to create a variant of the popular “Single View App” template. We will implement the MVVM architecture using the Single View App template.
- Navigate to the folder:
/Applications/Xcode.app/Contents/Developer/Platforms/iPhoneOS.platform/Developer/Library/Xcode/Templates/Project Templates/iOS/Applications/Single View App.xctemplate/
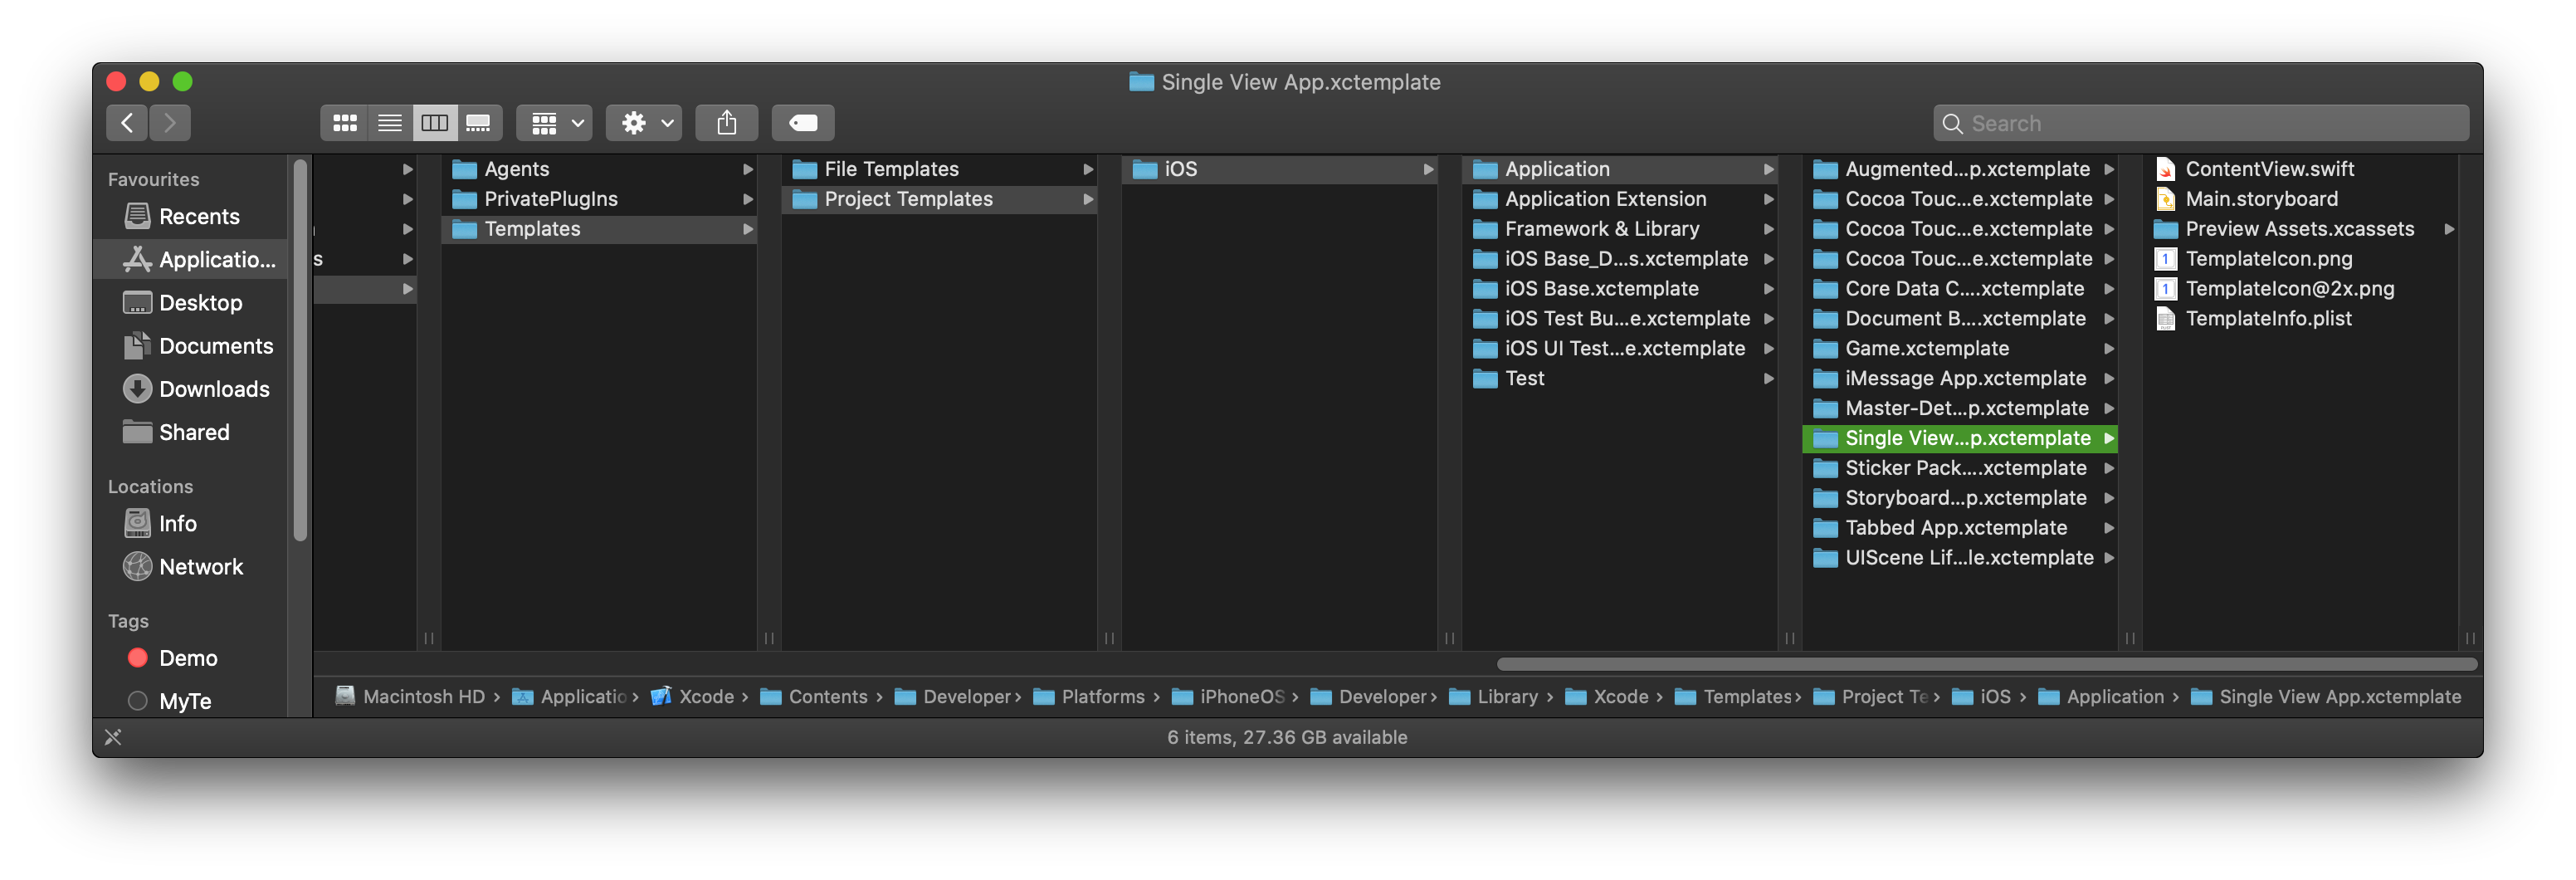
- Copy this folder on to your desktop.
- Rename it as MVVM App.xctemplate.
- Replace the TemplateIcon files with files of your choice.
- Next we will create the ViewModel files. We will use the basic files provided by the template wizard and additionally provide a file that will act as a view model.
If you notice we have 2 UI files in there. ContentView.swift as well as the Main.storyboard. One of them will be created when the user creates the project. This will be based on the users choice for UI. All this is configured in the TemplateInfo.plist file.
The project itself could be created in 2 different languages. It could be an Objective-C project or a Swift project. Hence we will have to keep 2 versions of the file ready: Swift & Objective-C.
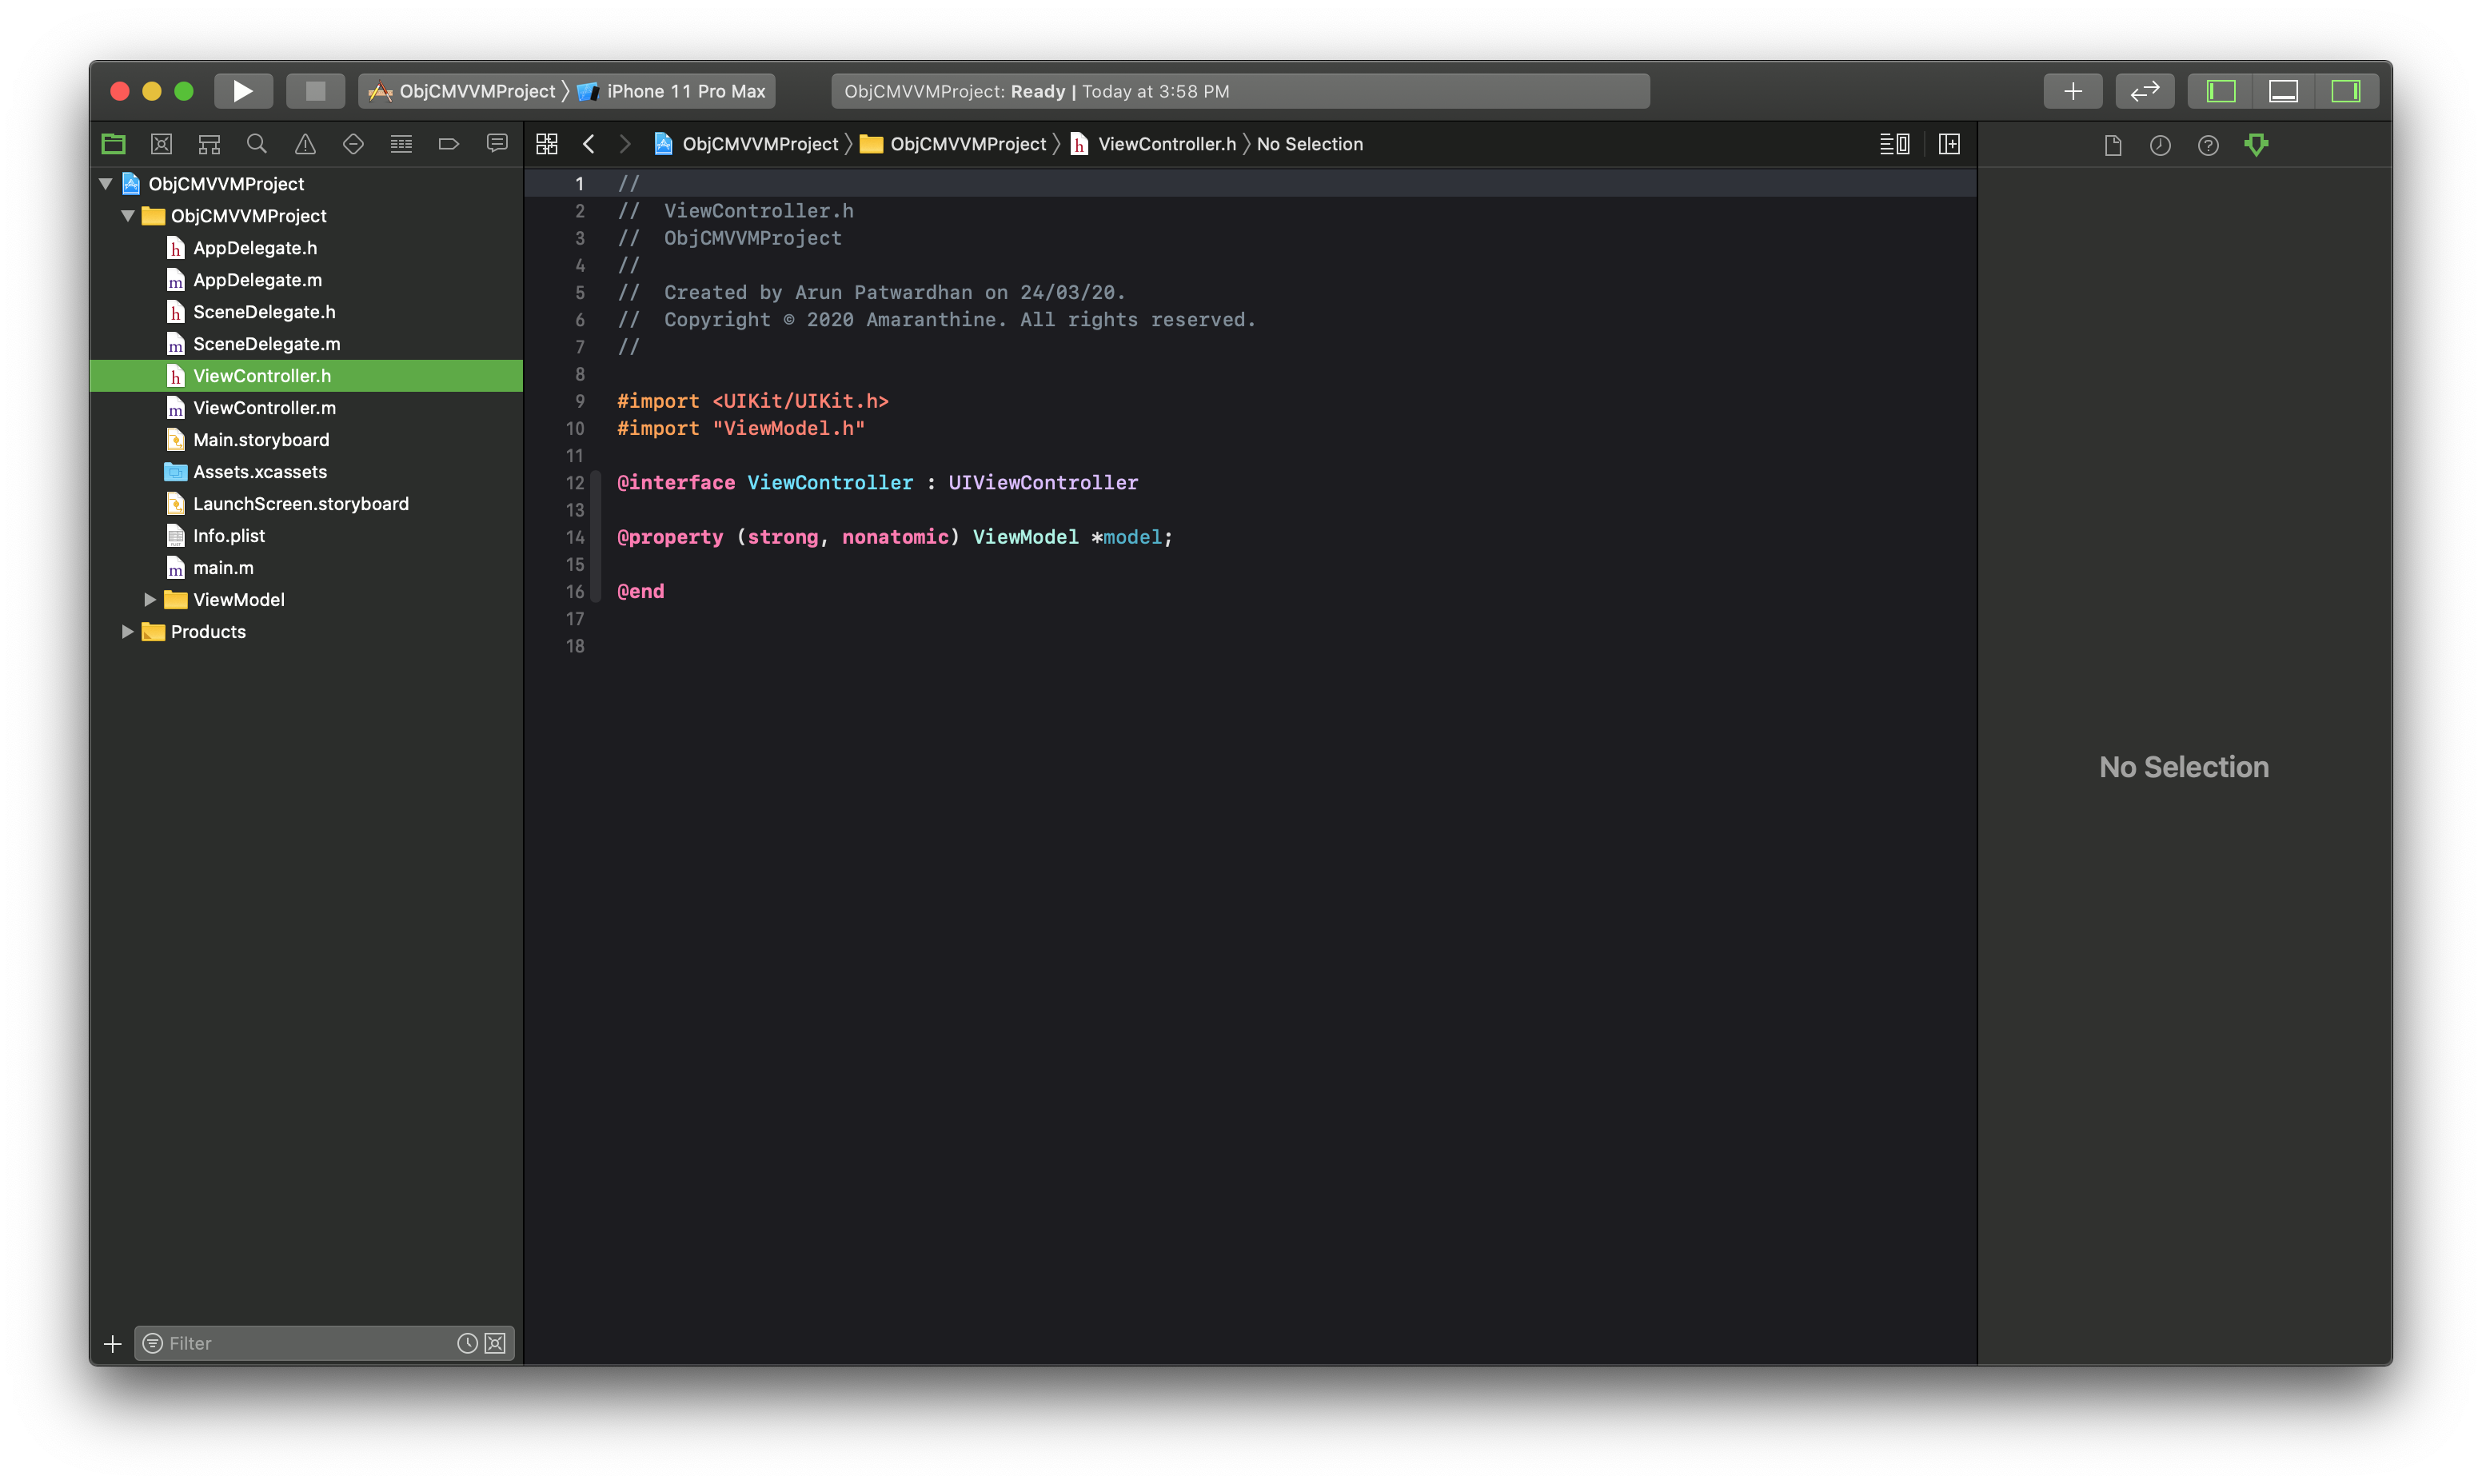
- Let us start with the Objective-C version. Create 2 new files in the folder call them ViewModel.h & ViewModel.m.
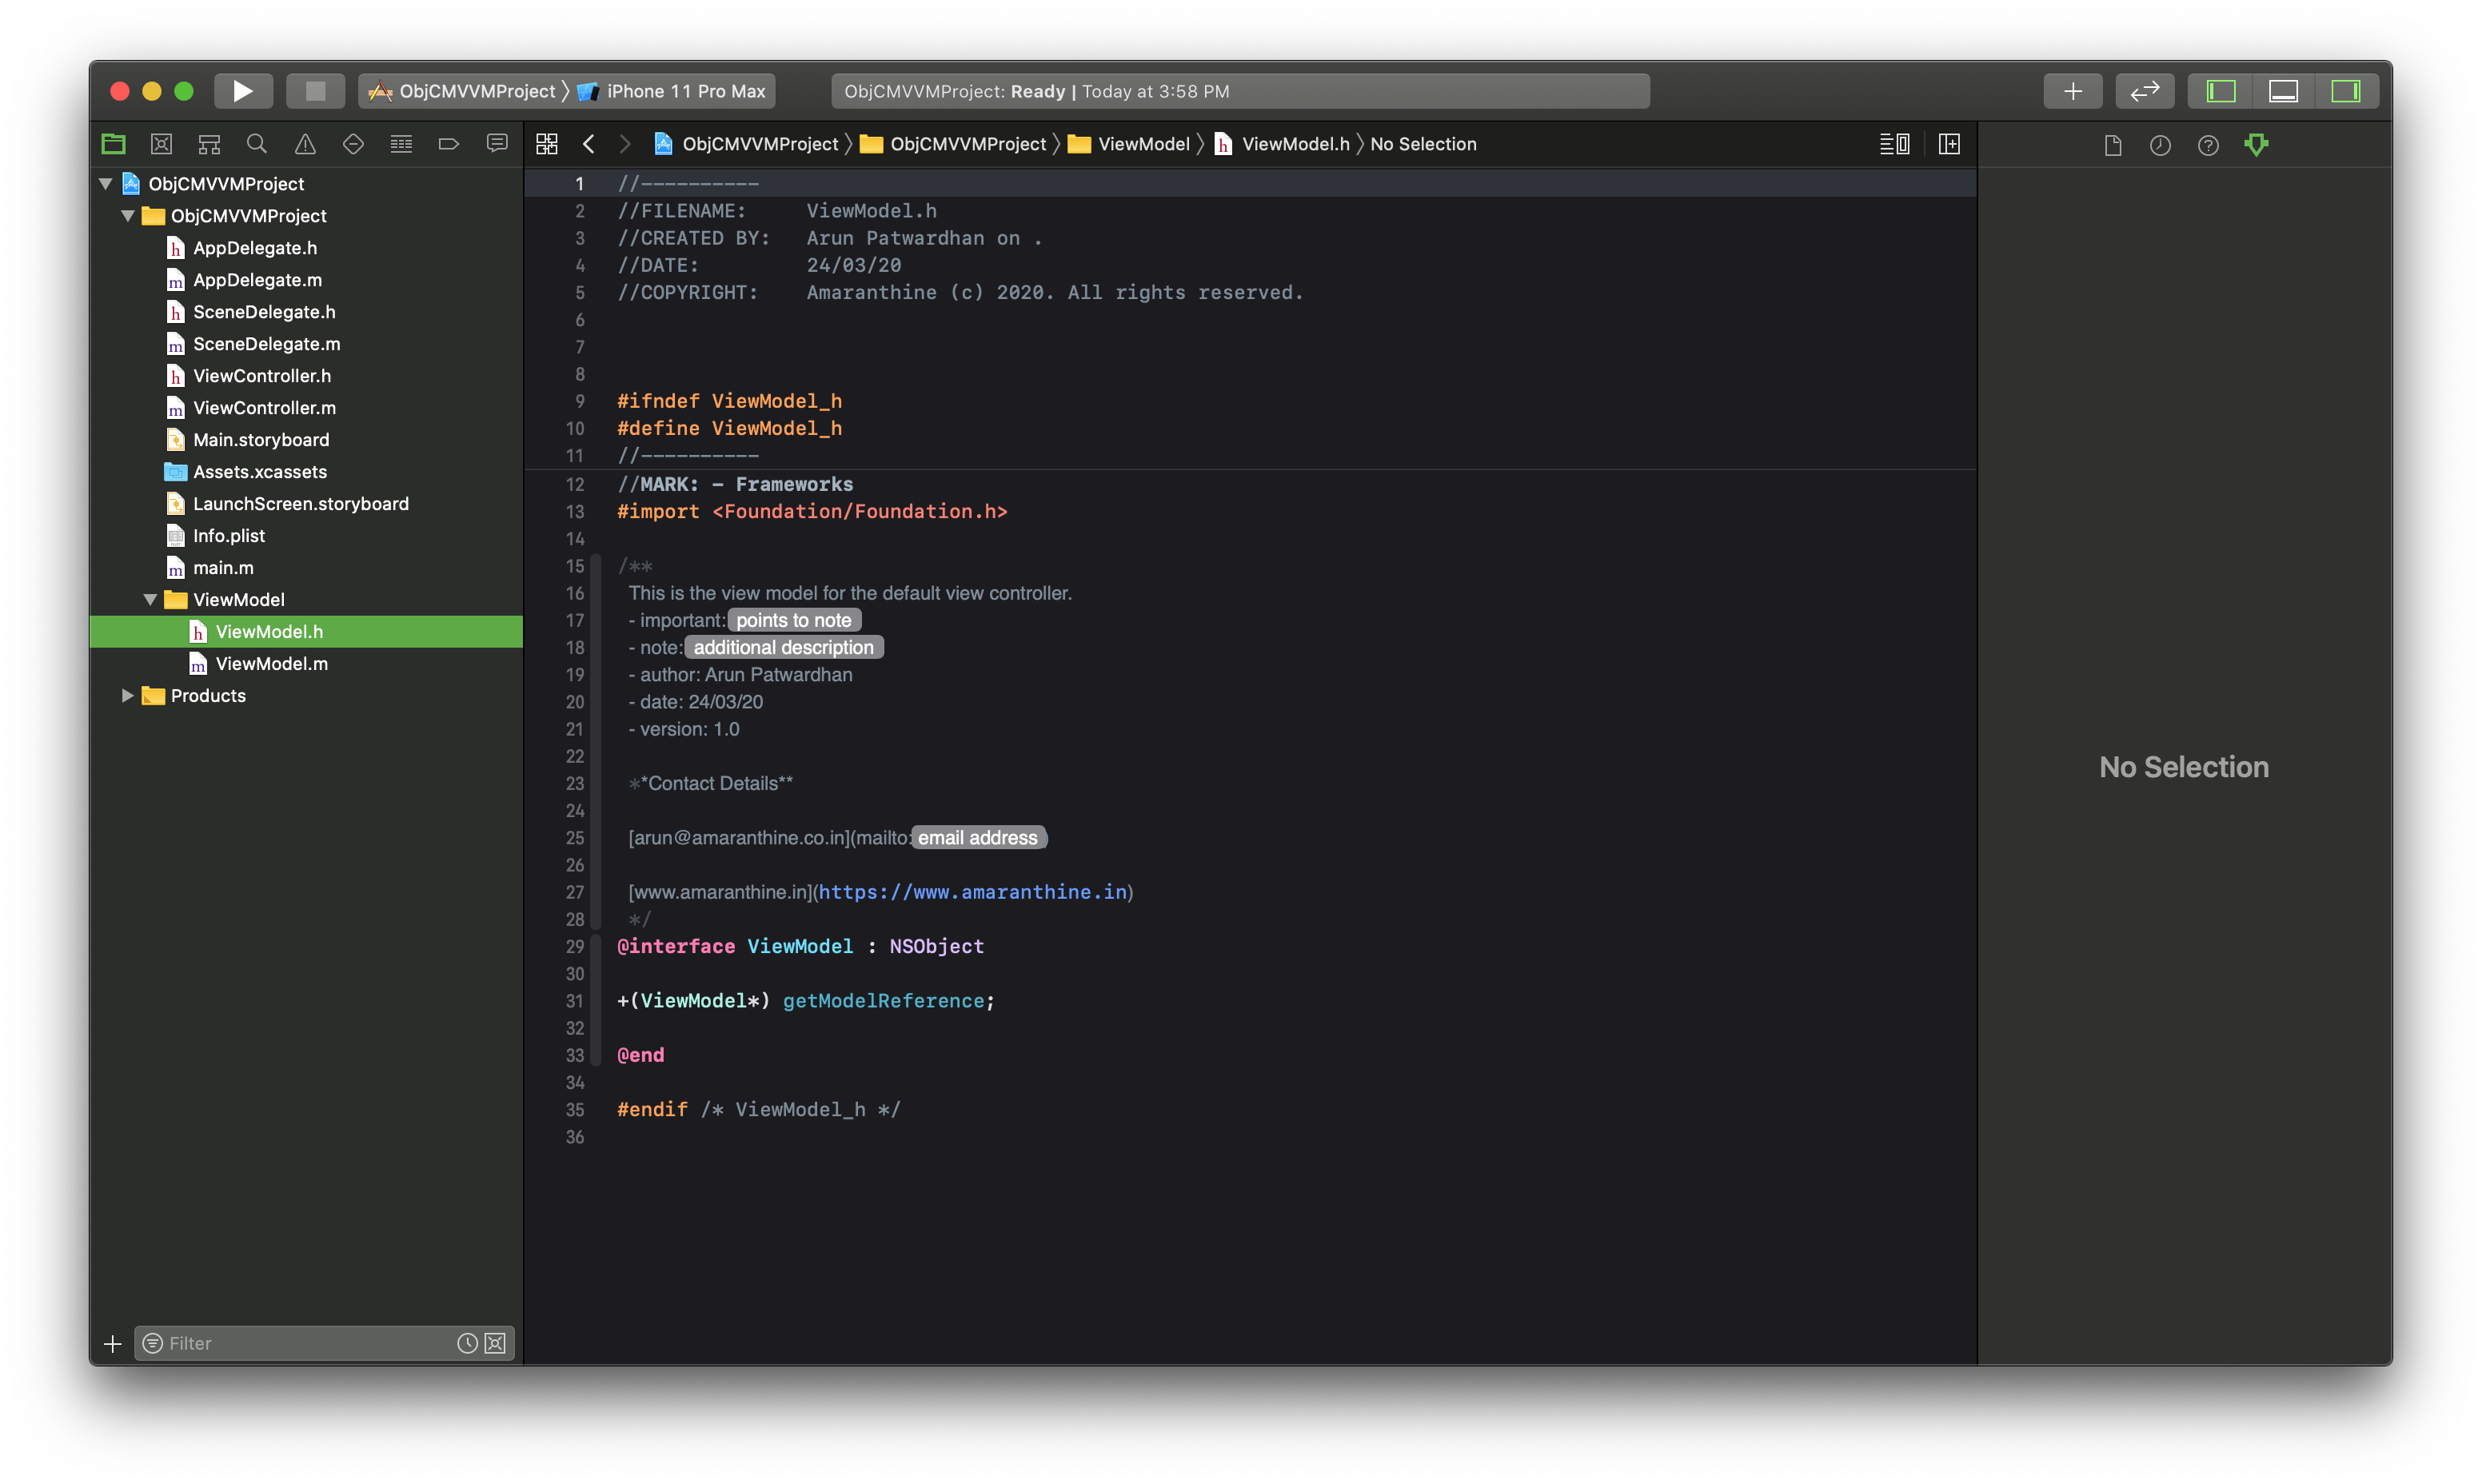
- Implement the ViewModel.h as shown:
//----------
//FILENAME:     ViewModel.h
//CREATED BY:   ___FULLUSERNAME___ on .
//DATE:         ___DATE___
//COPYRIGHT:    Amaranthine (c) 2020. All rights reserved.


#ifndef ViewModel_h
#define ViewModel_h
//----------
//MARK: - Frameworks
#import <Foundation/Foundation.h>

/**
 This is the view model for the default view controller.
 - important: <# points to note #>
 - note: <# additional description #>
 - author: ___FULLUSERNAME___
 - date: ___DATE___
 - version: 1.0

 **Contact Details**

 [arun@amaranthine.co.in](mailto:<# email address #>)

 [www.amaranthine.in](https://www.amaranthine.in)
 */
@interface ViewModel : NSObject

+(ViewModel*) getModelReference;

@end

#endif /* ViewModel_h */
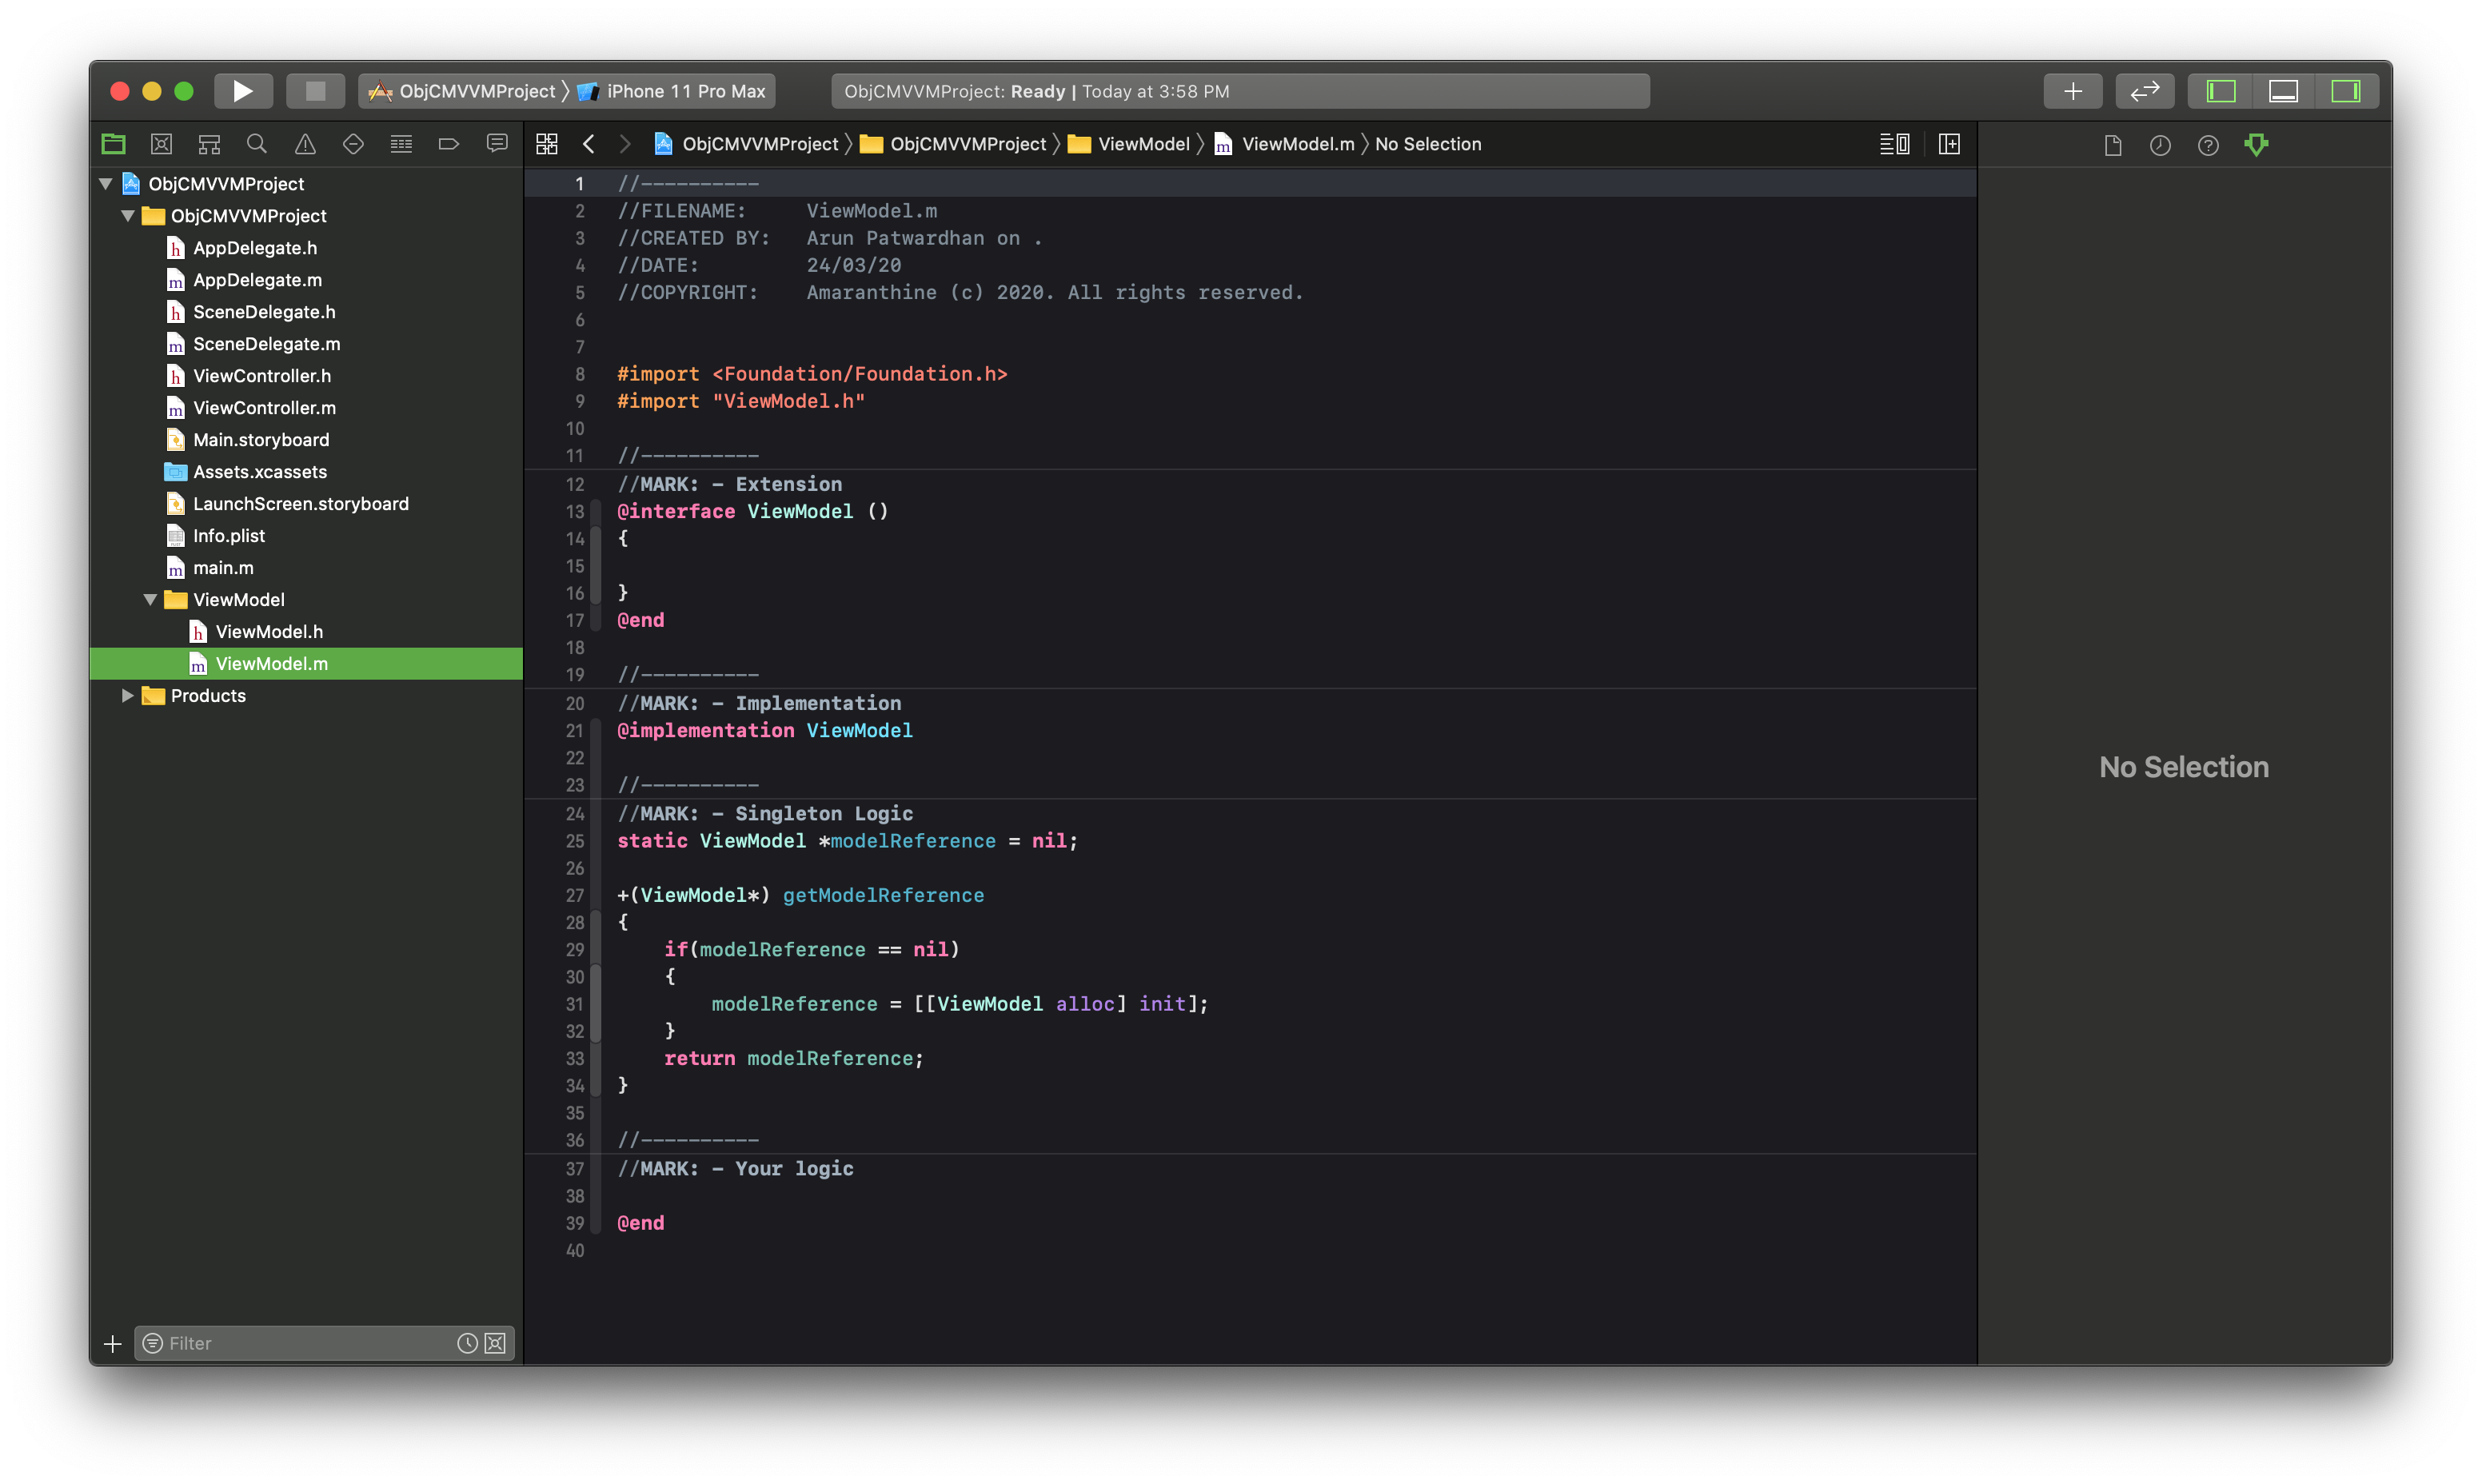
Implement the ViewModel.m as shown.
//----------
//FILENAME:     ViewModel.m
//CREATED BY:   ___FULLUSERNAME___ on .
//DATE:         ___DATE___
//COPYRIGHT:    Amaranthine (c) 2020. All rights reserved.


#import <Foundation/Foundation.h>
#import "ViewModel.h"

//----------
//MARK: - Extension
@interface ViewModel ()
{

}
@end

//----------
//MARK: - Implementation
@implementation ViewModel

//----------
//MARK: - Singleton Logic
static ViewModel *modelReference = nil;

+(ViewModel*) getModelReference
{
    if(modelReference == nil)
    {
        modelReference = [[ViewModel alloc] init];
    }
    return modelReference;
}

//----------
//MARK: - Your logic

@end
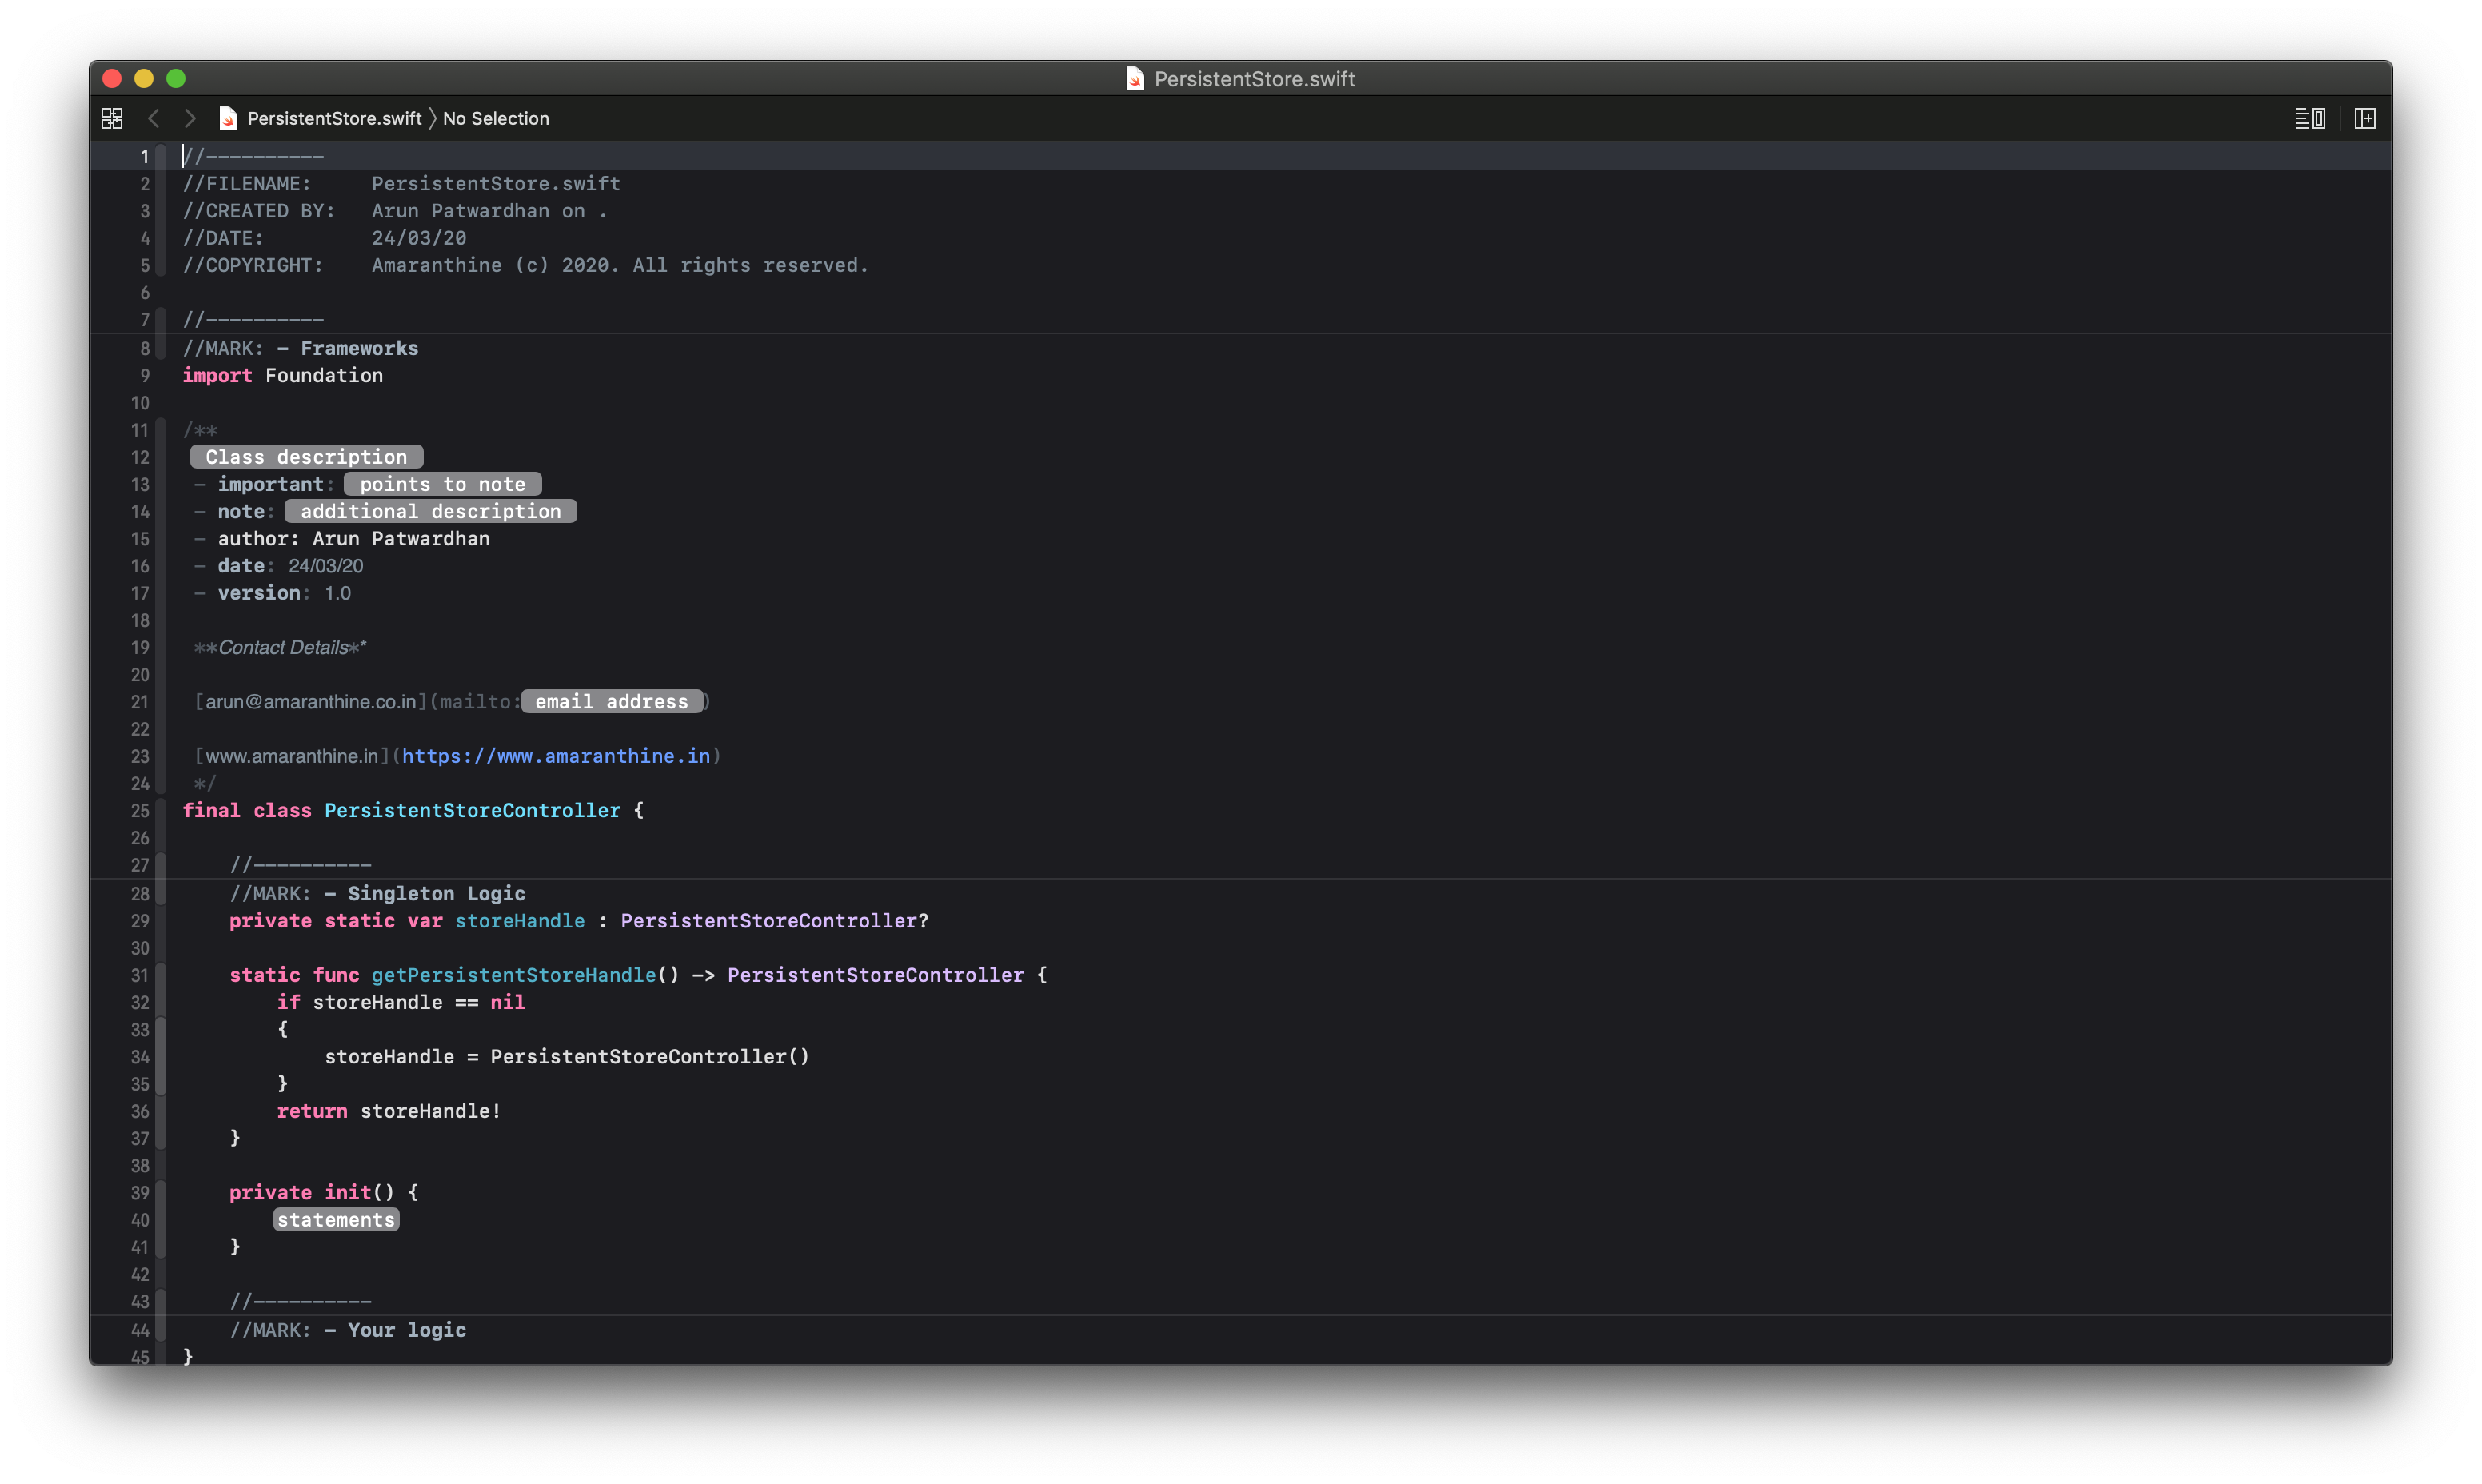
Similarly we will implement the swift version of the file.
//----------
//FILENAME:     ViewModel.swift
//CREATED BY:   ___FULLUSERNAME___ on .
//DATE:         ___DATE___
//COPYRIGHT:    Amaranthine (c) 2020. All rights reserved.

//----------
//MARK: - Frameworks
import Foundation

/**
 This is the view model for the default view controller.
 - important: <# points to note #>
 - note: <# additional description #>
 - author: ___FULLUSERNAME___
 - date: ___DATE___
 - version: 1.0

 **Contact Details**

 [arun@amaranthine.co.in](mailto:<# email address #>)

 [www.amaranthine.in](https://www.amaranthine.in)
 */
final class ViewModel {

    //----------
    //MARK: - Singleton Logic
    private static var viewModelHandle : ViewModel?

    static func getModelReference() -> ViewModel {
        if viewModelHandle == nil
        {
            viewModelHandle = ViewModel()
        }
        return viewModelHandle!
    }

    private init() {
        <#statements#>
    }

    //----------
    //MARK: - Your logic
}
- Next we will update the built in ContentView.swift file.
//----------
//FILENAME:     ContentView.swift
//CREATED BY:   ___FULLUSERNAME___ on .
//DATE:         ___DATE___
//COPYRIGHT:    Amaranthine (c) 2020. All rights reserved.


import SwiftUI

struct ContentView: View {
    //----------
    //MARK: - View Model code
    //View Model for the View
    var model : ViewModel = ViewModel.getModelReference()

    var body: some View {
        Text("Hello, World!")
    }
}

struct ContentView_Previews: PreviewProvider {
    static var previews: some View {
        ContentView()
    }
}
Now that we have updated and prepared all the code files we can shift our focus on modifying the template file. There are many parts of the file that we will have to modify. So I will explain each part as we encounter it.
- Open the TemplateInfo.plist file.
- Let us first modify the basic settings. Make changes to the following keys based on the sample below.
- Identifier
- Description
<key>Kind</key>
	<string>Xcode.Xcode3.ProjectTemplateUnitKind</string>
	<key>Identifier</key>
	<string>in.amaranthine.mvvmApplication</string>
	<key>Ancestors</key>
	<array>
		<string>com.apple.dt.unit.coreDataCocoaTouchApplication</string>
		<string>com.apple.dt.unit.sceneLifecycleApplication</string>
	</array>
	<key>Concrete</key>
	<true/>
	<key>Description</key>
	<string>This template provides a starting point for an application that uses a single view with an MVVM architecture. It provides a view controller to manage the view, and a storyboard or nib file that contains the view. It also provides the View Model file for the view controller.</string>
	<key>SortOrder</key>
	<integer>2</integer>
	<key>NameOfInitialFileForEditor</key>
	<string>ContentView.swift</string>
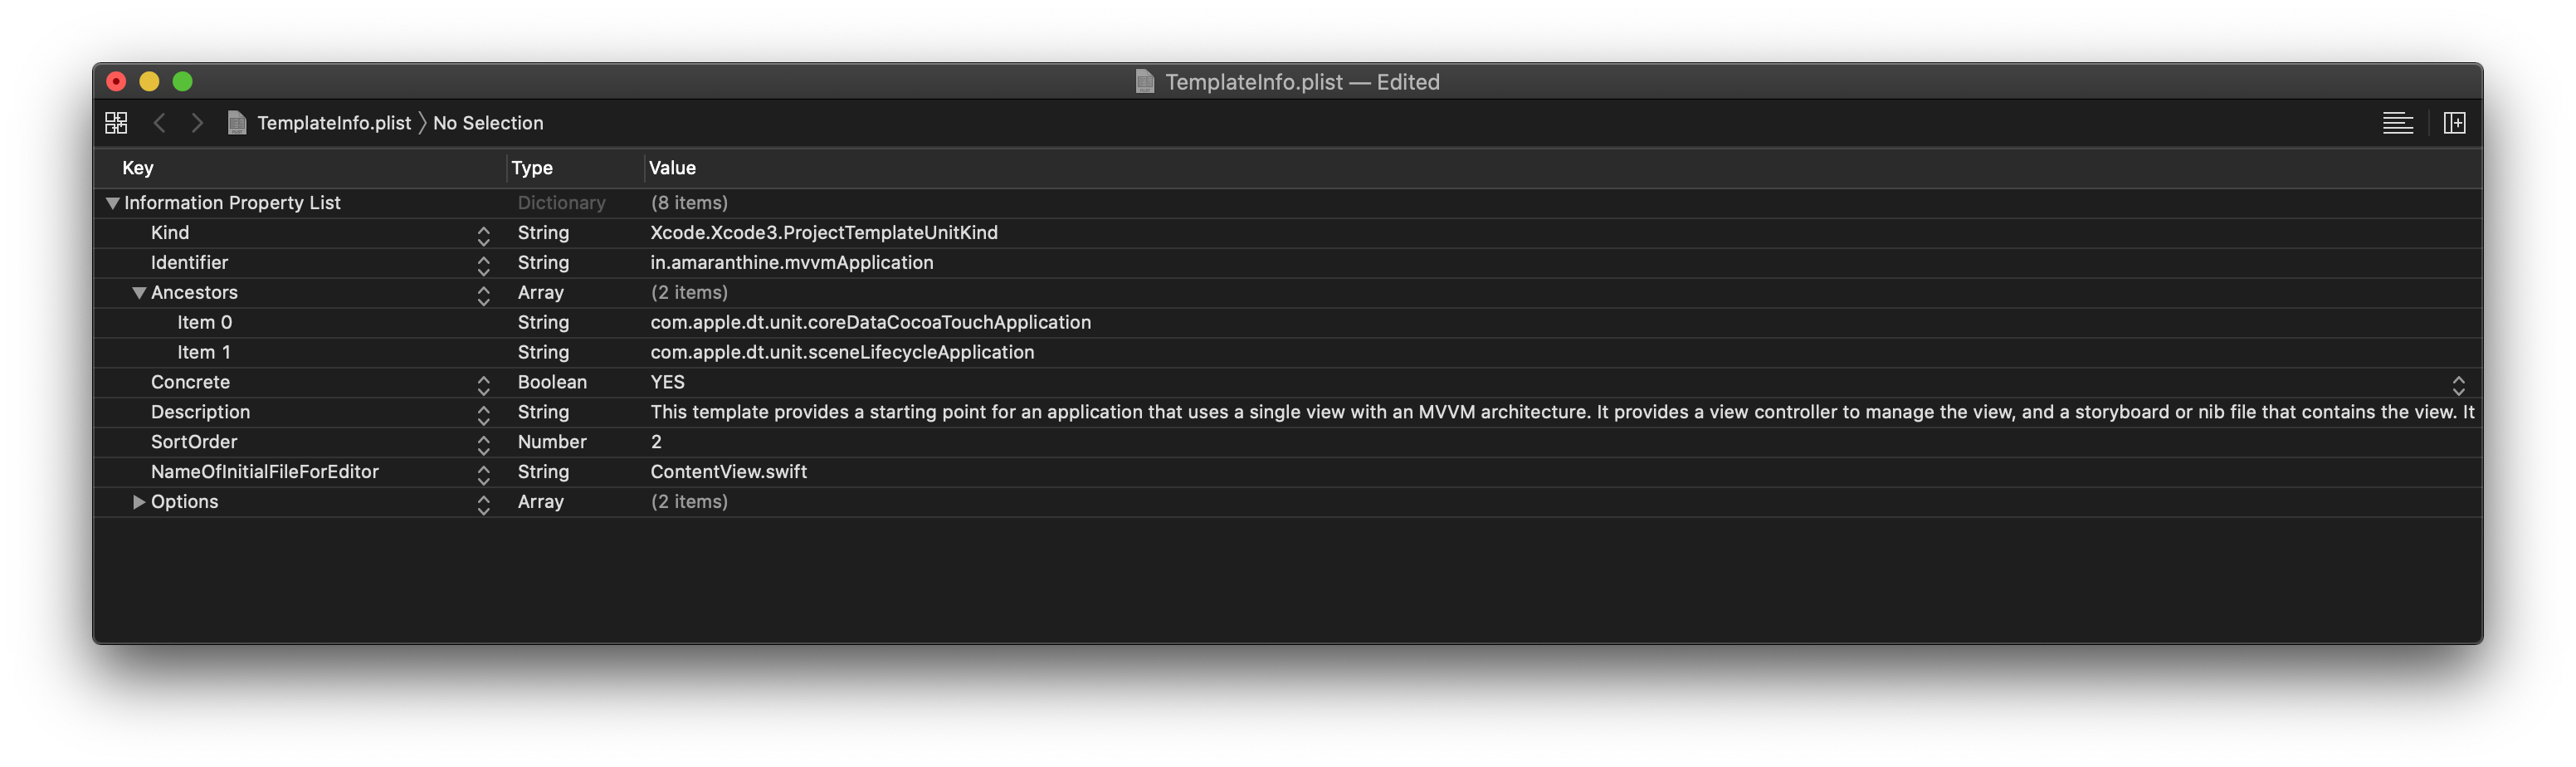
Let us examine some of the keys in the file.
| Key | Description |
|---|---|
| Kind | This specifies the kind of template that we are creating. In this case it is a project template. |
| Identifier | This is what is used to uniquely identify the template. This is the item that you have changed right now. |
| Ancestors | This is a bit like inheritance. You can say that the template you are creating is a variation of a previously create template. In this case our templates ancestors would be the same as the ancestors for the Single View Application. So we will inherit the attributes of the ancestors. |
| Concrete | This determines if the template should be shown in the template wizard or not. If it is set to false then the template will be treated as one that is used as an ancestor to other templates only. |
| Description | This is a description about the template. |
| Sort Order | The order with which the template is sorted in the template wizard. |
| Name Of Initial File For Editor | This is the file that the Xcode editor will first show when the project is newly created |
| Options | These are the choices presented to the user at the time of creating the project. |
What we have after that are the options. Let us explore them before we go ahead and make changes to the rest of the TemplateInfo.plist file.
Options is an array that contains 2 dictionaries named Item 0 & Item 1. If we look at the Template Wizard for Single View Application. We can see that there are 2 major choices that we have.
- Language
- User Interface
These are the choices that we need to customise for our current example.
The options related to CoreData, UI Tests, Unit Tests are coming from the parent templates.
Let us look at the settings for the second option.
<dict>
	<key>Identifier</key>
	<string>userInterface</string>
	<key>Name</key>
	<string>User Interface:</string>
	<key>Description</key>
	<string>The type of user interface.</string>
	<key>Values</key>
	<array>
		<string>SwiftUI</string>
		<string>Storyboard</string>
	</array>
	<key>RequiredOptionsForValues</key>
	<dict>
		<key>SwiftUI</key>
		<dict>
			<key>languageChoice</key>
			<string>Swift</string>
		</dict>
	</dict>
	<key>Default</key>
	<string>SwiftUI</string>
	<key>Type</key>
	<string>popup</string>
</dict>
This is the option used to select the user interface type. We don’t have to make any changes to this section.
| Key | Description of value for key |
|---|---|
| Identifier | Used to identify the current item being described. |
| Name | Name of the option. This is what is presented to the user. |
| Description | Description of the option. |
| Values | The possible values that the user can choose from. |
| Required Options For Values | This specifies any dependencies for the values. In this case we are mentioning that the language must be Swift for the user to choose SwiftUI as a possible value. |
| Default | This is the default value selected for this option. |
| Type | This determines how the value options are presented to the user. In this case it is a popup. |
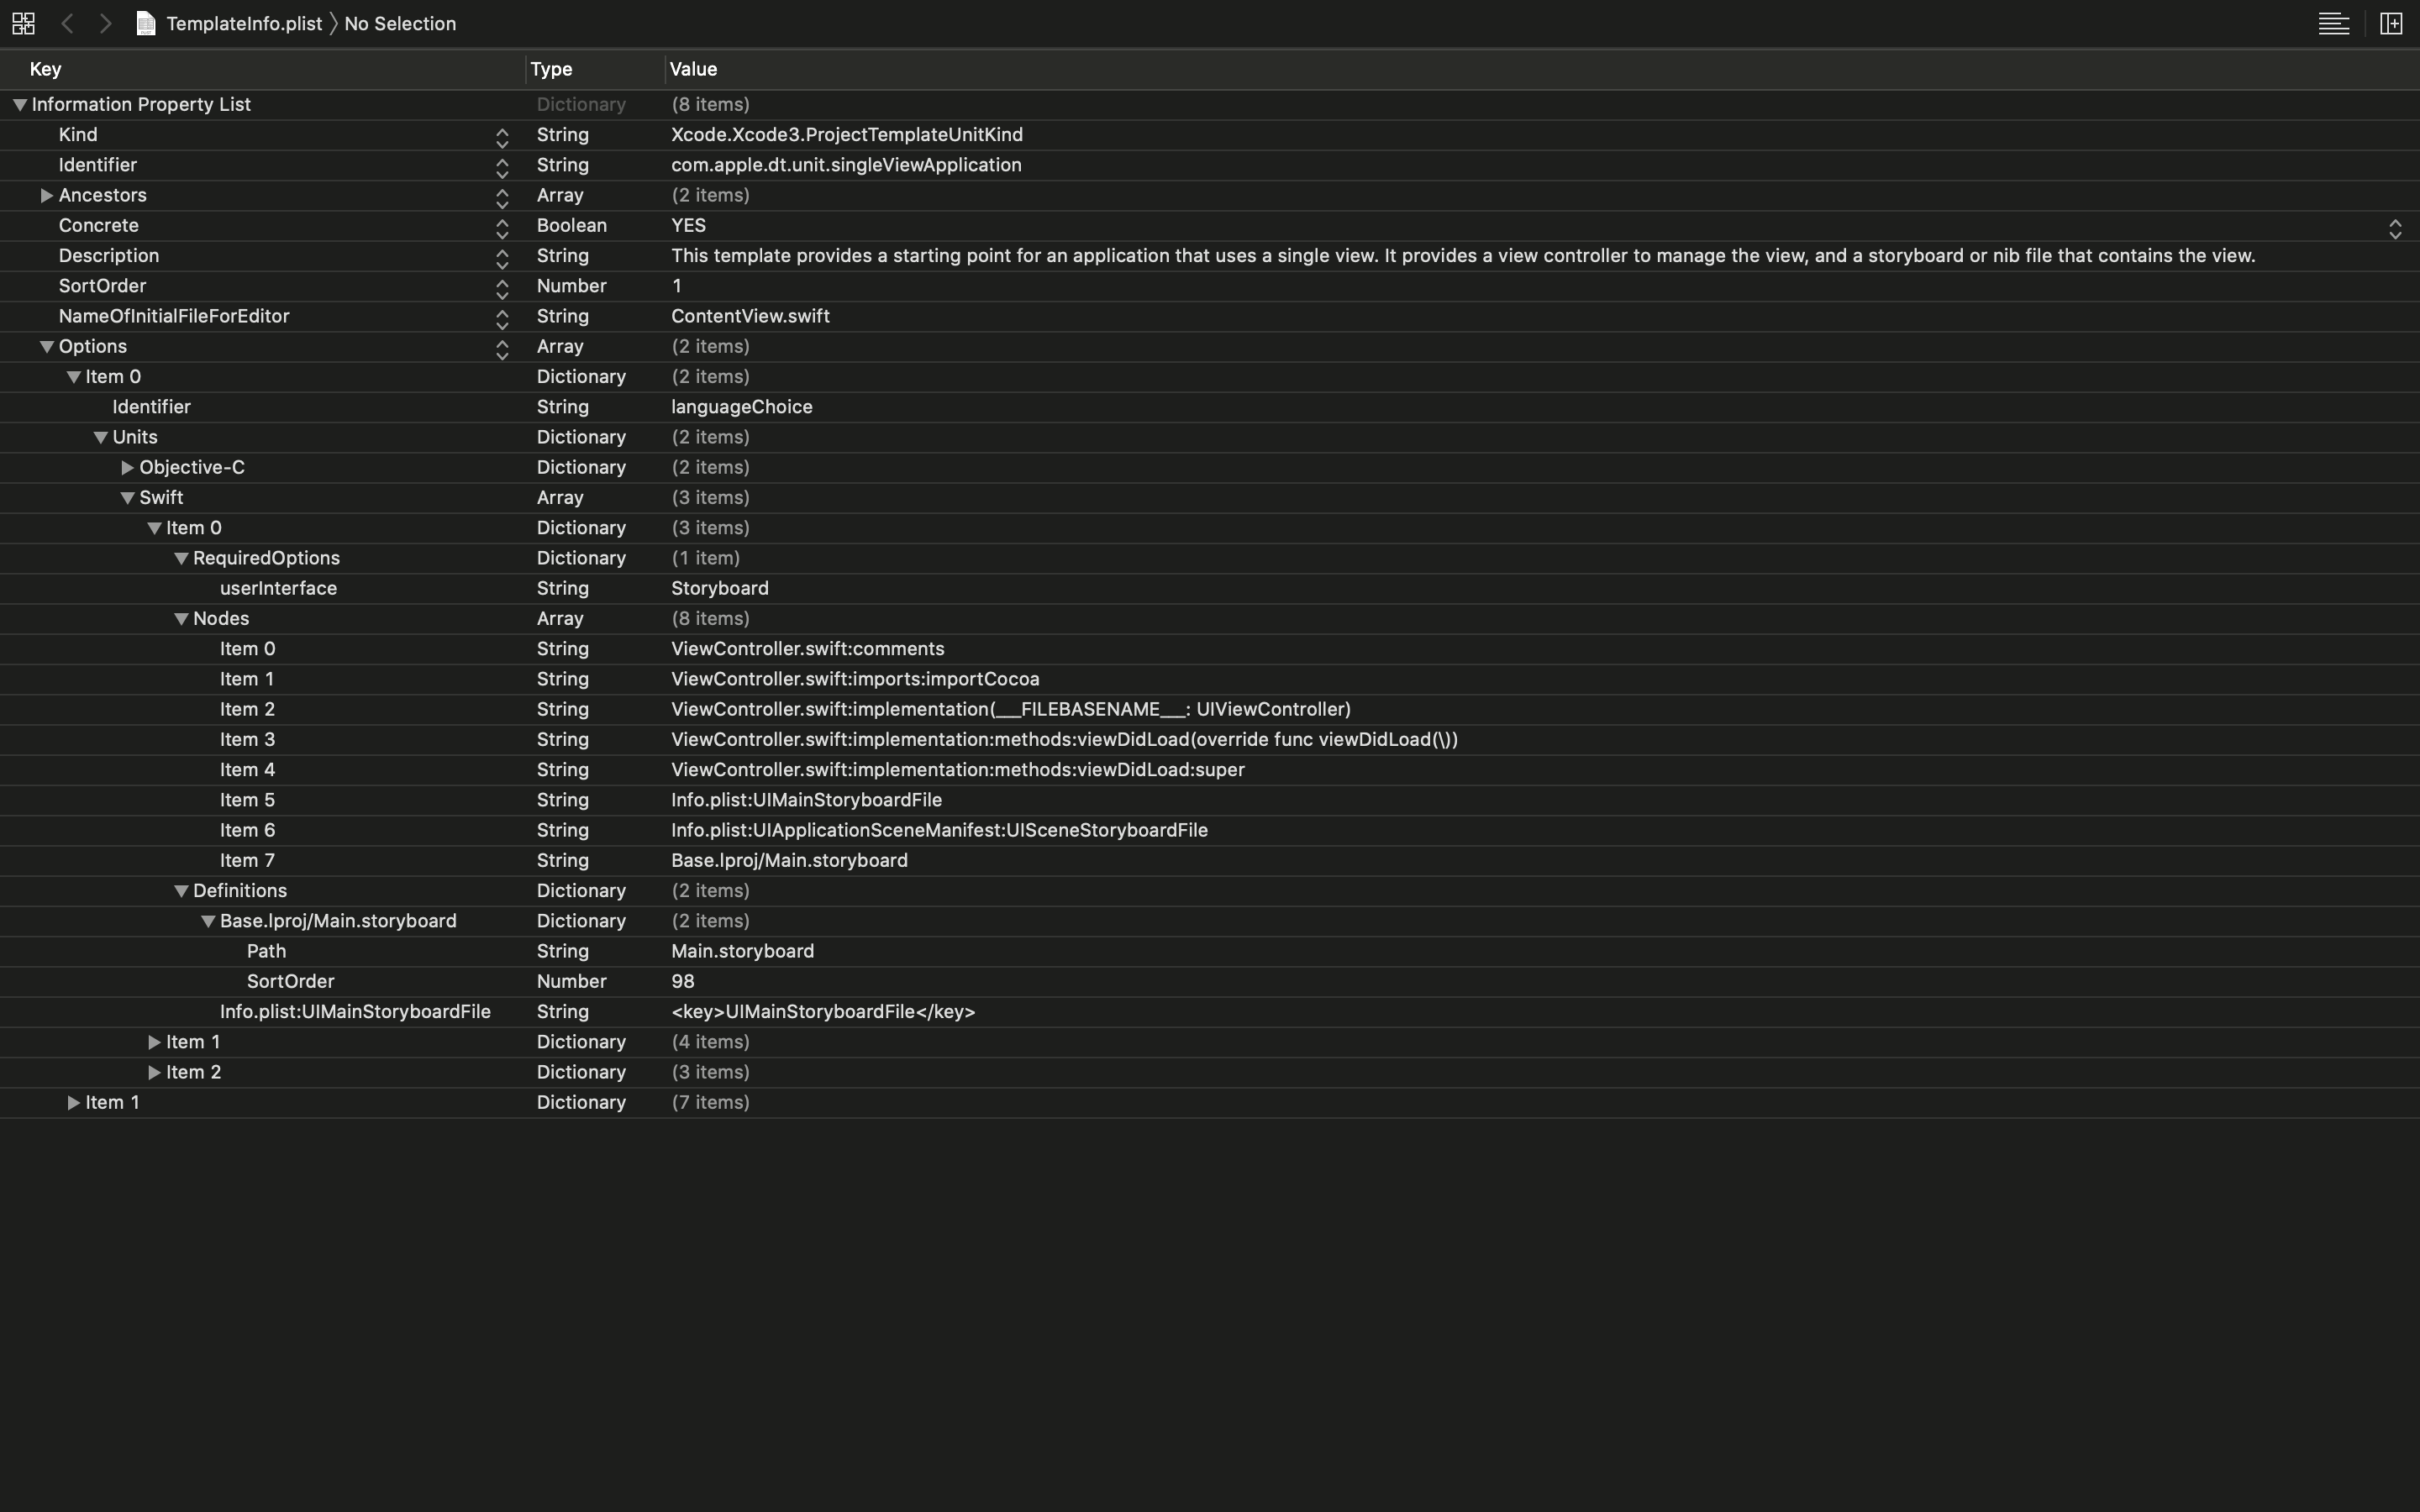
Let us look at the settings for the first option.
<dict>
            <key>Identifier</key>
            <string>languageChoice</string>
            <key>Units</key>
            <dict>
                <key>Objective-C</key>
                <dict>
                    <key>Nodes</key>
                    <array>
                        <string>ViewController.h:comments</string>
                        <string>ViewController.h:imports:importCocoa</string>
                        <string>ViewController.h:interface(___FILEBASENAME___ : UIViewController)</string>
                        <string>ViewController.m:comments</string>
                        <string>ViewController.m:imports:importHeader:ViewController.h</string>
                        <string>ViewController.m:extension</string>
                        <string>ViewController.m:implementation:methods:viewDidLoad(- (void\)viewDidLoad)</string>
                        <string>ViewController.m:implementation:methods:viewDidLoad:super</string>
                        <string>Info.plist:UIMainStoryboardFile</string>
                        <string>Info.plist:UIApplicationSceneManifest:UISceneStoryboardFile</string>
                        <string>Base.lproj/Main.storyboard</string>
                    </array>
                    <key>Definitions</key>
                    <dict>
                        <key>Base.lproj/Main.storyboard</key>
                        <dict>
                            <key>Path</key>
                            <string>Main.storyboard</string>
                            <key>SortOrder</key>
                            <integer>98</integer>
                        </dict>
                        <key>Info.plist:UIMainStoryboardFile</key>
                        <string><key>UIMainStoryboardFile</key>
                            <string>Main</string>
                        </string>
                    </dict>
                </dict>
                <key>Swift</key>
                <array>
                    <dict>
                        <key>RequiredOptions</key>
                        <dict>
                            <key>userInterface</key>
                            <string>Storyboard</string>
                        </dict>
                    <key>Nodes</key>
                    <array>
                        <string>ViewController.swift:comments</string>
                        <string>ViewController.swift:imports:importCocoa</string>
                        <string>ViewController.swift:implementation(___FILEBASENAME___: UIViewController)</string>
                        <string>ViewController.swift:implementation:methods:viewDidLoad(override func viewDidLoad(\))</string>
                        <string>ViewController.swift:implementation:methods:viewDidLoad:super</string>
                        <string>Info.plist:UIMainStoryboardFile</string>
                        <string>Info.plist:UIApplicationSceneManifest:UISceneStoryboardFile</string>
                        <string>Base.lproj/Main.storyboard</string>
                    </array>
                    <key>Definitions</key>
                    <dict>
                        <key>Base.lproj/Main.storyboard</key>
                        <dict>
                            <key>Path</key>
                            <string>Main.storyboard</string>
                            <key>SortOrder</key>
                            <integer>98</integer>
                        </dict>
                        <key>Info.plist:UIMainStoryboardFile</key>
                        <string><key>UIMainStoryboardFile</key>
                            <string>Main</string>
                        </string>
                    </dict>
                    </dict>
                    <dict>
                        <key>RequiredOptions</key>
                        <dict>
                            <key>userInterface</key>
                            <string>SwiftUI</string>
                        </dict>
                        <key>Nodes</key>
                        <array>
                            <string>ContentView.swift</string>
                            <string>Preview Content/Preview Assets.xcassets</string>
                            <string>SceneDelegate.swift:imports:importSwiftUI</string>
                            <string>SceneDelegate.swift:implementation:methods:sceneWillConnectToSession:body</string>
                            <string>SceneDelegate.swift:implementation:methods:sceneWillConnectToSession:body:windowScene</string>
                        </array>
                        <key>Definitions</key>
                        <dict>
                            <key>ContentView.swift</key>
                            <dict>
                                <key>SortOrder</key>
                                <integer>99</integer>
                                <key>Path</key>
                                <string>ContentView.swift</string>
                            </dict>
                            <key>Preview Content/Preview Assets.xcassets</key>
                            <dict>
                                <key>SortOrder</key>
                                <integer>100</integer>
                                <key>Path</key>
                                <string>Preview Assets.xcassets</string>
                                <key>Group</key>
                                <string>Preview Content</string>
                            </dict>
                            <key>SceneDelegate.swift:implementation:methods:sceneWillConnectToSession:body</key>
                            <string>
// Create the SwiftUI view that provides the window contents.
let contentView = ContentView()
</string>
                            <key>SceneDelegate.swift:implementation:methods:sceneWillConnectToSession:body:windowScene</key>
                            <string>
// Use a UIHostingController as window root view controller.
if let windowScene = scene as? UIWindowScene {
    let window = UIWindow(windowScene: windowScene)
    window.rootViewController = UIHostingController(rootView: contentView)
    self.window = window
    window.makeKeyAndVisible()
}</string>
                            <key>*:imports:importSwiftUI</key>
                            <string>import SwiftUI</string>
                        </dict>
                        <key>Targets</key>
                        <array>
                            <dict>
                                <key>SharedSettings</key>
                                <dict>
                                    <key>ENABLE_PREVIEWS</key>
                                    <string>YES</string>
                                    <key>DEVELOPMENT_ASSET_PATHS</key>
                                    <string>___PACKAGENAMEPREVIEWCONTENT:quoteIfNeeded___</string>
                                </dict>
                            </dict>
                        </array>
                    </dict>
                    <dict>
                        <key>RequiredOptions</key>
                        <dict>
                            <key>userInterface</key>
                            <string>SwiftUI</string>
                            <key>coreData</key>
                            <string>true</string>
                        </dict>
                        <key>Nodes</key>
                        <array>
                            <string>SceneDelegate.swift:implementation:methods:sceneWillConnectToSession:body</string>
                        </array>
                        <key>Definitions</key>
                        <dict>
                            <key>SceneDelegate.swift:implementation:methods:sceneWillConnectToSession:body</key>
                            <string>
// Get the managed object context from the shared persistent container.
let context = (UIApplication.shared.delegate as! AppDelegate).persistentContainer.viewContext

// Create the SwiftUI view and set the context as the value for the managedObjectContext environment keyPath.
// Add `@Environment(\.managedObjectContext)` in the views that will need the context.
let contentView = ContentView().environment(\.managedObjectContext, context)
</string>
                        </dict>
                    </dict>
                </array>
            </dict>
        </dict>
Let us examine the settings before making the changes. The second option contains a dictionary with 2 entries. A key value pair for key Identifier and value language choice.
The second key value pair is has a Key called units with a value being a dictionary. Units allow us to perform certain actions based on which option is selected. In this case we have a choice between Objective-C and Swift. It might be easier to view this by opening the plist in Xcode.
The units dictionary contains 2 key value pairs. The first one has Key as Objective-C and value is a dictionary. The second one has Key as Swift and value as an array. Next we will look at the Objective-C dictionary.
The Objective-C dictionary contains 2 entries. Nodes and definitions. Nodes help us create the copies of our files. Definitions list out the variables and files in the template. Expand the node list.

We can see that the node contains multiple entries for the ViewController.h, ViewController.m, Info.plist, and Main.Storyboard. These are describing the various elements that are expected by the creator of the Single View Application. Let us expand the definitions.

Definitions give us more details about the where the file should be located and what they should contain. A combination of Nods and definitions helps the template wizard create the projects accordingly.
This is how it looks for Swift.


Similar to Objective-C we are describing the files and their contents through nodes and definitions. We also have to deal with the additional case of SwiftUI as a new UI option.
Based on this we will try to modify the file to get our custom template. That should clarify many more things.
Let us list out the items that we need for our example.
- We will be needing all the files already being created by the existing template
- There will be 1 additional class representing the View Model for our ViewController. This will be implemented in both the Objective-C as well as the Swift versions of our project.
- We will need to modify the ViewController to hold a property for the View Model
This means that we will have to modify the nodes and definitions for the 2 languages. Also we will have to create the Swift and Objective-C versions of the ViewModel and keep. We have done that in step 7 & 8. Now we will continue our modification of the TemplateInfo.plist file.
- Under the nodes for Objective-C add the items as shown below.
<key>Nodes</key>
	<array>
		<string>ViewController.h:comments</string>
		<string>ViewController.h:imports:importCocoa</string>
		<string>ViewController.h:imports:importHeader:ViewModel.h</string>
		<string>ViewController.h:interface(___FILEBASENAME___ : UIViewController)</string>
		<string>ViewController.h:interface:property</string>
		<string>ViewController.m:comments</string>
		<string>ViewController.m:imports:importHeader:ViewController.h</string>
		<string>ViewController.m:extension</string>
		<string>ViewController.m:implementation:synthesis</string>
		<string>ViewController.m:implementation:methods:viewDidLoad(- (void\)viewDidLoad)</string>
		<string>ViewController.m:implementation:methods:viewDidLoad:super</string>
		<string>ViewController.m:implementation:methods:viewDidLoad:singleton</string>
		<string>Info.plist:UIMainStoryboardFile</string>
		<string>Info.plist:UIApplicationSceneManifest:UISceneStoryboardFile</string>
		<string>Base.lproj/Main.storyboard</string>
		<string>ViewModel.h</string>
		<string>ViewModel.m</string>
	</array>
Here is how it looks if you are modifying the file in Xcode.

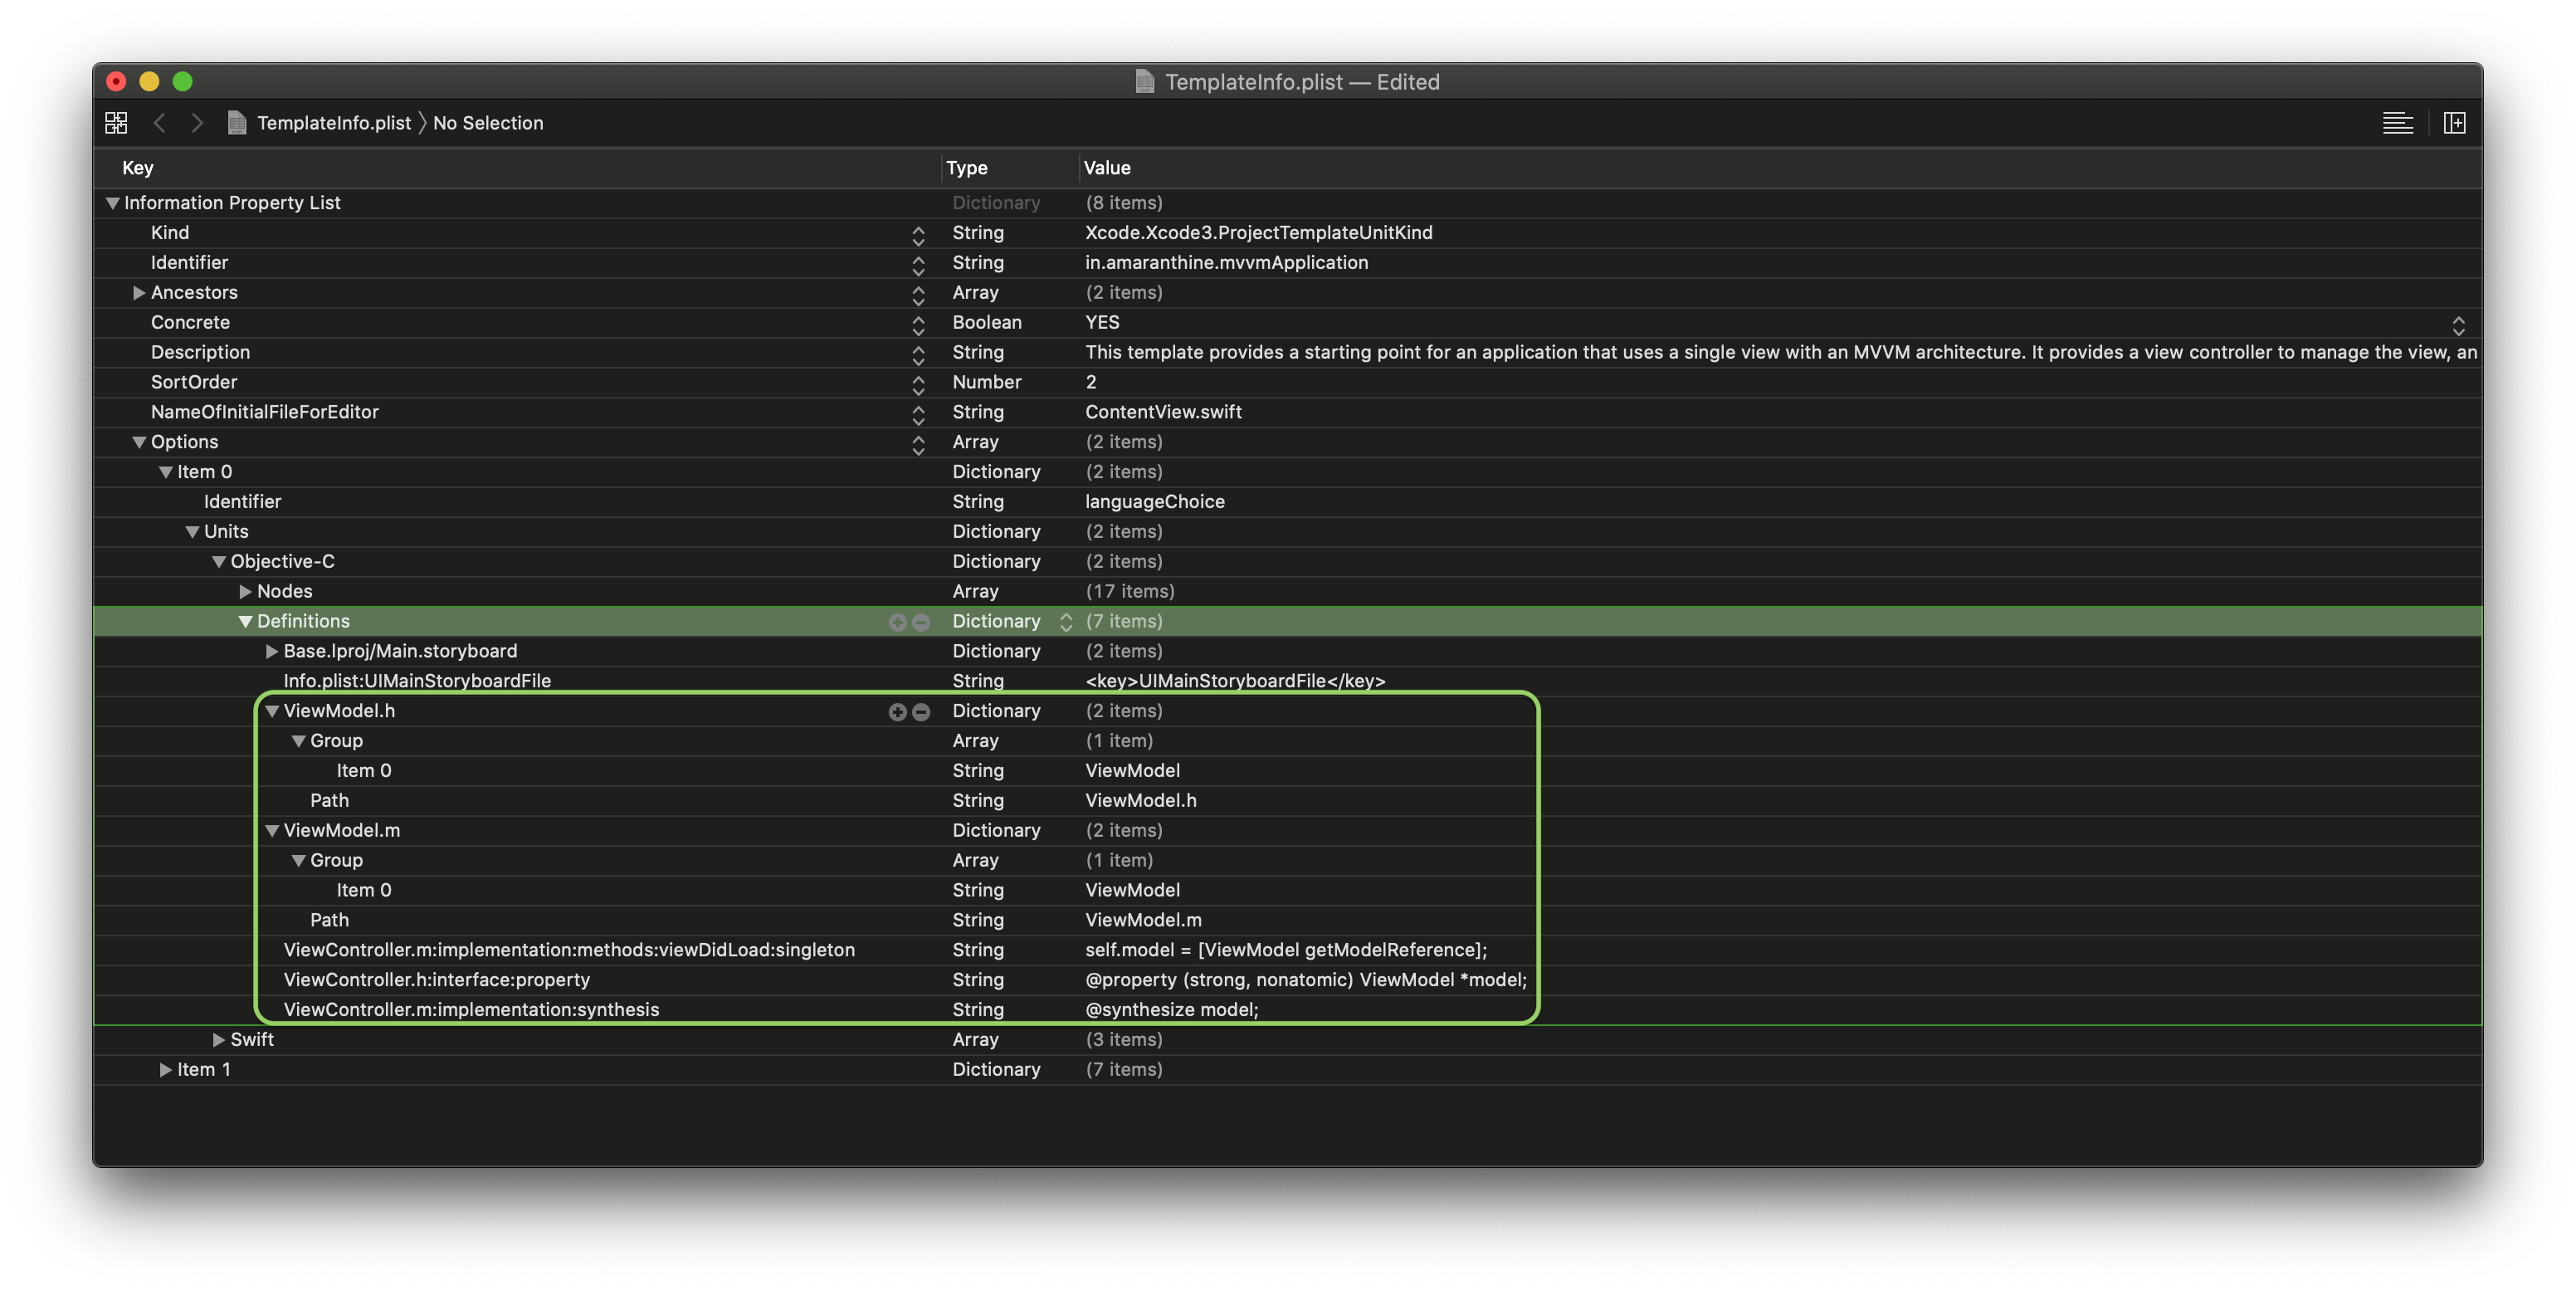
- Next we will update the definitions for Objective-C.
<key>Definitions</key>
	<dict>
		<key>Base.lproj/Main.storyboard</key>
		<dict>
			<key>Path</key>
			<string>Main.storyboard</string>
			<key>SortOrder</key>
		        <integer>98</integer>
		</dict>
		<key>Info.plist:UIMainStoryboardFile</key>
		<string><key>UIMainStoryboardFile</key>
                            <string>Main</string>
                    </string>
		<key>ViewModel.h</key>
		<dict>
			<key>Group</key>
			<array>
				<string>ViewModel</string>
			</array>
			<key>Path</key>
			<string>ViewModel.h</string>
		</dict>
		<key>ViewModel.m</key>
		<dict>
			<key>Group</key>
			<array>
				<string>ViewModel</string>
			</array>
			<key>Path</key>
			<string>ViewModel.m</string>
		</dict>
		<key>ViewController.m:implementation:methods:viewDidLoad:singleton</key>
		<string>self.model = [ViewModel getModelReference];</string>
		<key>ViewController.h:interface:property</key>
		<string>@property (strong, nonatomic) ViewModel *model;</string>
		<key>ViewController.m:implementation:synthesis</key>
		<string>@synthesize model;</string>
	</dict>
This is the Xcode version.
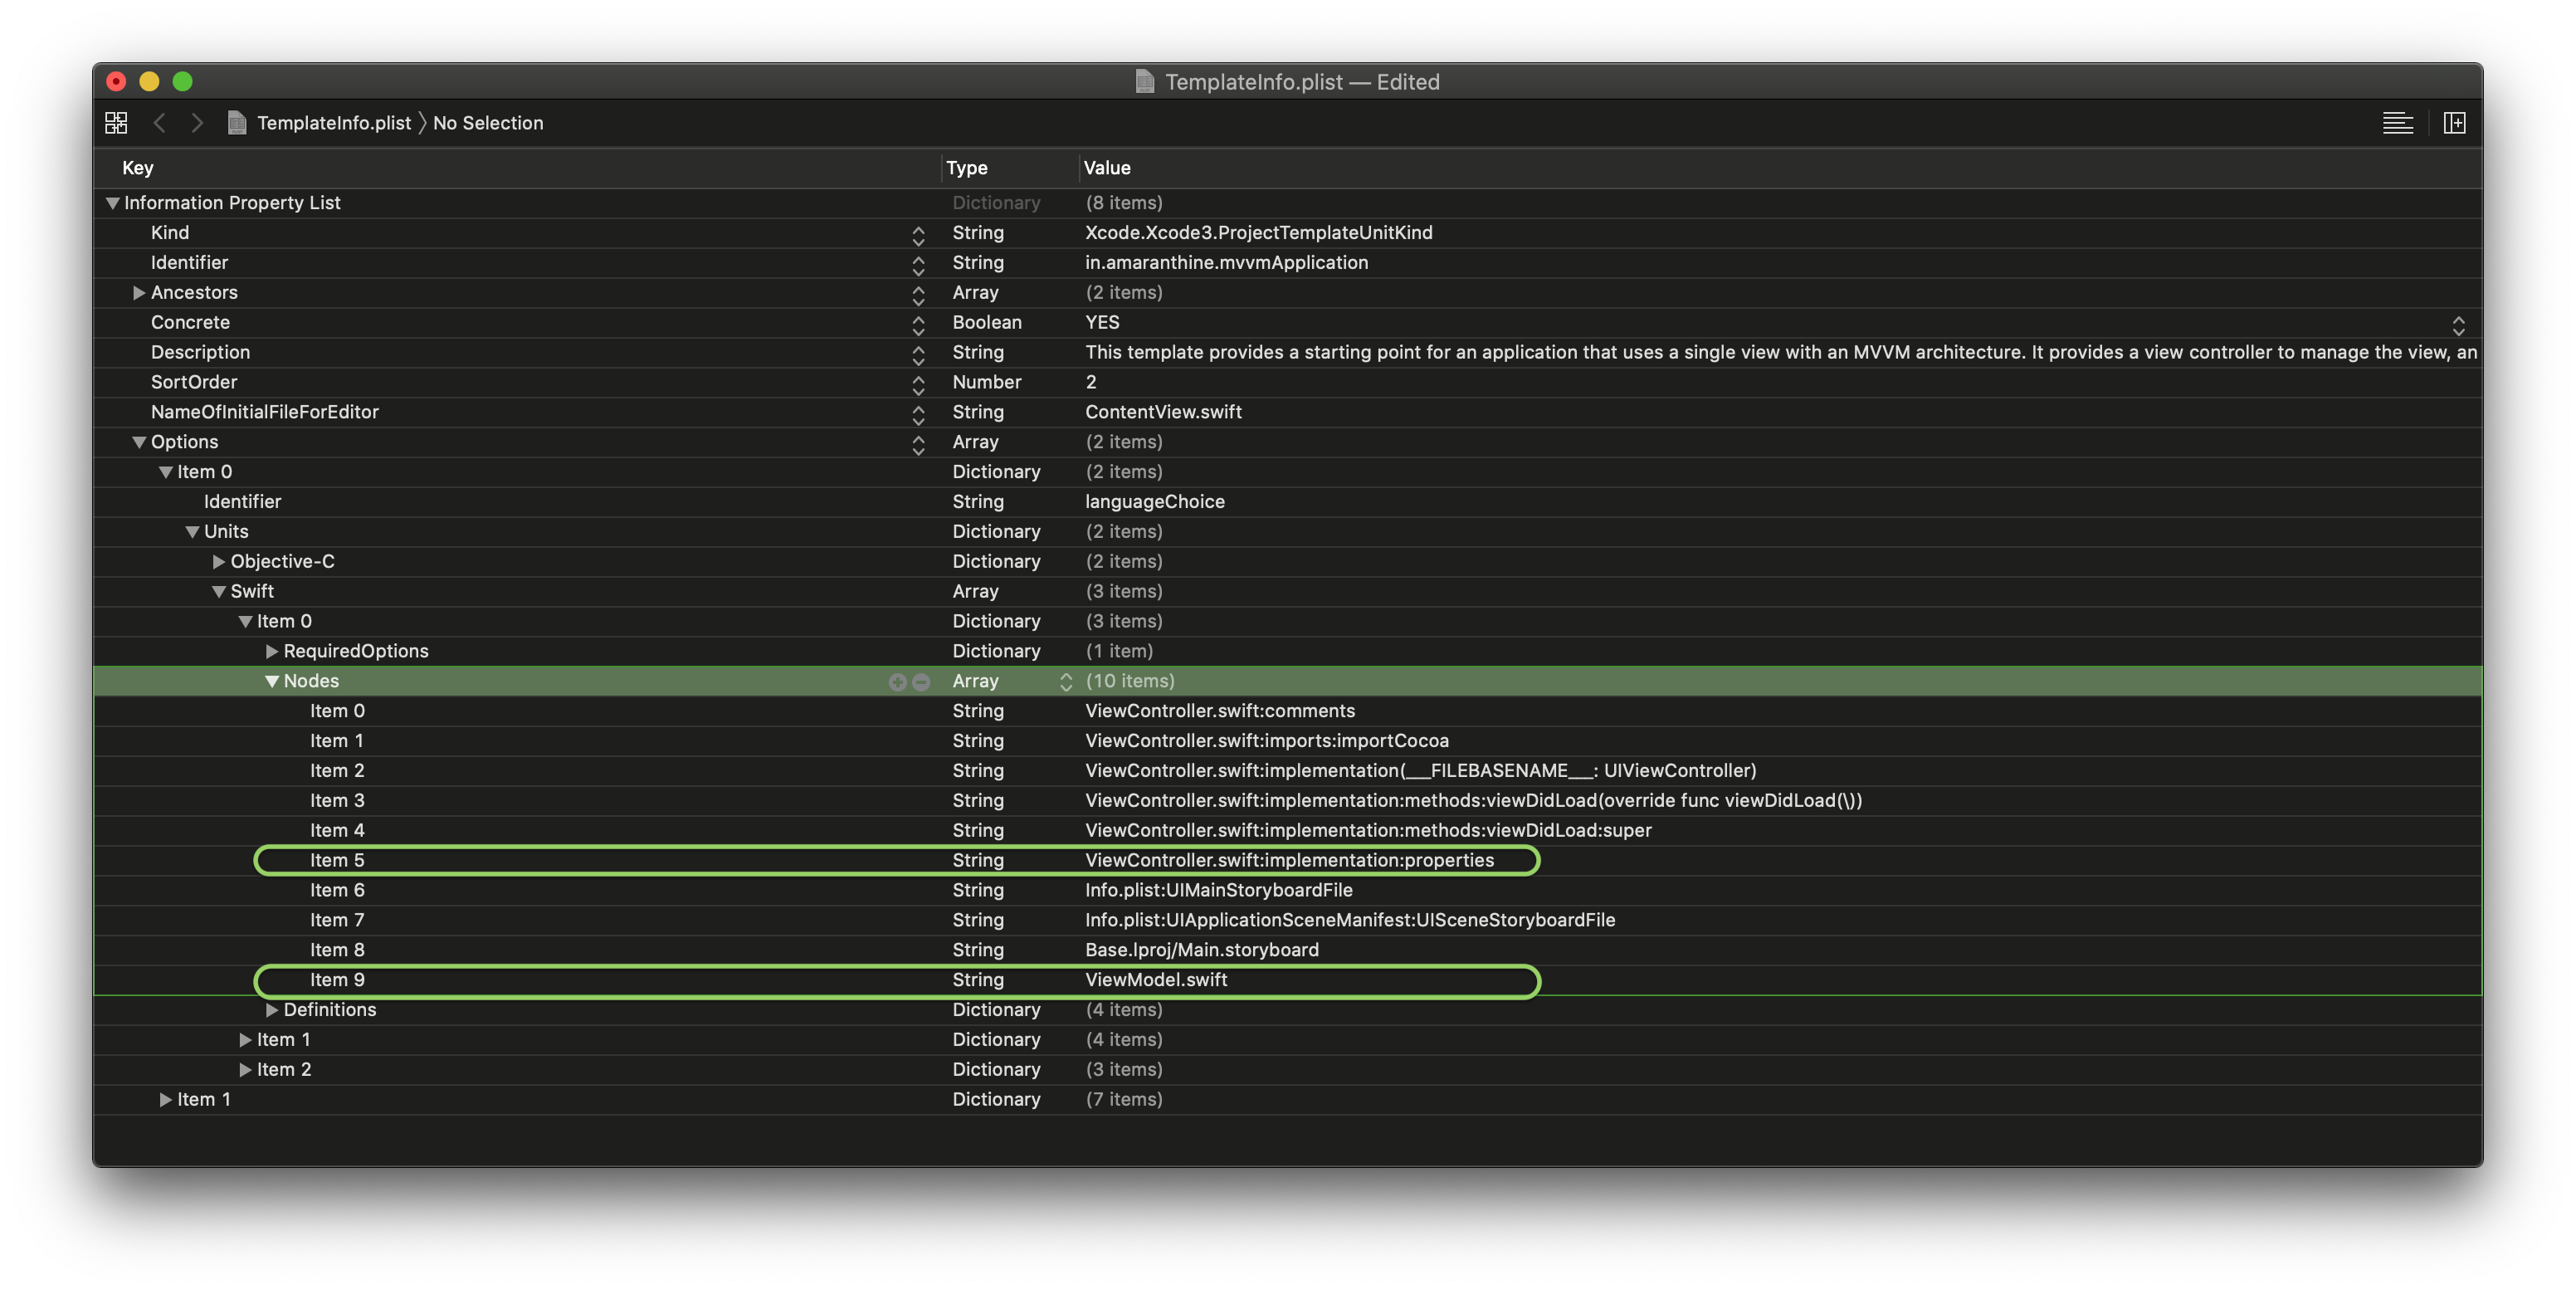
- We will make similar changes to the Swift section. Update the nodes for the Storyboard option as shown below.
<key>Nodes</key>
<array>
	<string>ViewController.swift:comments</string>
	<string>ViewController.swift:imports:importCocoa</string>
	<string>ViewController.swift:implementation(___FILEBASENAME___: UIViewController)</string>
	<string>ViewController.swift:implementation:methods:viewDidLoad(override func viewDidLoad(\))</string>
	<string>ViewController.swift:implementation:methods:viewDidLoad:super</string>
	<string>ViewController.swift:implementation:properties</string>
	<string>Info.plist:UIMainStoryboardFile</string>
	<string>Info.plist:UIApplicationSceneManifest:UISceneStoryboardFile</string>
	<string>Base.lproj/Main.storyboard</string>
	<string>ViewModel.swift</string>
</array>
- Update the definitions as shown.
<key>Definitions</key>
<dict>
	<key>Base.lproj/Main.storyboard</key>
	<dict>
		<key>Path</key>
		<string>Main.storyboard</string>
		<key>SortOrder</key>
		<integer>98</integer>
	</dict>
	<key>Info.plist:UIMainStoryboardFile</key>
	<string><key>UIMainStoryboardFile</key>
                            <string>Main</string>
                  </string>
	<key>ViewModel.swift</key>
	<dict>
		<key>Group</key>
		<array>
			<string>ViewModel</string>
		</array>
		<key>Path</key>
		<string>ViewModel.swift</string>
	</dict>
	<key>ViewController.swift:implementation:properties</key>
	<string>var model : ViewModel = ViewModel.getModelReference()</string>
</dict>

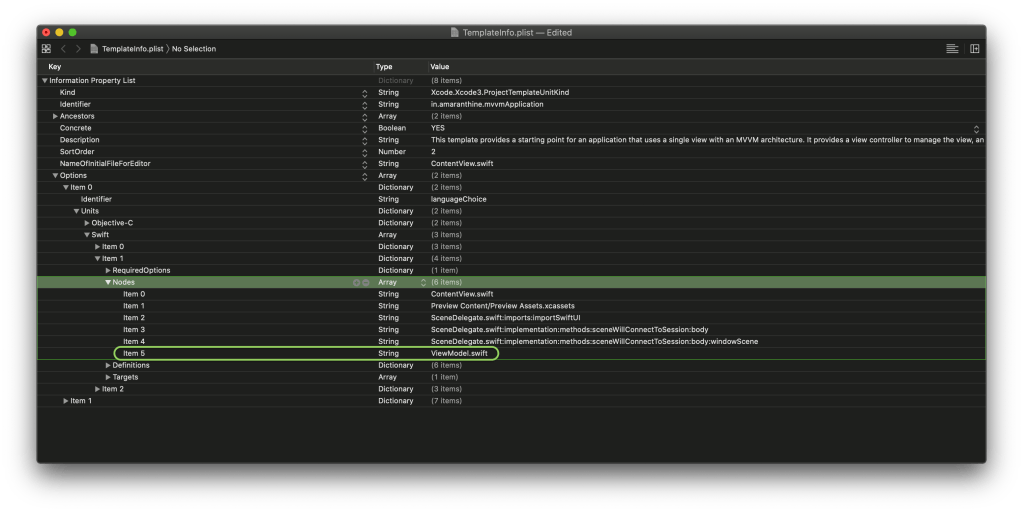
- Now we will update the node list for the SwiftUI version of the template.
<key>Nodes</key>
<array>
	<string>ContentView.swift</string>
	<string>Preview Content/Preview Assets.xcassets</string>
	<string>SceneDelegate.swift:imports:importSwiftUI</string>
	<string>SceneDelegate.swift:implementation:methods:sceneWillConnectToSession:body</string>
	<string>SceneDelegate.swift:implementation:methods:sceneWillConnectToSession:body:windowScene</string>
	<string>ViewModel.swift</string>
</array>
- Next we will update the definitions.
<key>Definitions</key>
<dict>
	<key>ContentView.swift</key>
	<dict>
		<key>SortOrder</key>
		<integer>99</integer>
		<key>Path</key>
		<string>ContentView.swift</string>
	</dict>
	<key>Preview Content/Preview Assets.xcassets</key>
	<dict>
		<key>SortOrder</key>
		<integer>100</integer>
		<key>Path</key>
		<string>Preview Assets.xcassets</string>
		<key>Group</key>
		<string>Preview Content</string>
	</dict>
	<key>ViewModel.swift</key>
	<dict>
		<key>Group</key>
		<array>
			<string>ViewModel</string>
		</array>
		<key>Path</key>
		<string>ViewModel.swift</string>
	</dict>
	<key>SceneDelegate.swift:implementation:methods:sceneWillConnectToSession:body</key>
	<string>
// Create the SwiftUI view that provides the window contents.
let contentView = ContentView()
</string>
	<key>SceneDelegate.swift:implementation:methods:sceneWillConnectToSession:body:windowScene</key>
	<string>
// Use a UIHostingController as window root view controller.
if let windowScene = scene as? UIWindowScene {
    let window = UIWindow(windowScene: windowScene)
    window.rootViewController = UIHostingController(rootView: contentView)
    self.window = window
    window.makeKeyAndVisible()
}</string>
	<key>*:imports:importSwiftUI</key>
	<string>import SwiftUI</string>
</dict>

This is the full modified TemplateInfo.plist file.
<?xml version="1.0" encoding="UTF-8"?>
<!DOCTYPE plist PUBLIC "-//Apple//DTD PLIST 1.0//EN" "http://www.apple.com/DTDs/PropertyList-1.0.dtd">
<plist version="1.0">
<dict>
	<key>Kind</key>
	<string>Xcode.Xcode3.ProjectTemplateUnitKind</string>
	<key>Identifier</key>
	<string>in.amaranthine.mvvmApplication</string>
	<key>Ancestors</key>
	<array>
		<string>com.apple.dt.unit.coreDataCocoaTouchApplication</string>
		<string>com.apple.dt.unit.sceneLifecycleApplication</string>
	</array>
	<key>Concrete</key>
	<true/>
	<key>Description</key>
	<string>This template provides a starting point for an application that uses a single view with an MVVM architecture. It provides a view controller to manage the view, and a storyboard or nib file that contains the view. It also provides the View Model file for the view controller.</string>
	<key>SortOrder</key>
	<integer>2</integer>
	<key>NameOfInitialFileForEditor</key>
	<string>ContentView.swift</string>
	<key>Options</key>
	<array>
		<dict>
			<key>Identifier</key>
			<string>languageChoice</string>
			<key>Units</key>
			<dict>
				<key>Objective-C</key>
				<dict>
					<key>Nodes</key>
					<array>
						<string>ViewController.h:comments</string>
						<string>ViewController.h:imports:importCocoa</string>
						<string>ViewController.h:imports:importHeader:ViewModel.h</string>
						<string>ViewController.h:interface(___FILEBASENAME___ : UIViewController)</string>
						<string>ViewController.h:interface:property</string>
						<string>ViewController.m:comments</string>
						<string>ViewController.m:imports:importHeader:ViewController.h</string>
						<string>ViewController.m:extension</string>
						<string>ViewController.m:implementation:synthesis</string>
						<string>ViewController.m:implementation:methods:viewDidLoad(- (void\)viewDidLoad)</string>
						<string>ViewController.m:implementation:methods:viewDidLoad:super</string>
						<string>ViewController.m:implementation:methods:viewDidLoad:singleton</string>
						<string>Info.plist:UIMainStoryboardFile</string>
						<string>Info.plist:UIApplicationSceneManifest:UISceneStoryboardFile</string>
						<string>Base.lproj/Main.storyboard</string>
						<string>ViewModel.h</string>
						<string>ViewModel.m</string>
					</array>
					<key>Definitions</key>
					<dict>
						<key>Base.lproj/Main.storyboard</key>
						<dict>
							<key>Path</key>
							<string>Main.storyboard</string>
							<key>SortOrder</key>
							<integer>98</integer>
						</dict>
						<key>Info.plist:UIMainStoryboardFile</key>
						<string><key>UIMainStoryboardFile</key>
                            <string>Main</string>
                        </string>
						<key>ViewModel.h</key>
						<dict>
							<key>Group</key>
							<array>
								<string>ViewModel</string>
							</array>
							<key>Path</key>
							<string>ViewModel.h</string>
						</dict>
						<key>ViewModel.m</key>
						<dict>
							<key>Group</key>
							<array>
								<string>ViewModel</string>
							</array>
							<key>Path</key>
							<string>ViewModel.m</string>
						</dict>
						<key>ViewController.m:implementation:methods:viewDidLoad:singleton</key>
						<string>self.model = [ViewModel getModelReference];</string>
						<key>ViewController.h:interface:property</key>
						<string>@property (strong, nonatomic) ViewModel *model;</string>
						<key>ViewController.m:implementation:synthesis</key>
						<string>@synthesize model;</string>
					</dict>
				</dict>
				<key>Swift</key>
				<array>
					<dict>
						<key>RequiredOptions</key>
						<dict>
							<key>userInterface</key>
							<string>Storyboard</string>
						</dict>
						<key>Nodes</key>
						<array>
							<string>ViewController.swift:comments</string>
							<string>ViewController.swift:imports:importCocoa</string>
							<string>ViewController.swift:implementation(___FILEBASENAME___: UIViewController)</string>
							<string>ViewController.swift:implementation:methods:viewDidLoad(override func viewDidLoad(\))</string>
							<string>ViewController.swift:implementation:methods:viewDidLoad:super</string>
							<string>ViewController.swift:implementation:properties</string>
							<string>Info.plist:UIMainStoryboardFile</string>
							<string>Info.plist:UIApplicationSceneManifest:UISceneStoryboardFile</string>
							<string>Base.lproj/Main.storyboard</string>
							<string>ViewModel.swift</string>
						</array>
						<key>Definitions</key>
						<dict>
							<key>Base.lproj/Main.storyboard</key>
							<dict>
								<key>Path</key>
								<string>Main.storyboard</string>
								<key>SortOrder</key>
								<integer>98</integer>
							</dict>
							<key>Info.plist:UIMainStoryboardFile</key>
							<string><key>UIMainStoryboardFile</key>
                            <string>Main</string>
                        </string>
							<key>ViewModel.swift</key>
							<dict>
								<key>Group</key>
								<array>
									<string>ViewModel</string>
								</array>
								<key>Path</key>
								<string>ViewModel.swift</string>
							</dict>
							<key>ViewController.swift:implementation:properties</key>
							<string>var model : ViewModel = ViewModel.getModelReference()</string>
						</dict>
					</dict>
					<dict>
						<key>RequiredOptions</key>
						<dict>
							<key>userInterface</key>
							<string>SwiftUI</string>
						</dict>
						<key>Nodes</key>
						<array>
							<string>ContentView.swift</string>
							<string>Preview Content/Preview Assets.xcassets</string>
							<string>SceneDelegate.swift:imports:importSwiftUI</string>
							<string>SceneDelegate.swift:implementation:methods:sceneWillConnectToSession:body</string>
							<string>SceneDelegate.swift:implementation:methods:sceneWillConnectToSession:body:windowScene</string>
							<string>ViewModel.swift</string>
						</array>
						<key>Definitions</key>
						<dict>
							<key>ContentView.swift</key>
							<dict>
								<key>SortOrder</key>
								<integer>99</integer>
								<key>Path</key>
								<string>ContentView.swift</string>
							</dict>
							<key>Preview Content/Preview Assets.xcassets</key>
							<dict>
								<key>SortOrder</key>
								<integer>100</integer>
								<key>Path</key>
								<string>Preview Assets.xcassets</string>
								<key>Group</key>
								<string>Preview Content</string>
							</dict>
							<key>ViewModel.swift</key>
							<dict>
								<key>Group</key>
								<array>
									<string>ViewModel</string>
								</array>
								<key>Path</key>
								<string>ViewModel.swift</string>
							</dict>
							<key>SceneDelegate.swift:implementation:methods:sceneWillConnectToSession:body</key>
							<string>
// Create the SwiftUI view that provides the window contents.
let contentView = ContentView()
</string>
							<key>SceneDelegate.swift:implementation:methods:sceneWillConnectToSession:body:windowScene</key>
							<string>
// Use a UIHostingController as window root view controller.
if let windowScene = scene as? UIWindowScene {
    let window = UIWindow(windowScene: windowScene)
    window.rootViewController = UIHostingController(rootView: contentView)
    self.window = window
    window.makeKeyAndVisible()
}</string>
							<key>*:imports:importSwiftUI</key>
							<string>import SwiftUI</string>
						</dict>
						<key>Targets</key>
						<array>
							<dict>
								<key>SharedSettings</key>
								<dict>
									<key>ENABLE_PREVIEWS</key>
									<string>YES</string>
									<key>DEVELOPMENT_ASSET_PATHS</key>
									<string>___PACKAGENAMEPREVIEWCONTENT:quoteIfNeeded___</string>
								</dict>
							</dict>
						</array>
					</dict>
					<dict>
						<key>RequiredOptions</key>
						<dict>
							<key>userInterface</key>
							<string>SwiftUI</string>
							<key>coreData</key>
							<string>true</string>
						</dict>
						<key>Nodes</key>
						<array>
							<string>SceneDelegate.swift:implementation:methods:sceneWillConnectToSession:body</string>
						</array>
						<key>Definitions</key>
						<dict>
							<key>SceneDelegate.swift:implementation:methods:sceneWillConnectToSession:body</key>
							<string>
// Get the managed object context from the shared persistent container.
let context = (UIApplication.shared.delegate as! AppDelegate).persistentContainer.viewContext

// Create the SwiftUI view and set the context as the value for the managedObjectContext environment keyPath.
// Add `@Environment(\.managedObjectContext)` in the views that will need the context.
let contentView = ContentView().environment(\.managedObjectContext, context)
</string>
						</dict>
					</dict>
				</array>
			</dict>
		</dict>
		<dict>
			<key>Identifier</key>
			<string>userInterface</string>
			<key>Name</key>
			<string>User Interface:</string>
			<key>Description</key>
			<string>The type of user interface.</string>
			<key>Values</key>
			<array>
				<string>SwiftUI</string>
				<string>Storyboard</string>
			</array>
			<key>RequiredOptionsForValues</key>
			<dict>
				<key>SwiftUI</key>
				<dict>
					<key>languageChoice</key>
					<string>Swift</string>
				</dict>
			</dict>
			<key>Default</key>
			<string>SwiftUI</string>
			<key>Type</key>
			<string>popup</string>
		</dict>
	</array>
</dict>
</plist>
Let us understand what we did in the steps above.
Step 11: We added lines to
- Import ViewModel.h in ViewController.h
- Declare a namespace for a property declaration in the header file. Its implementation will be added in the definition
- Declare a namespace for property synthesis in the implementation file.
- Declare the namespace for the implementation of the property creation logic (named singleton).
- Declare the presence of 2 more files. ViewModel.h & ViewModel.m
Step 12: Provide implementation for the namespaces declared in Step 11. This is done in the definitions section.
- Provide a new group called ViewModel. Place the ViewModel.h & ViewModel.m in the group.
- Provide the implementation for the singleton namespace.
- Similarly we provide implementation details for the property and synthesis namespace.
Step 13 & 14: We do the same thing we have done in Step 11 & 12, but this time we do it for the Swift implementation using storyboard.
Step 15 & 16: We do the same thing we have done in Step 11 & 12, but this time we do it for the Swift implementation using SwiftUI.
And that’s it. We have created our own template.
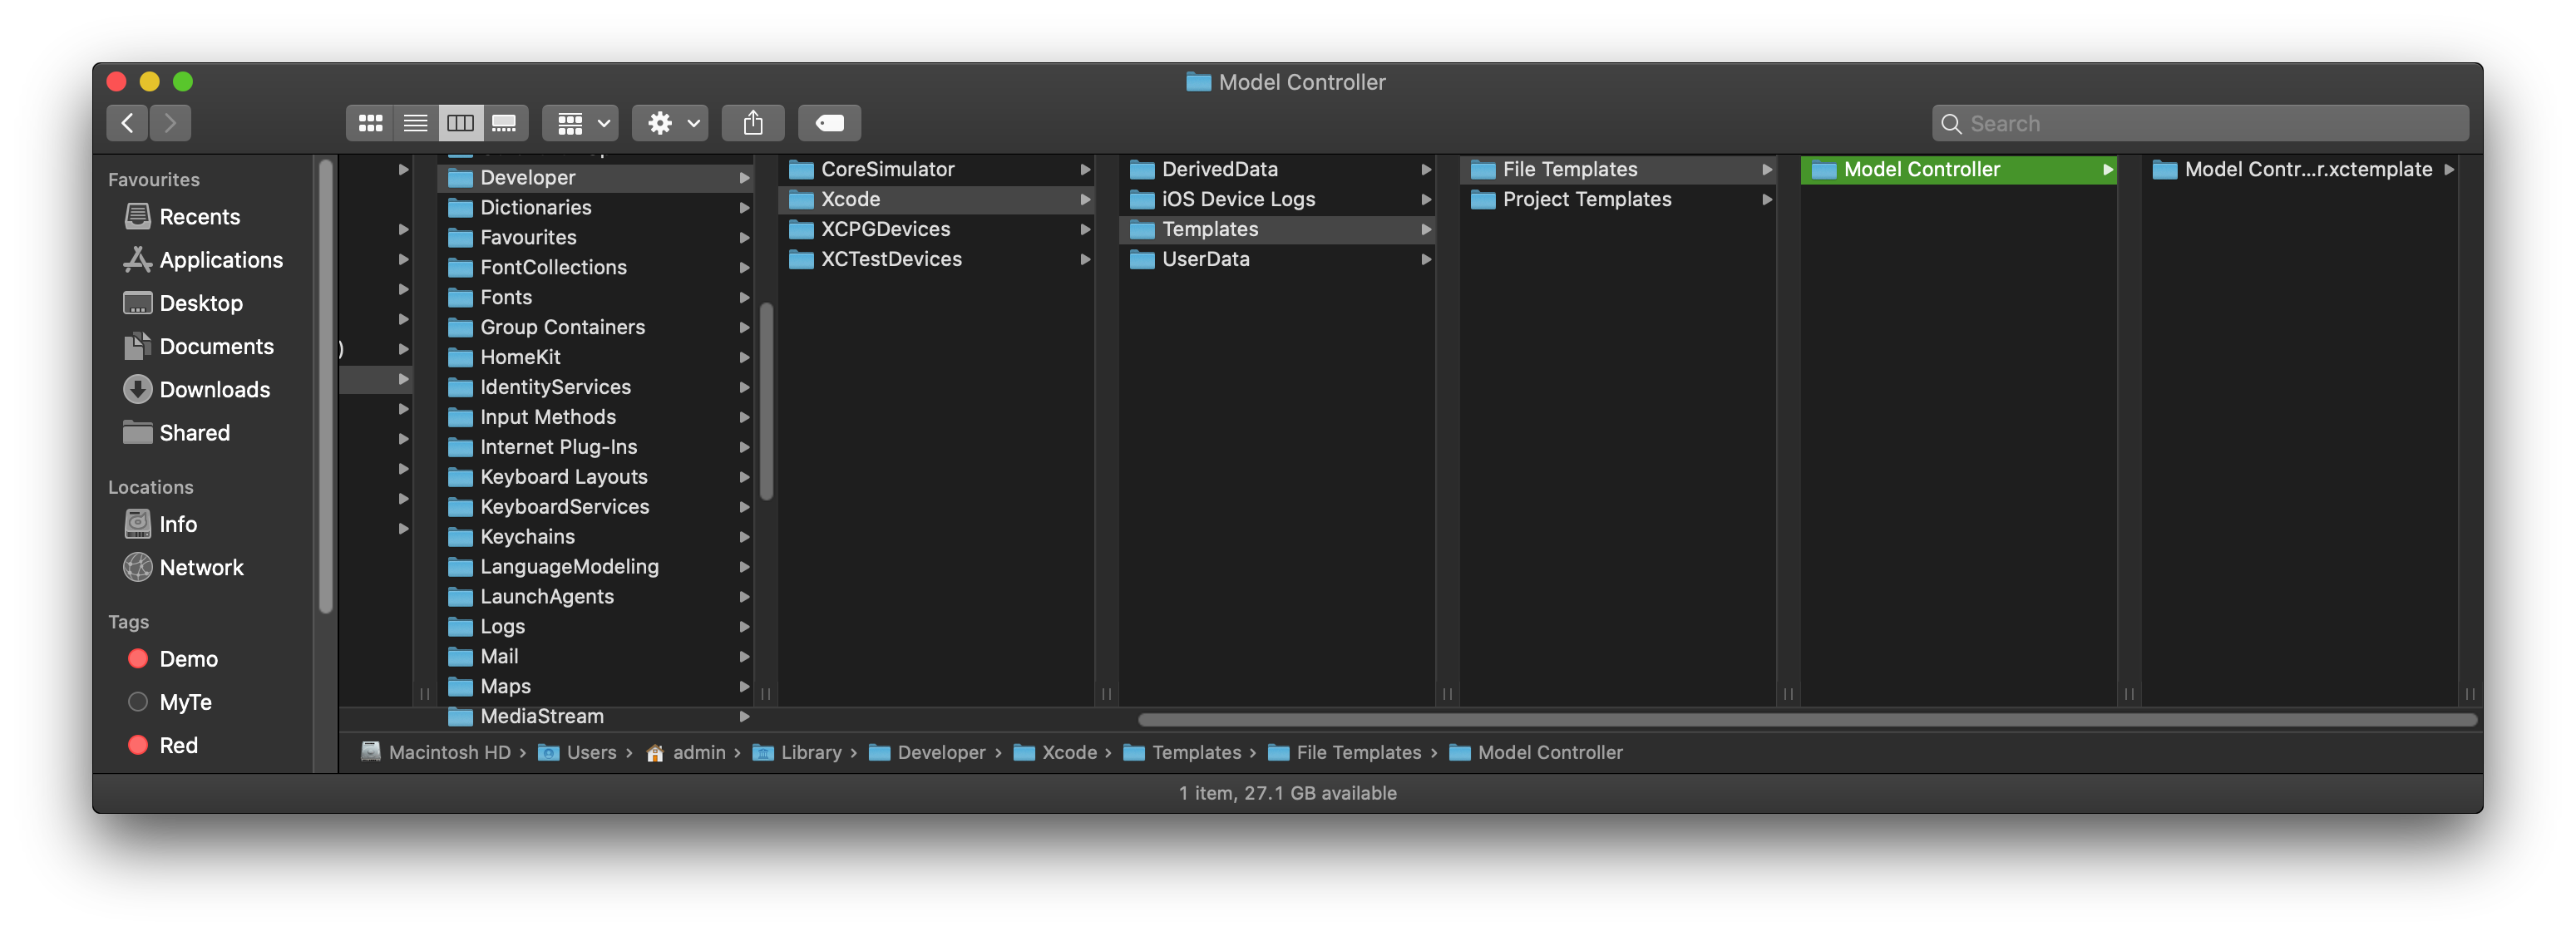
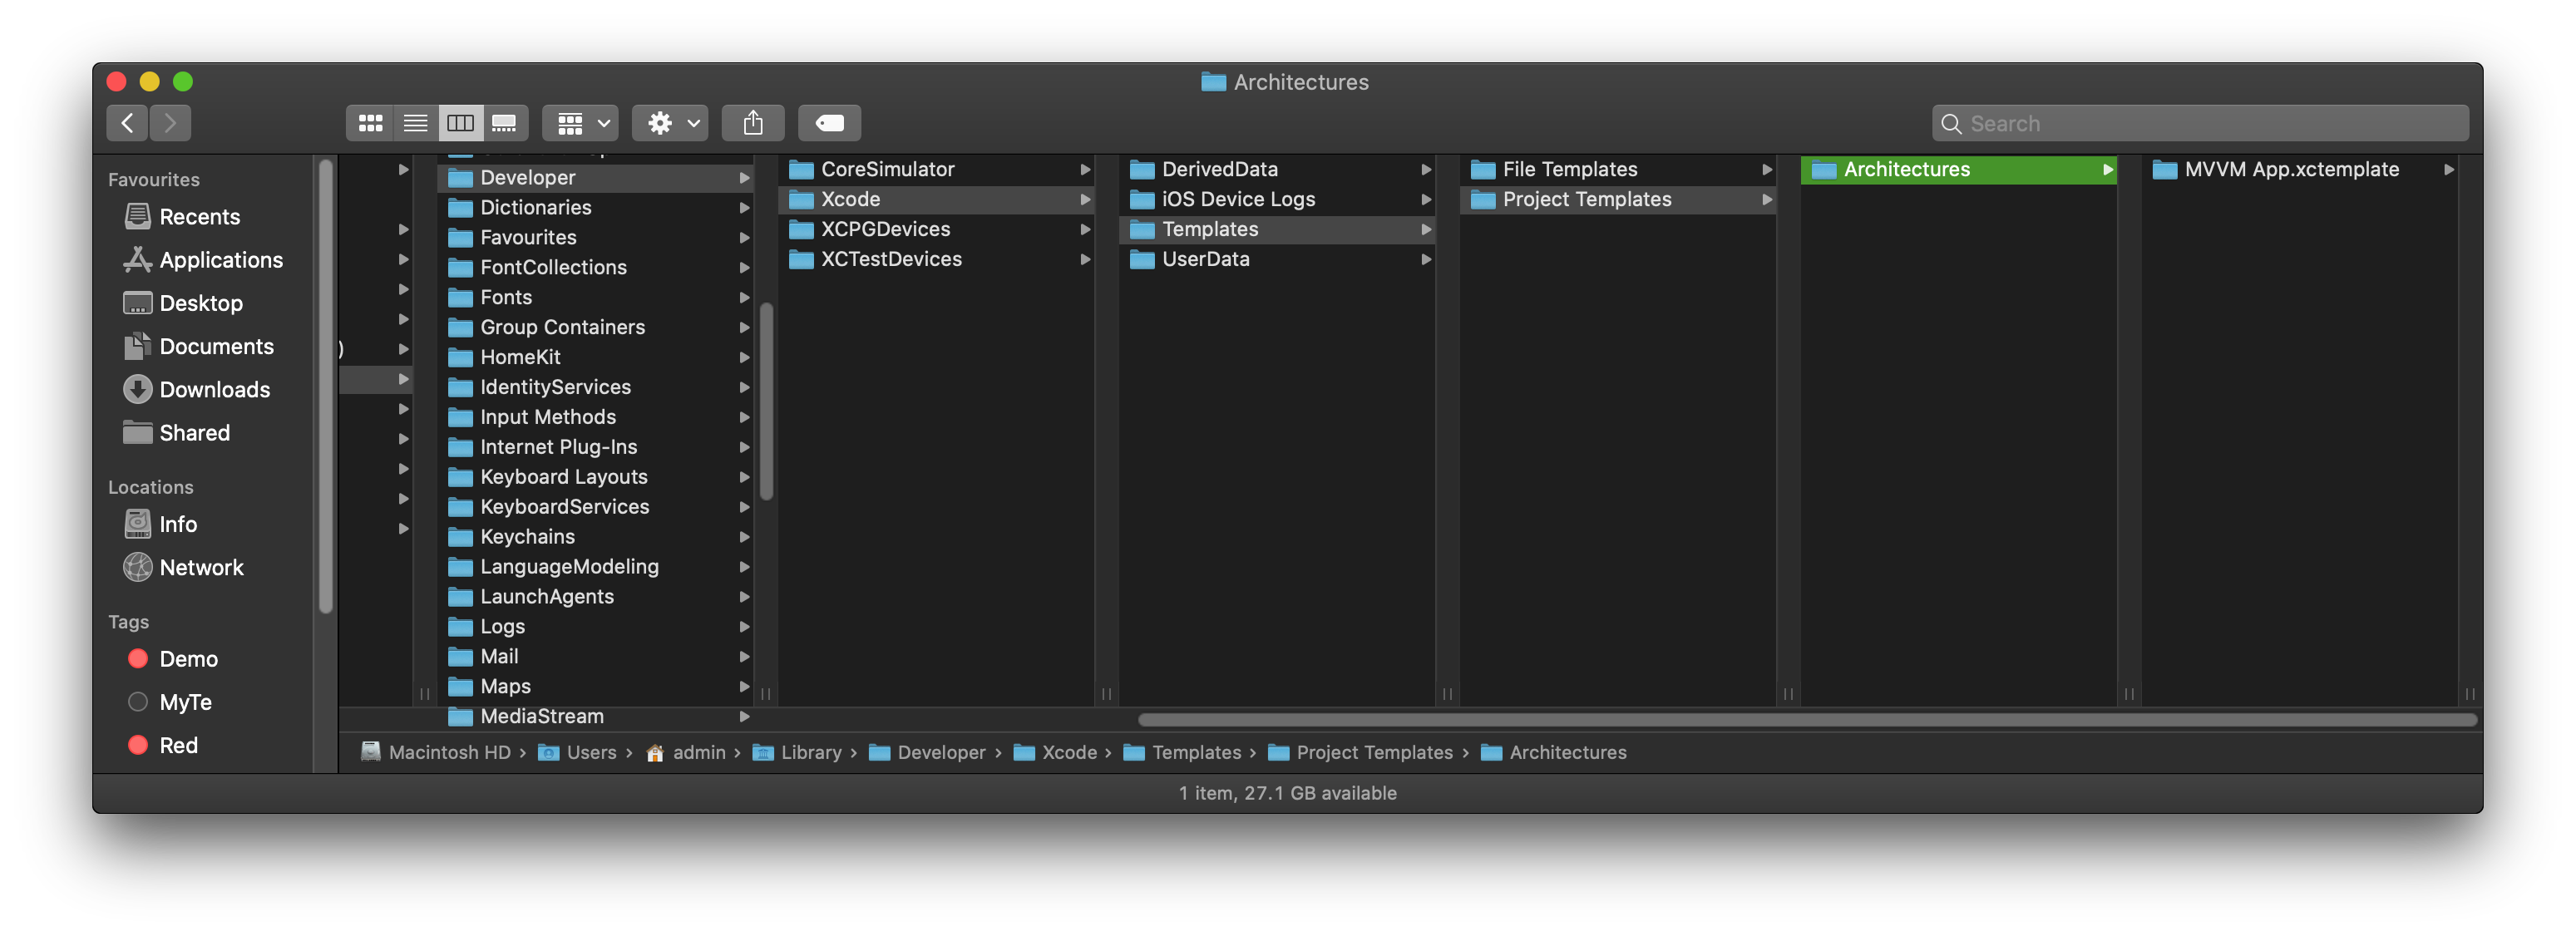
- Now we will place the newly created template in the appropriate folder. Switch to finder and navigate to:
~/Library/Developer/Xcode/Templates/Project Templates
- Create a new folder. Call it Architectures.
- Copy the template folder into this newly created folder. The end result of the above steps should look like
- Next, we will test our templates out. Let us create projects in Objective-C, Swift with Storyboard, & Swift with SwiftUI.


Here we have successfully created and Objective-C project.
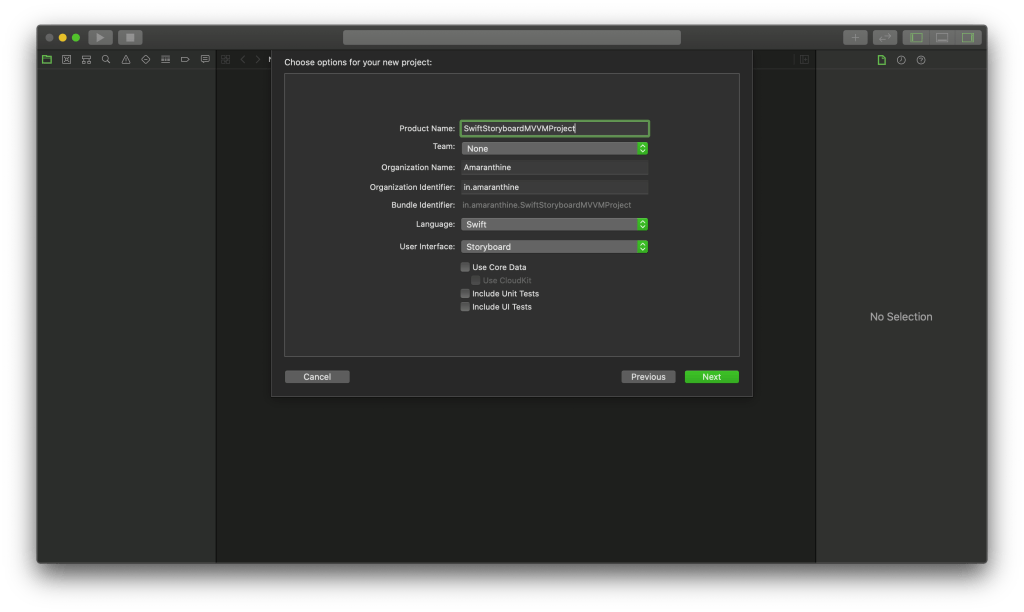


A storyboard project in Swift.


A SwiftUI project in Swift.
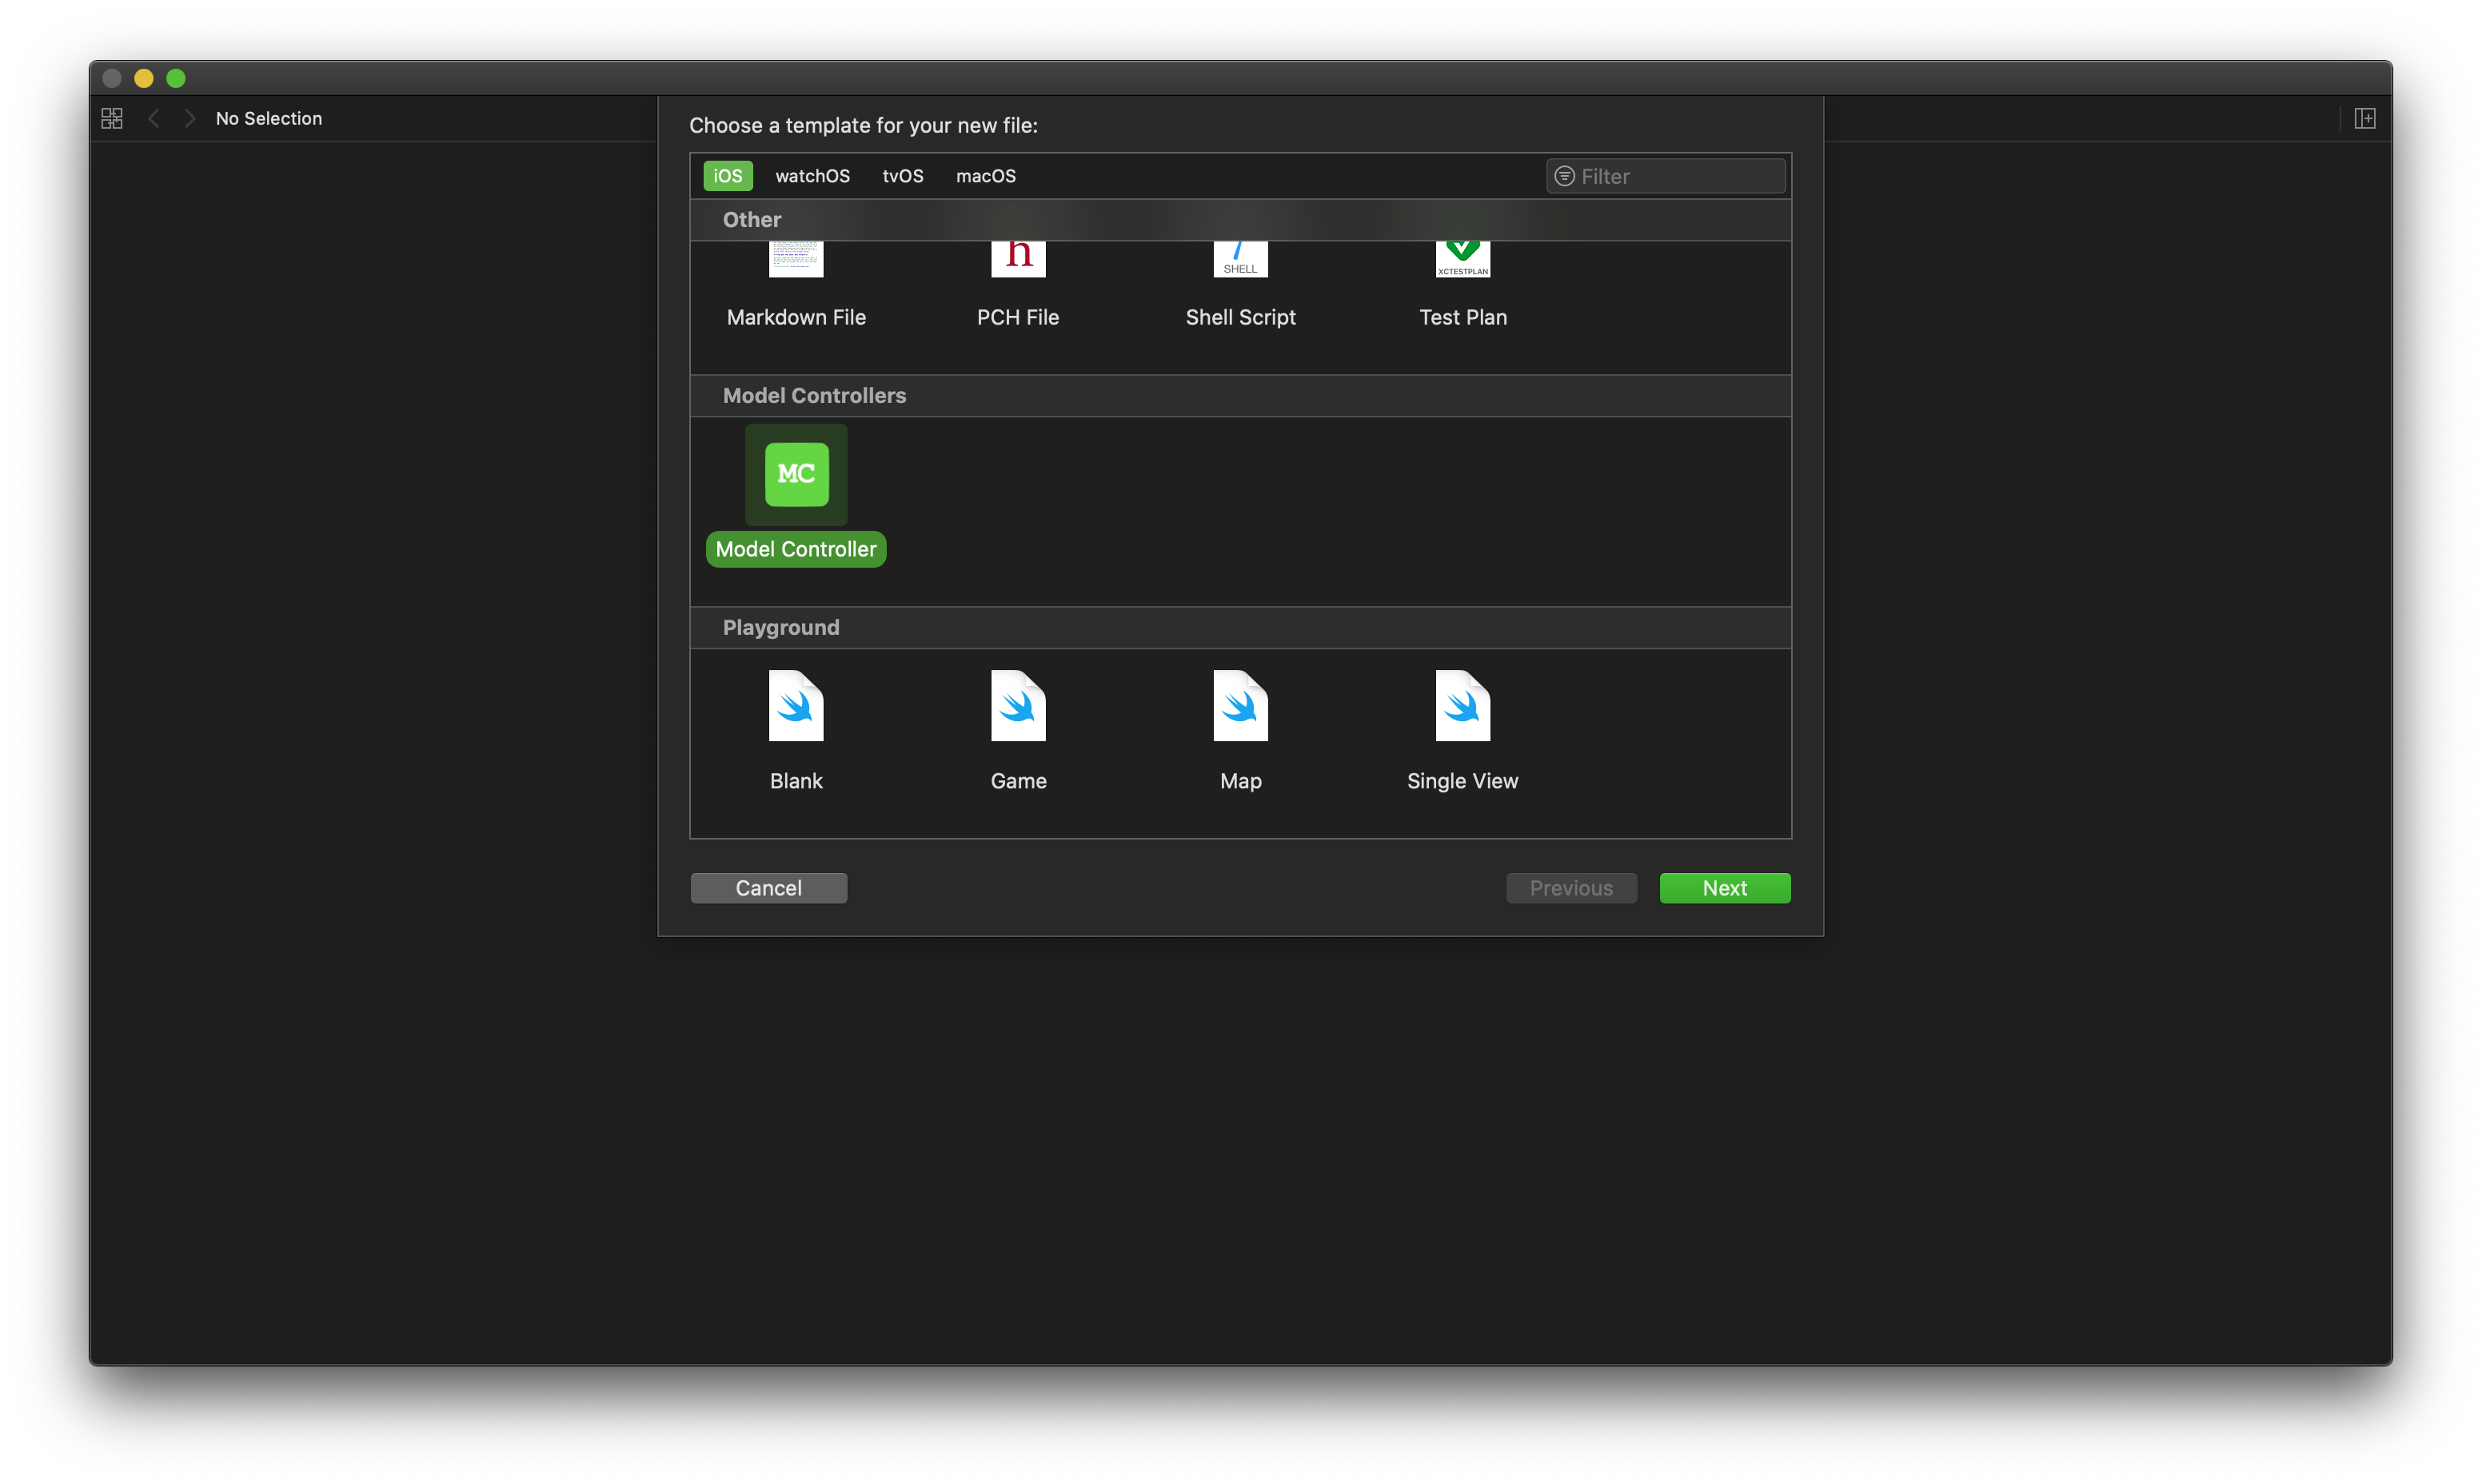
Similarly we can create a custom Model Controller file based on our template.
That’s how we can create our own custom templates. Play around and create more templates.

Something similar can also be done for macOS.