Creating File Templates
Now we will get started with creating File Templates.
- Navigate to the folder:
/Applications/Xcode.app/Contents/Developer/Platforms/iPhoneOS.platform/Developer/Library/Xcode/Templates/File Templates/User Inteface/View.xctemplate/

- Copy it to the desktop. We will make changes to the desktop version of the template and then move it else where. You could use any template as a reference to start off with.
- Navigate to the desktop where the folder was just copied. I am going to create a model controller template. I will use this template whenever I wish to implement the model in my project.
- Replace the template icon images with an image of you choice.
- Delete the xib file. Since this is going to be a template for a model we won’t be needing the xib file.
- Create a new empty swift file and save it inside the folder on the desktop. Name the file: ___FILEBASENAME___.swift. We will populate the file momentarily.
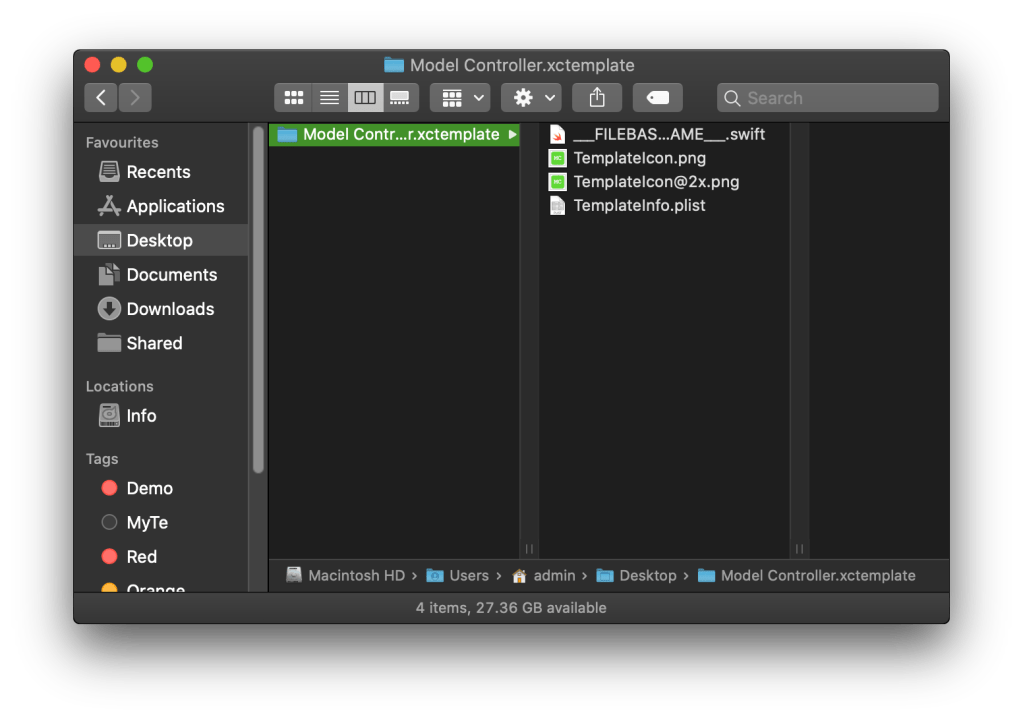
- Rename the template folder to Model Controller.xctemplate. Once done your folder should look like:
- First let us modify the swift file. Implement it as shown below.
//----------
//FILENAME:     ___FILENAME___
//CREATED BY:   ___FULLUSERNAME___ on .
//DATE:         ___DATE___
//COPYRIGHT:    Amaranthine (c) 2020. All rights reserved.

//----------
//MARK: - Frameworks
import Foundation

/**
 <# Class description #>
 - important: <# points to note #>
 - note: <# additional description #>
 - author: ___FULLUSERNAME___
 - date: ___DATE___
 - version: 1.0

 **Contact Details**

 [arun@amaranthine.co.in](mailto:<# email address #>)

 [www.amaranthine.in](https://www.amaranthine.in)
 */
final class ___FILEBASENAMEASIDENTIFIER___Controller {

    //----------
    //MARK: - Singleton Logic
    private static var ___VARIABLE_referenceHandle___ : ___FILEBASENAMEASIDENTIFIER___Controller?

    static func ___VARIABLE_methodName___() -> ___FILEBASENAMEASIDENTIFIER___Controller {
        if ___VARIABLE_referenceHandle___ == nil
        {
            ___VARIABLE_referenceHandle___ = ___FILEBASENAMEASIDENTIFIER___Controller()
        }
        return ___VARIABLE_referenceHandle___!
    }

    private init() {
        <#statements#>
    }

    //----------
    //MARK: - Your logic
}
This is how the rendered version looks like when opened in Xcode.

Note: The syntax <# … #> automatically gets converted to placeholders when the file is opened in Xcode.
For example: <# Class description #> becomes a placeholder with the phrase “Class description” as can be seen on line 12 of the screenshot. These placeholders are intended for the developer who is creating the file and not for Xcode.
There are some other placeholders that are not rendered by Xcode. These are used by Xcode when it is creating the file at the time the developer requests it. These can easily be identified as they have 3 underscores ‘___’ at the start and end of the placeholder.
For example, ___FILEBASENAMEASIDENTIFIER___ which is used to specify the class name. We will examine these later once we are done implementing the TemplateInfo.plist file.
- Next we will focus on modifying the TemplateInfo.plist file. Open it and implement it as shown.
<?xml version="1.0" encoding="UTF-8"?>
<!DOCTYPE plist PUBLIC "-//Apple//DTD PLIST 1.0//EN" "http://www.apple.com/DTDs/PropertyList-1.0.dtd">
<plist version="1.0">
<dict>
	<key>Kind</key>
	<string>Xcode.IDEFoundation.TextSubstitutionFileTemplateKind</string>
	<key>Description</key>
	<string>This generates a model controller file with all the necessary singleton logic in place.</string>
	<key>Summary</key>
	<string>This generates a model controller file with all the necessary singleton logic in place.</string>
	<key>SortOrder</key>
	<string>30</string>
	<key>AllowedTypes</key>
	<array>
		<string>public.swift-source</string>
	</array>
	<key>DefaultCompletionName</key>
	<string>File</string>
	<key>MainTemplateFile</key>
	<string>___FILEBASENAME___.swift</string>
	<key>Options</key>
	<array>
		<dict>
			<key>Identifier</key>
			<string>methodName</string>
			<key>Required</key>
			<true/>
			<key>Name</key>
			<string>Method:</string>
			<key>Description</key>
			<string>This is the name of your model controller</string>
			<key>Type</key>
			<string>text</string>
			<key>NotPersisted</key>
			<true/>
		</dict>
		<dict>
			<key>Identifier</key>
			<string>referenceHandle</string>
			<key>Required</key>
			<true/>
			<key>Name</key>
			<string>Reference Handle:</string>
			<key>Default</key>
			<string>objReference</string>
			<key>Description</key>
			<string>This is the name of the private variable.</string>
			<key>Type</key>
			<string>text</string>
			<key>NotPersisted</key>
			<true/>
		</dict>
	</array>
</dict>
</plist>
If you open the file in Xcode it should look like this.
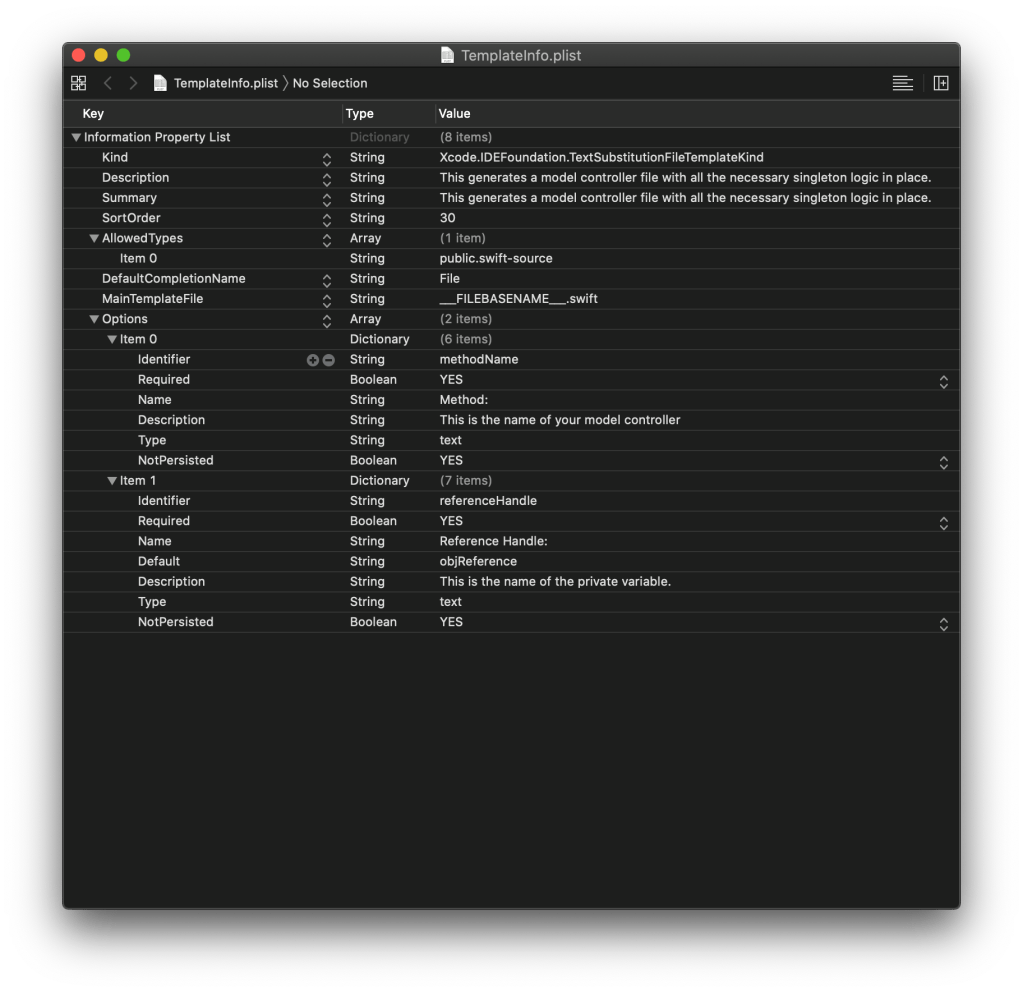
Let us examine the different options.
| Key | Description |
|---|---|
| Kind | The kind specifies the kind of template being created. |
| Description | This is a description of the template |
| Summary | A summary about the template. |
| SortOrder | This is the order in which the template will be sorted in the template wizard. |
| Main Template File | This is the main file that will be created by the template. |
| Allowed Types | This specifies the type of file that can be created. |
| Options | This can have multiple values. Here we provide the options to the user while they are creating the file. |
Let us look at the values within the Options.
| Key | Description |
|---|---|
| Identifier | Used to uniquely identify the option provided. We will be using this identifier in the swift file. |
| Required | Indicates whether this is a mandatory option. |
| Name | This is what will be displayed to the user. Usual it gives information about what is expected from the user. |
| Description | A description about the option provided. |
| Type | What type of value does the option expect. |
| Not Persisted | Indicates whether the value chosen in this case will be the same used in all future instances when the same file type is being created. |
The key point here being the identifiers for the options. This is what we have used in the template swift file. The ___VARIABLE_referenceHandle___ refers to the identifier referenceHandle. So whatever the user enters in there will be used in place of the text macros.
Similarly there is another text macro ___VARIABLE_methodName___ this refers to the identifier methodName.
This is how the link between the options within the TemplateInfo.plist and the template file was established.
There are many other macros we have used in the swift file:
| ___FILENAME___ |
| ___FULLUSERNAME___ |
| ___DATE___ |
| ___FILEBASENAMEASIDENTIFIER___ |
For a full list of text macros read this documentation by Apple.
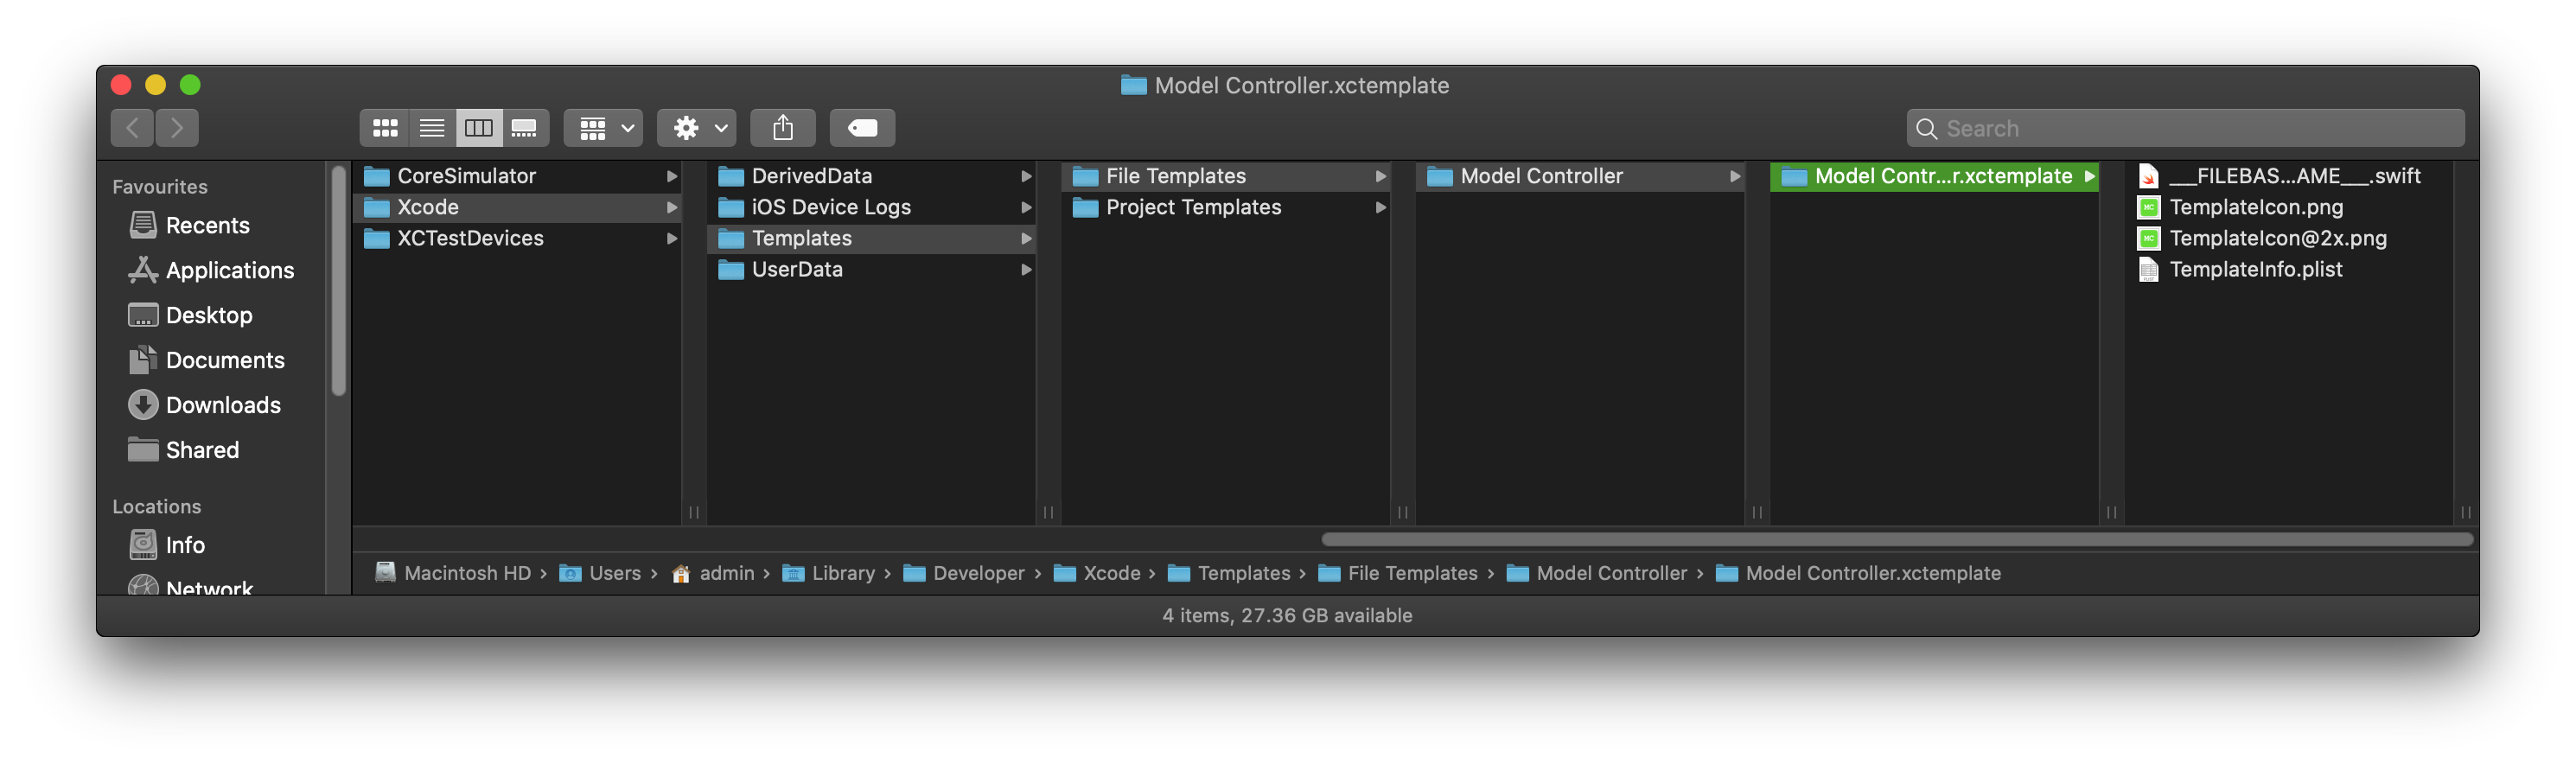
- Now we will place the newly created template in the appropriate folder. Switch to finder and navigate to:
~/Library/Developer/Xcode/Templates/File Templates
- Create a folder called Model Controller. This represents a section in the template wizard.
- Copy the Model Controller.xctemplate from the desktop to this folder.
- Next we will open Xcode to see if we can create a file from this template. Just to be sure quit Xcode if it is already open and then reopen Xcode.
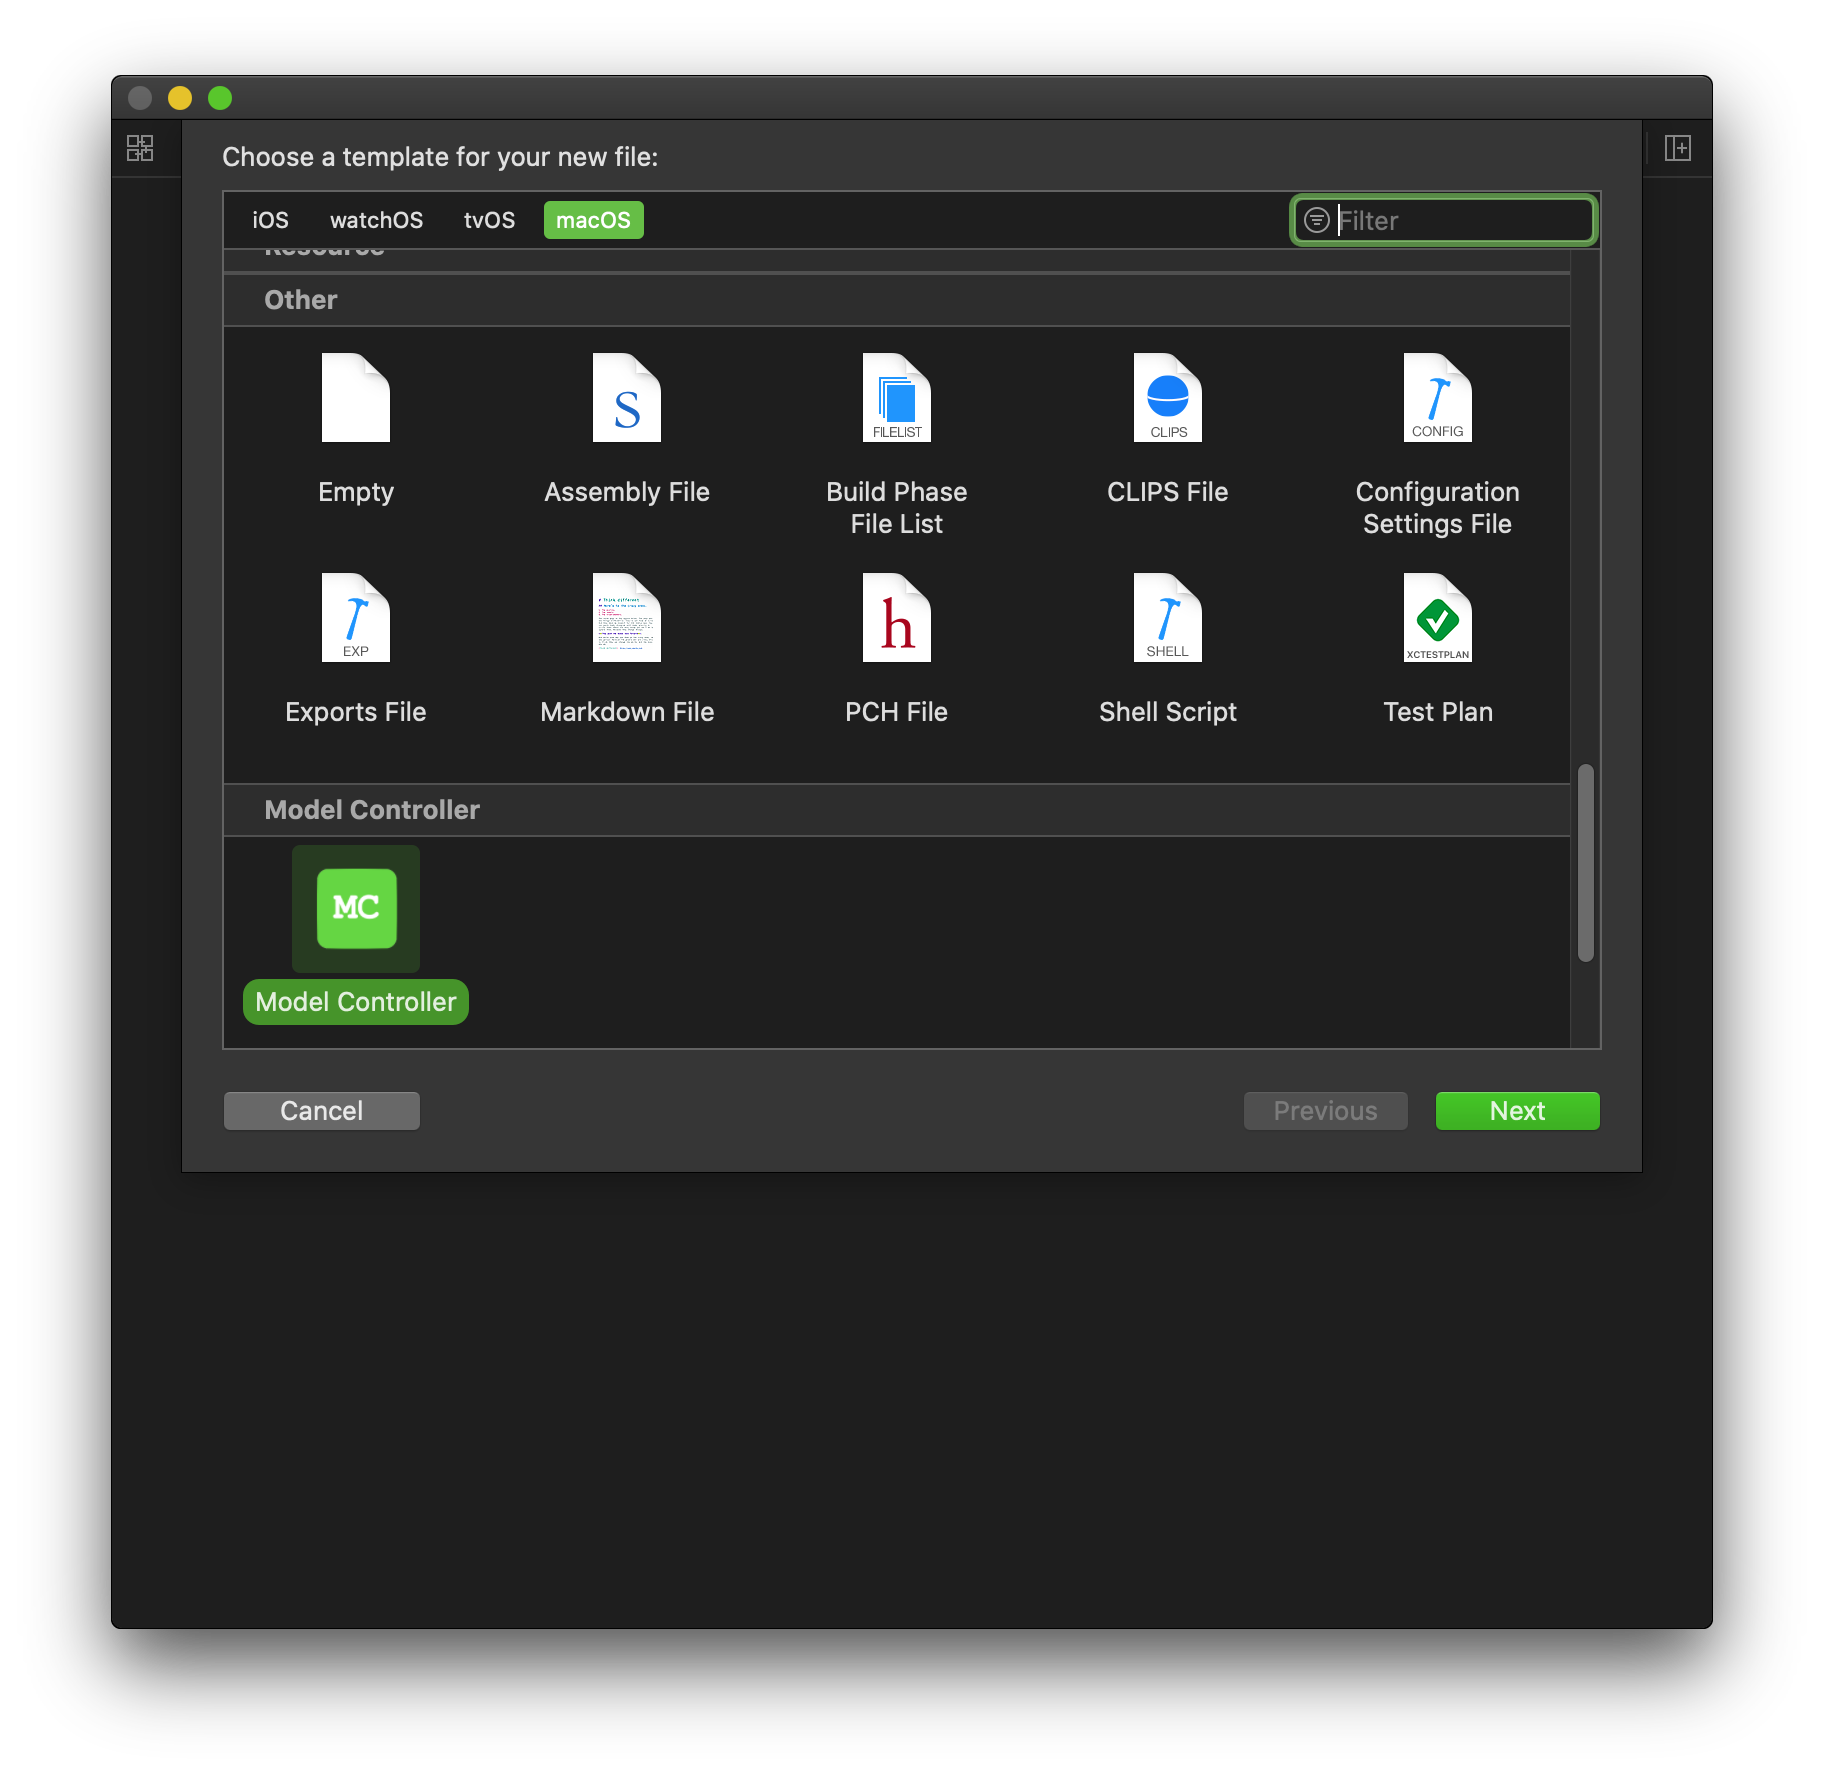
- Click on File > New > File. This should bring up the template wizard.
- Scroll all the way to the bottom. You should see your template with the custom icon you designed in there.
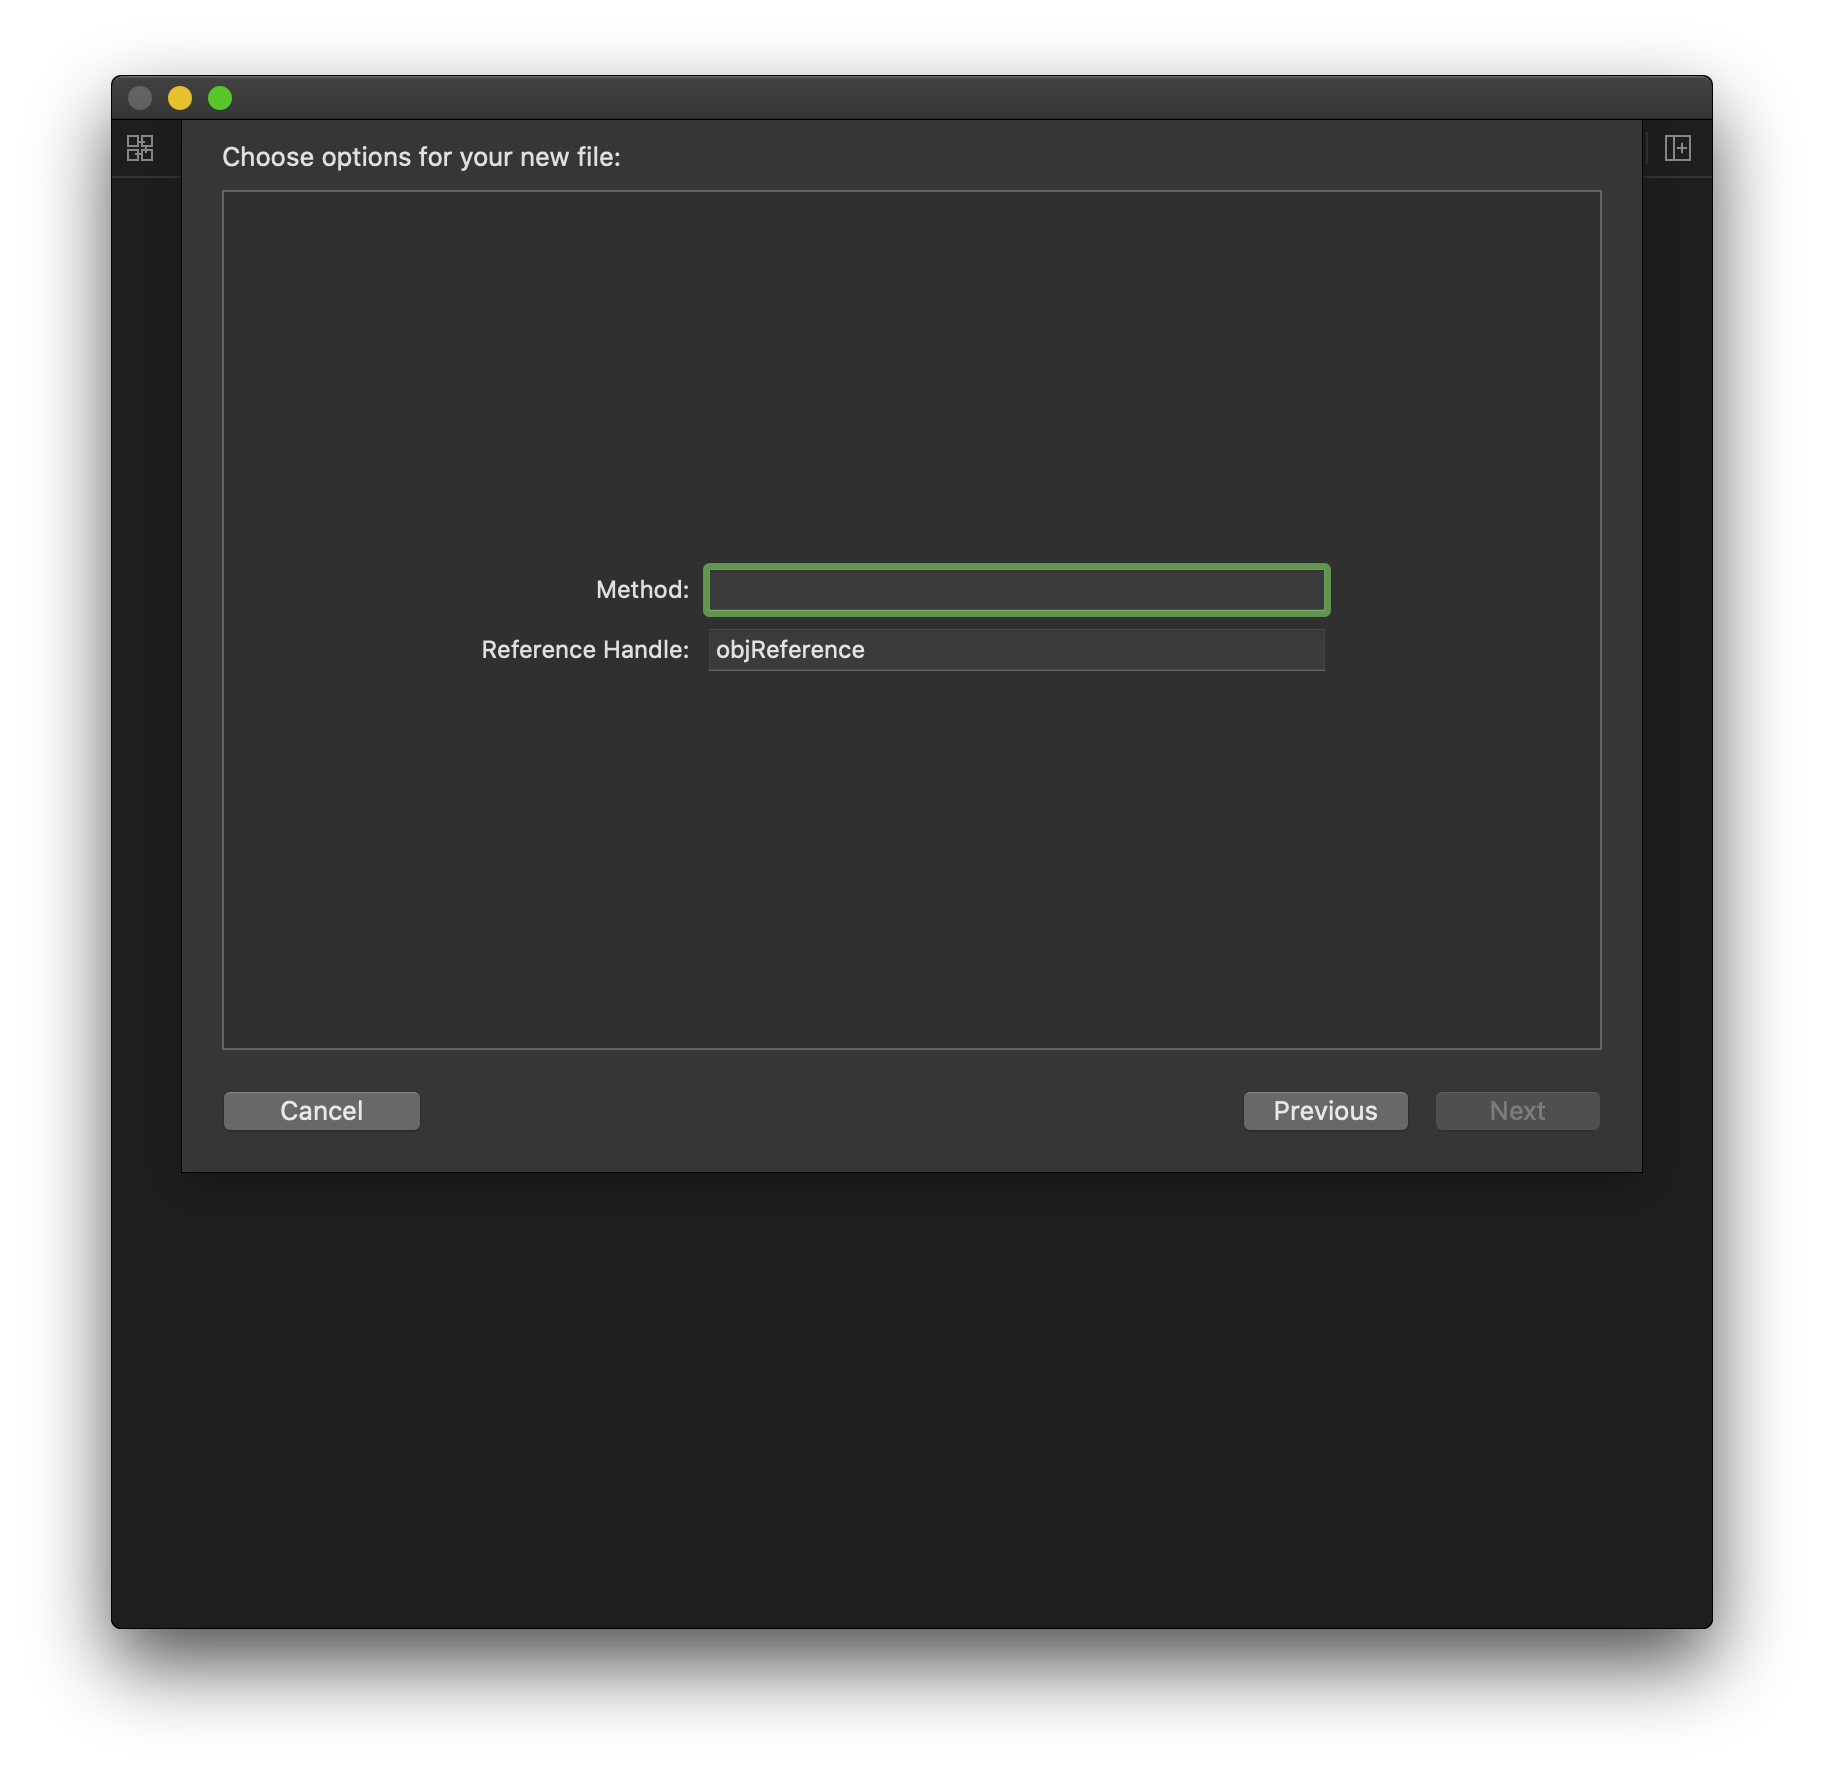
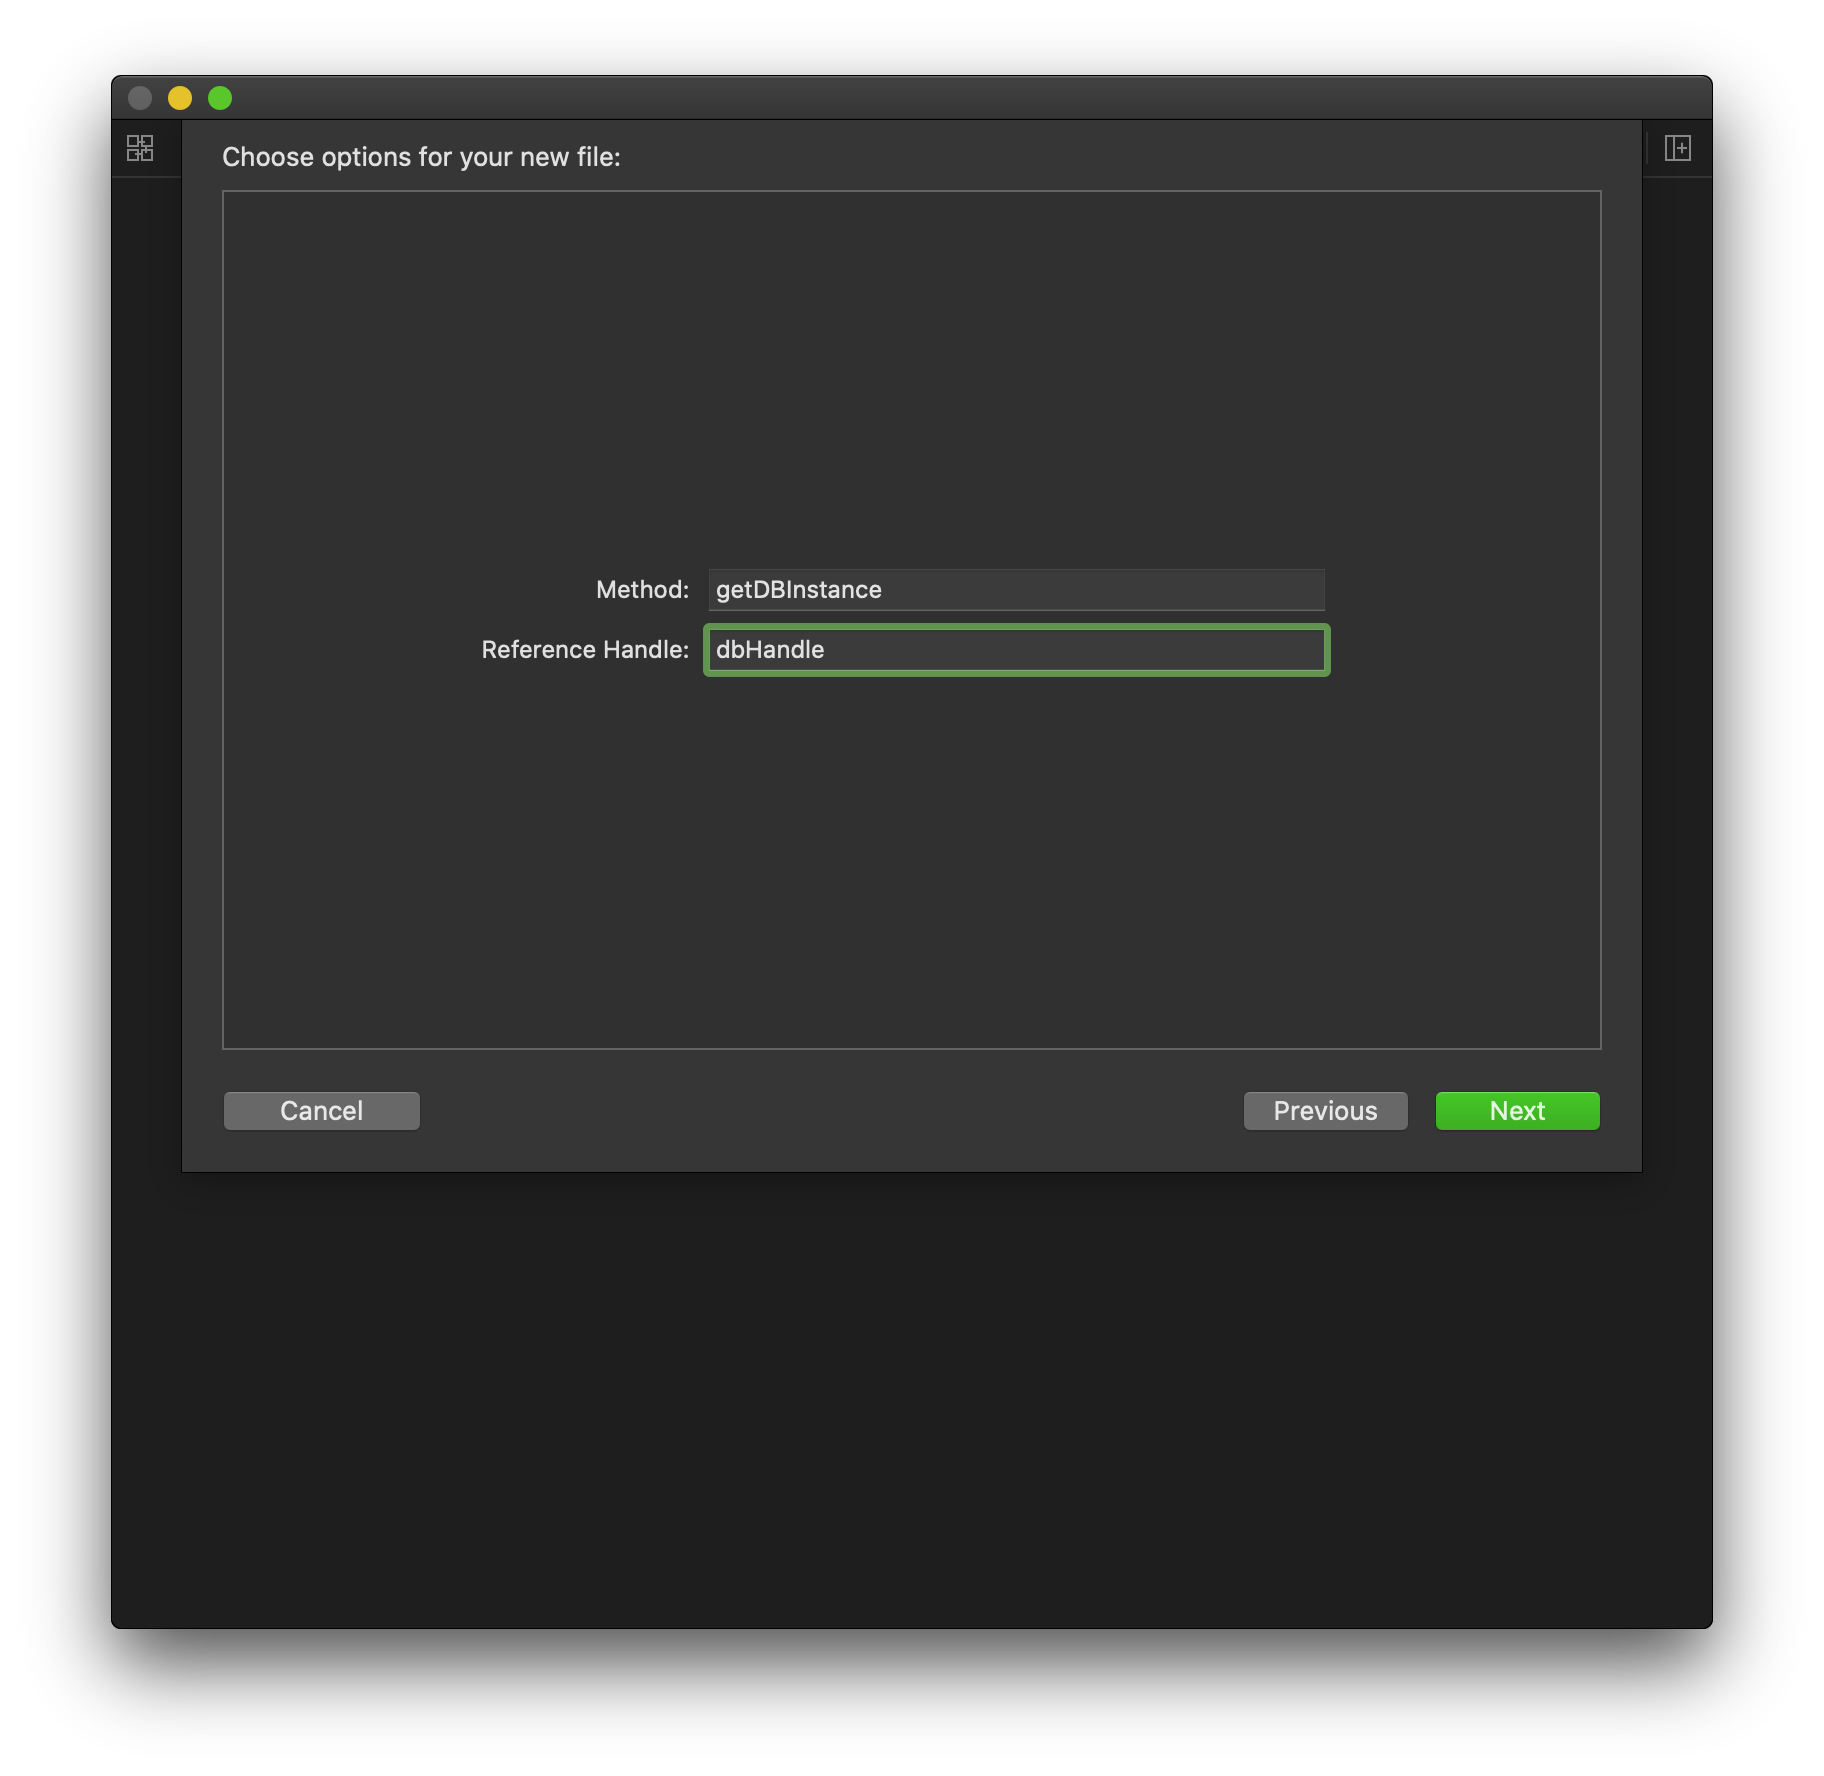
- As you navigate through the screens you will get the options you mentioned in the template info.
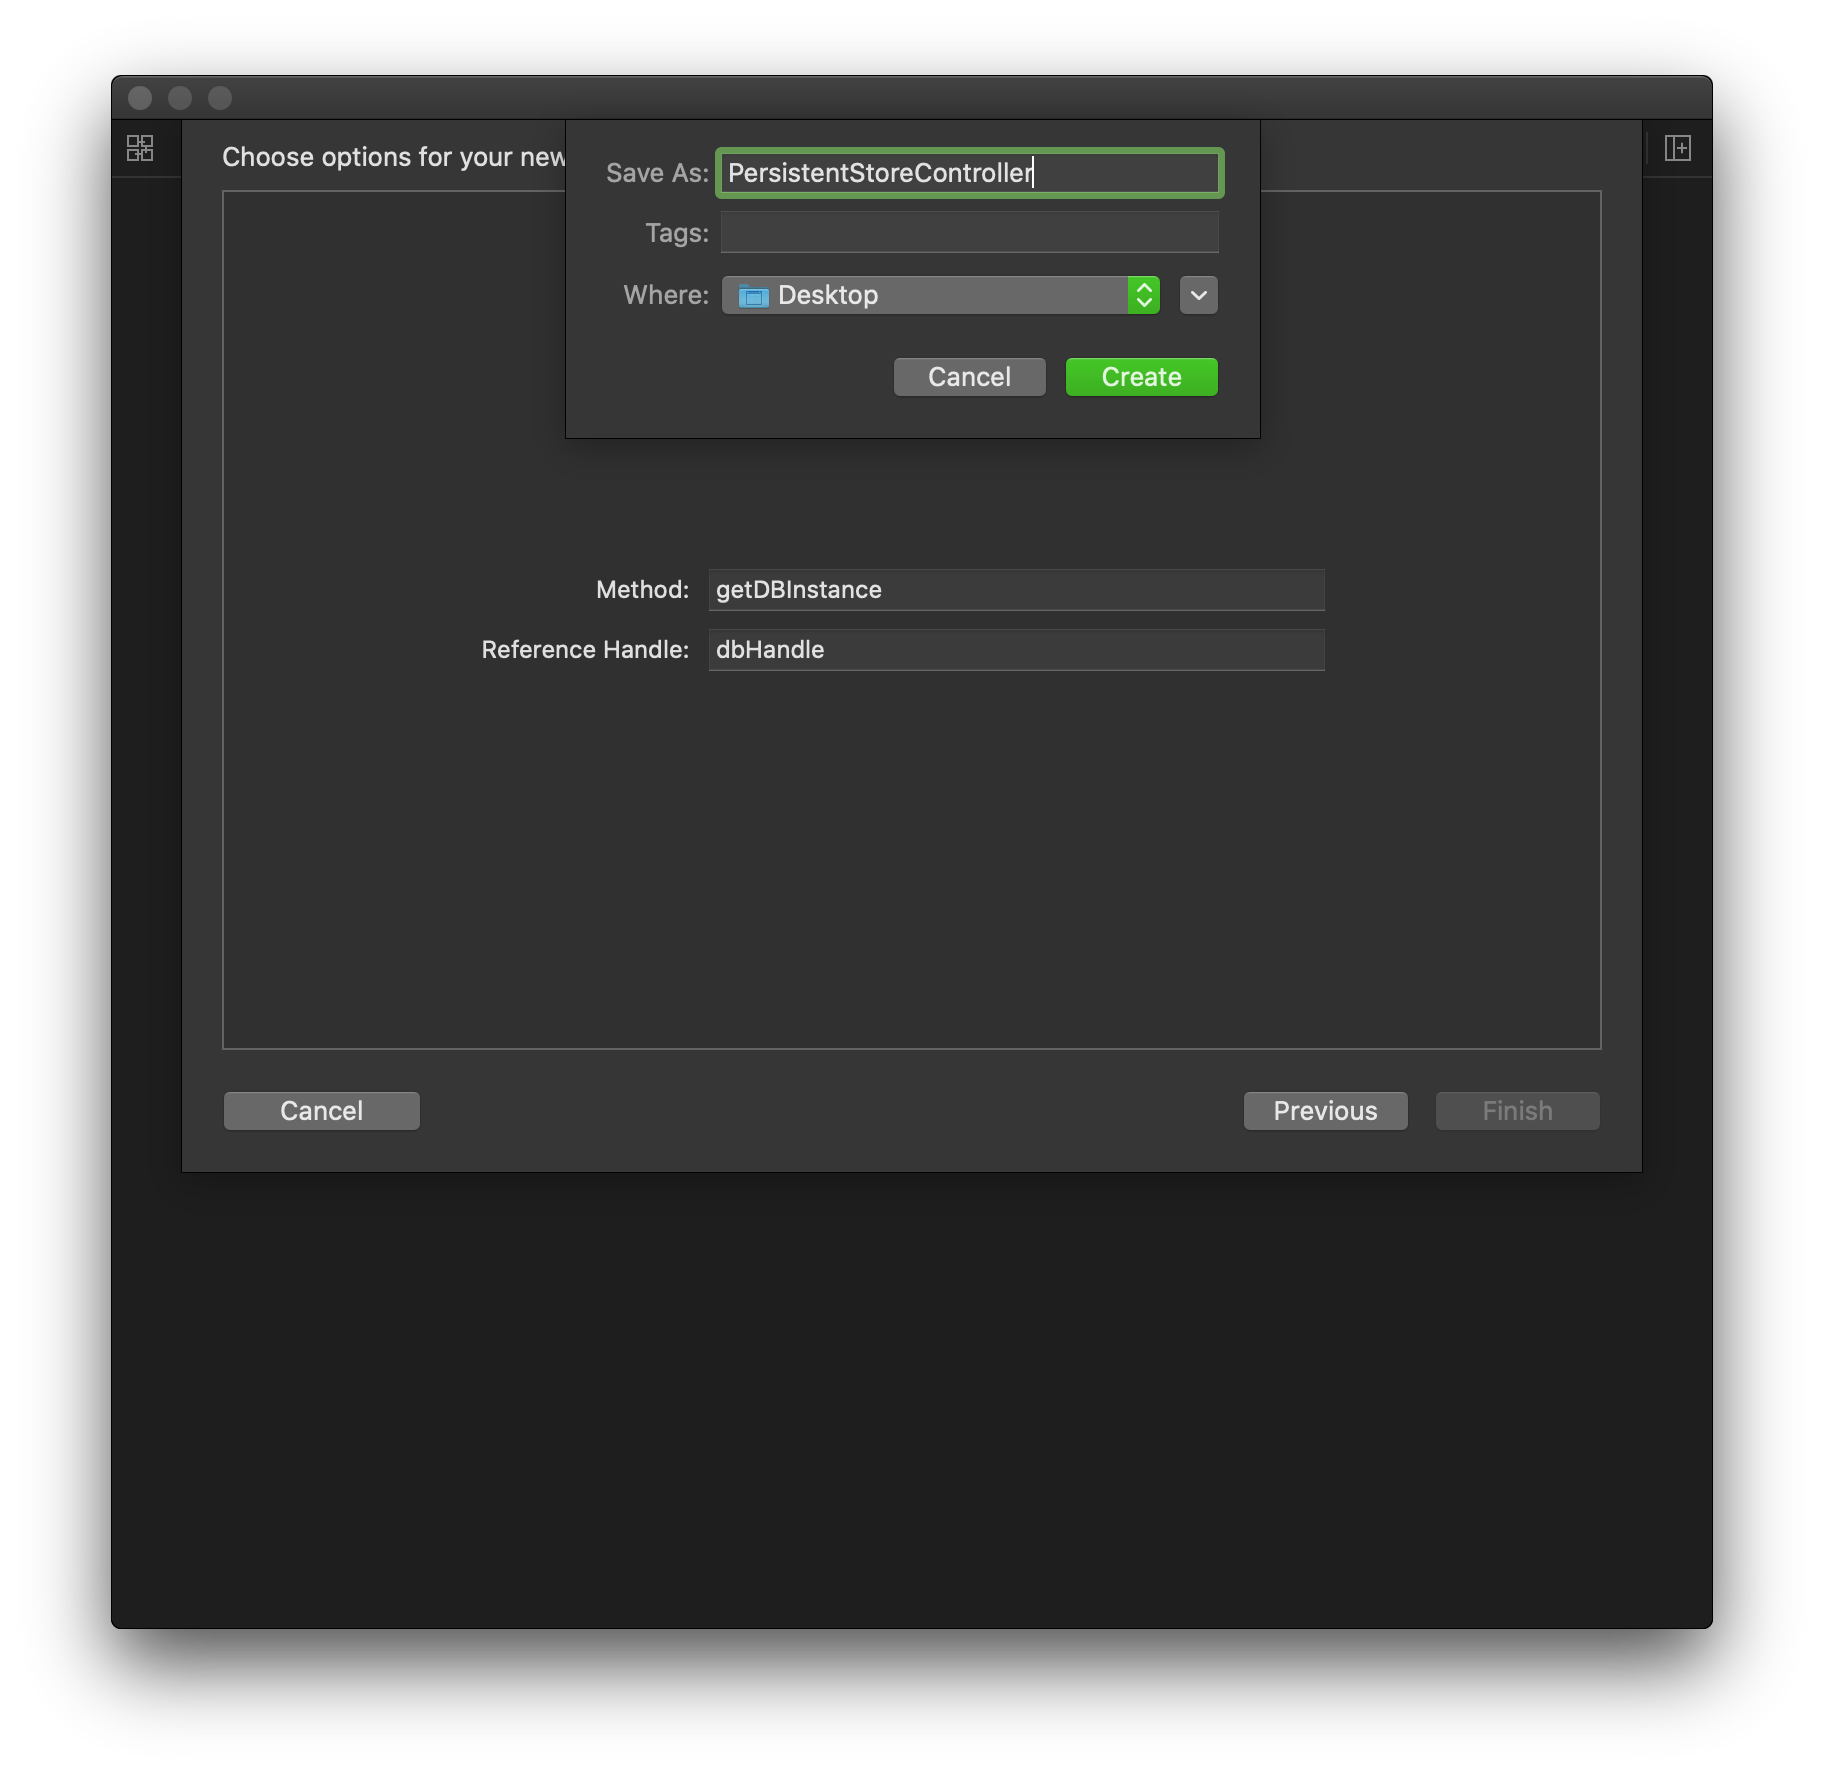
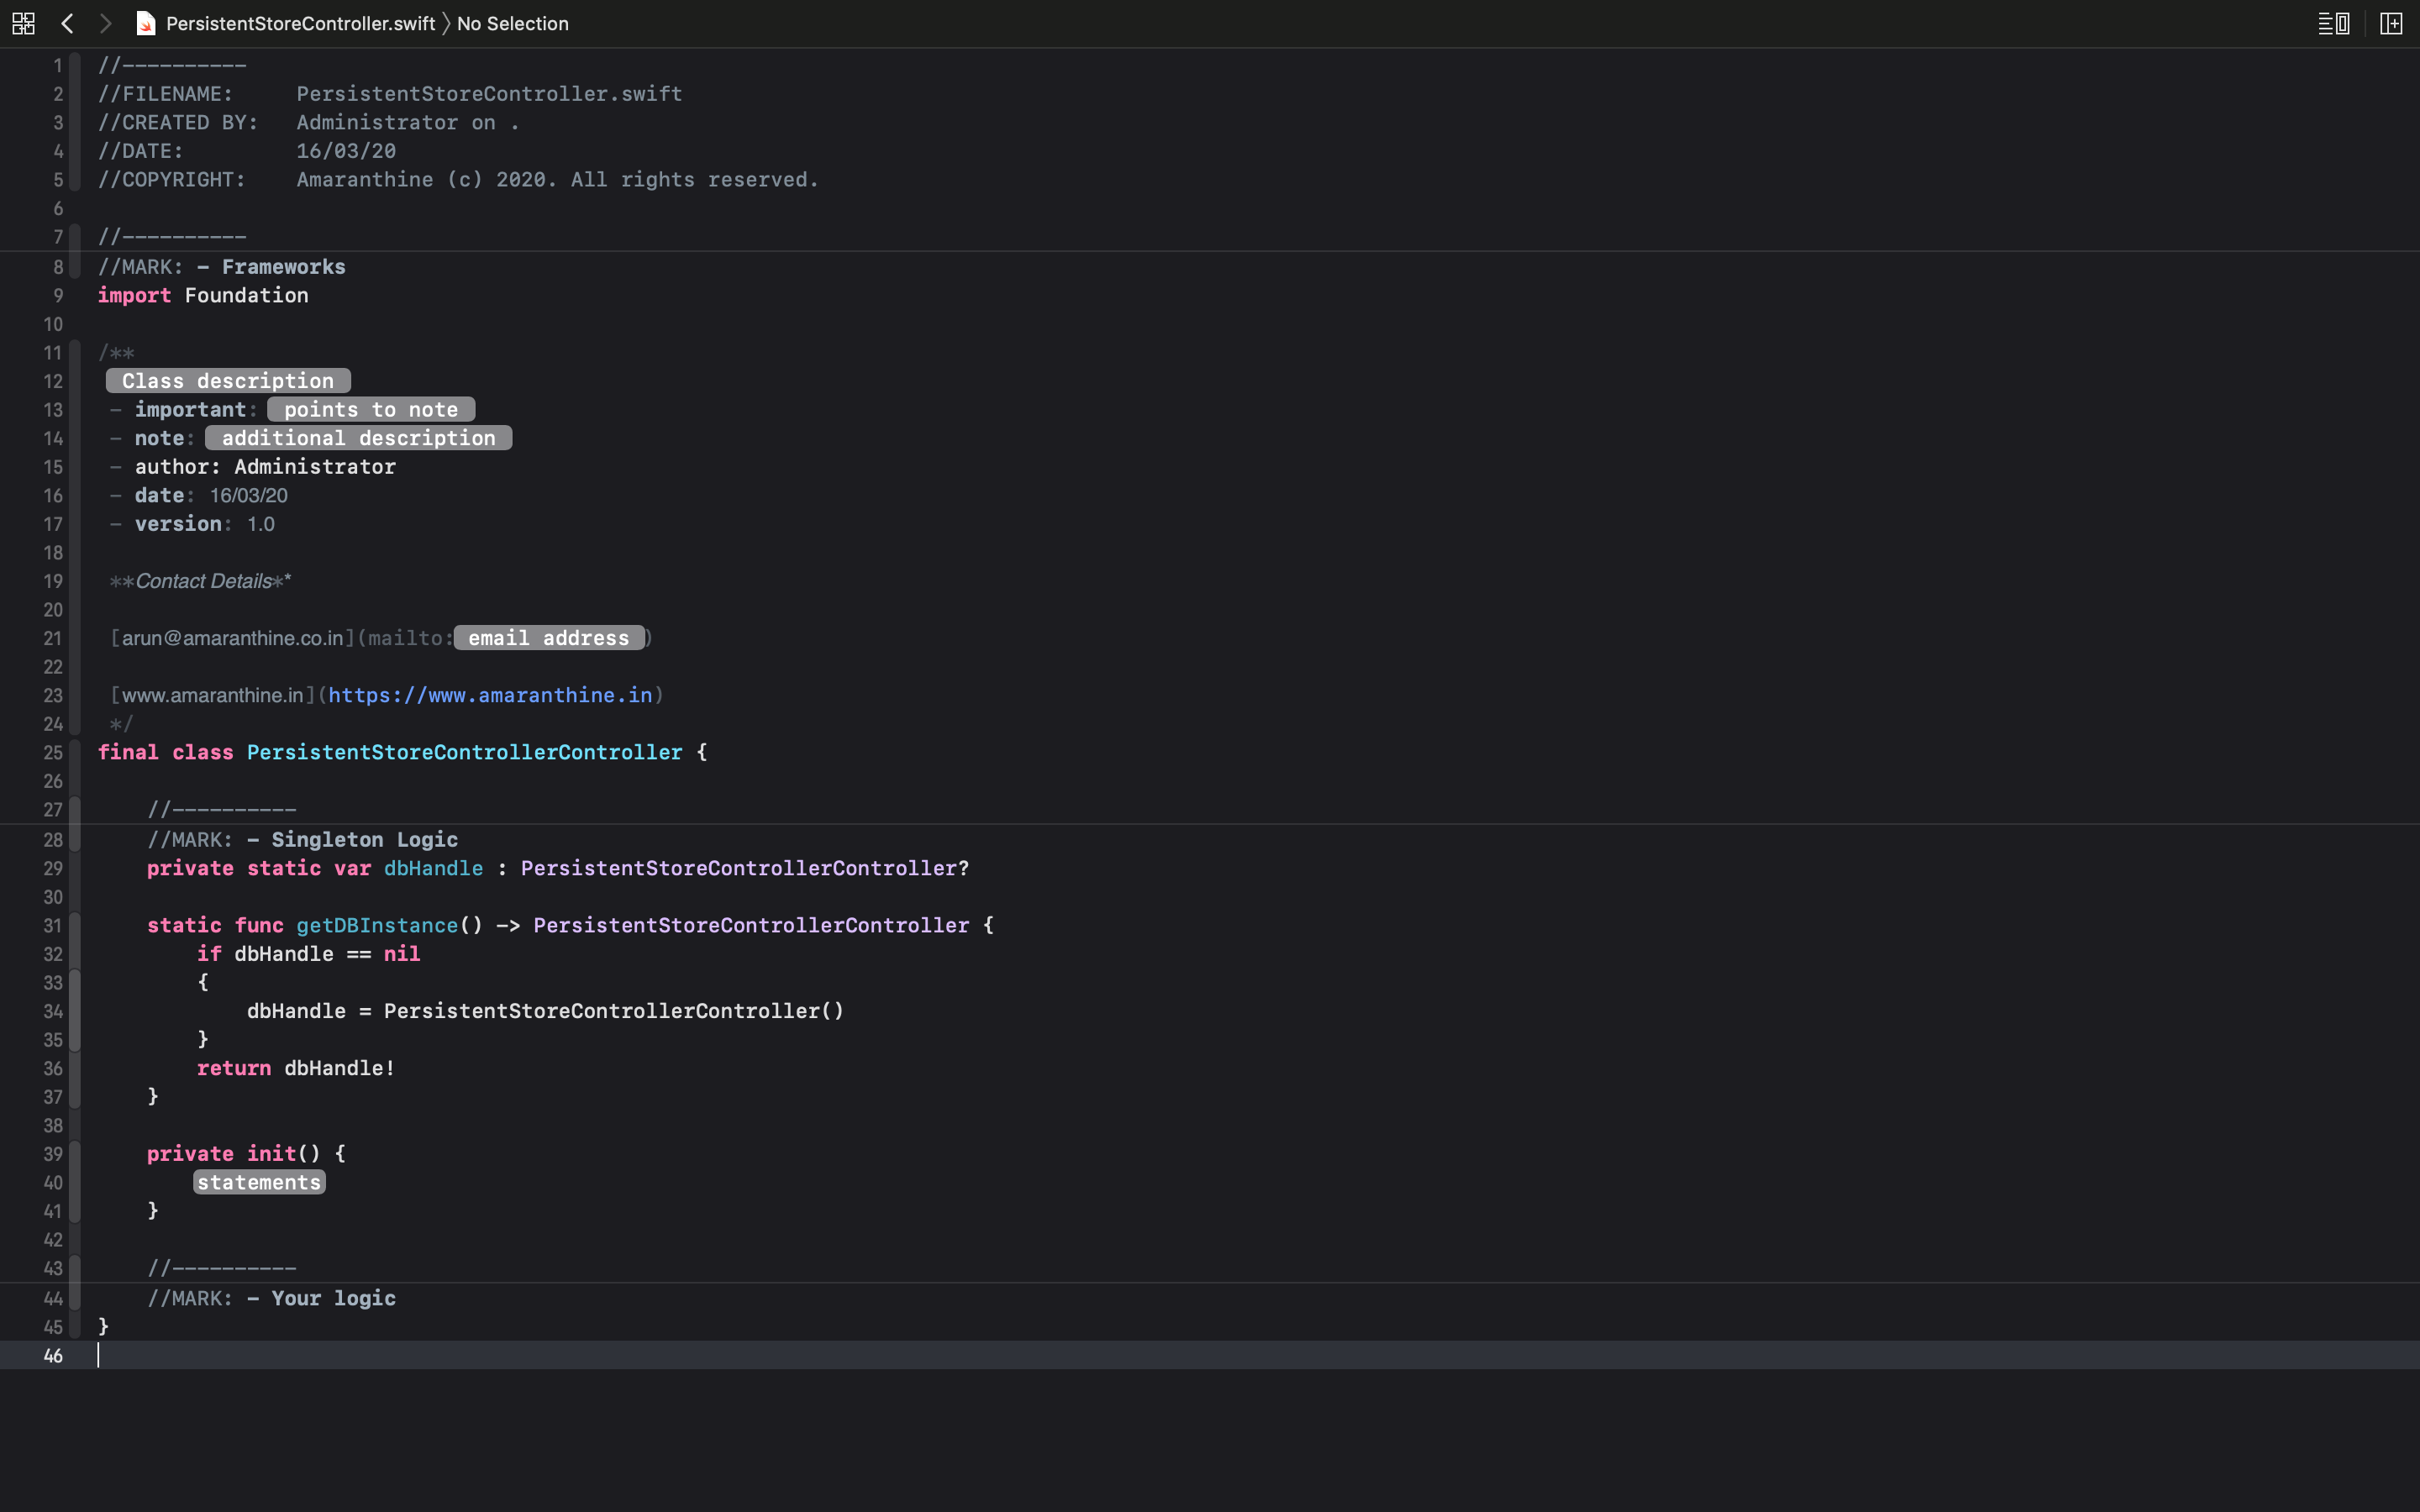
- Go ahead and create the file. See if it comes up as you desire. Here is how the file created based on the above slideshow looks like.
//----------
//FILENAME:     PersistentStoreController.swift
//CREATED BY:   Administrator on .
//DATE:         16/03/20
//COPYRIGHT:    Amaranthine (c) 2020. All rights reserved.

//----------
//MARK: - Frameworks
import Foundation

/**
 <# Class description #>
 - important: <# points to note #>
 - note: <# additional description #>
 - author: Administrator
 - date: 16/03/20
 - version: 1.0

 **Contact Details**

 [arun@amaranthine.co.in](mailto:<# email address #>)

 [www.amaranthine.in](https://www.amaranthine.in)
 */
final class PersistentStoreControllerController {

    //----------
    //MARK: - Singleton Logic
    private static var dbHandle : PersistentStoreControllerController?

    static func getDBInstance() -> PersistentStoreControllerController {
        if dbHandle == nil
        {
            dbHandle = PersistentStoreControllerController()
        }
        return dbHandle!
    }

    private init() {
        <#statements#>
    }

    //----------
    //MARK: - Your logic
}
And that’s how we can create file templates. The process for creating ones with Objective-C and views would be similar. The main thing to remember is that you should start off with an existing template.
Next we will look at creating project templates

Something similar can also be done for macOS.